MadaboutKitcars

This is a read-only archive of the old Madabout Kitcars forum. New posts and replies are no longer possible, but every thread is still here to browse and read.

Another Cordite Is Born ...

2 Jul 2016, 7:04pm
As above Paul!

It really is starting to look tasty and special!!

Good luck with the Mot.

Scottie
2 Jul 2016, 9:20pm
Well there will be no lack of superlatives when you get on the road too post MOT and that's before they know that you built and shaped almost every panel yourself!

To reiterate on a previous compliment too, that boot looks even better in the flesh!

At this rate it will MOT by the end of the month Paul...
3 Jul 2016, 7:30am
Dave, Scottie & Jones - Thanks gentlemen. :cool:

Your positive feedback helps to stop me falling into a "can't see the wood for the trees" trap. :rolleyes:

As, after spending so long building this car, I really do see all the differences in Pop's post #2541 above. :icon_sad:

But when the sun was shining yesterday, the car really did stand out as much more than the sum of its (mis-matched) parts. :D

So this is great motivation for me to keep working my way through the long & time consuming "MOT - To Do" list.

- - - - - - - - - - - - - - - - - - - - - - - - - - - - - - -

Factory Standards
The other thing I am trying to do these days is stop comparing my efforts to the really stunning builds on here (e.g. Swifty's).

Now don't get me wrong, I have always tried to achieve the highest possible standard I can with this build.
( And the car would not look as good as it does if I hadn't aimed high. )

But I really need to stop beating myself up about the "wonky" bits, as they reflect both my skills and race cars from the 1950 & 60's.

I used this photo on Smash's 250 SWB bumper thread to point out that the original car was NOT built by robots.


"Back in the day", many racing cars from this era were built/prepared in sheds by blokes with fags in their mouths. :icon_wink:


And this photo of the Team Lotus Grand Prix team mechanics in action did make me smile.


Especially when you consider they are working in better conditions than I am:
- The ground isn't sloping at a silly angle.
- Their tools are in a big van next to them, not at the end of the garden.
- There is more than one of them and they are mechanics, not accountants!
- Etc.

:icon_wink:

- - - - - - - - - - - - - - - - - - - - - - - - - - - - - - -

MOT
The only thing I am vaguely confident about is that I should be ready for an MOT before the end of 2016. :pray:

As, unfortunately, the harsh reality is that even small jobs can burn time at an alarming rate.

However, I really feel that the build is now gaining the momentum needed to keep pushing through the list of jobs.

So whilst I didn't use any of the "big washers" I made yesterday, they are now ready & waiting for when I need them. :cool:

- - - - - - - - - - - - - - - - - - - - - - - - - - - - - - -

Not sure if I will get the chance to work on the car today, but I'll be back later if I do.

Cheers, Paul. :)
4 Jul 2016, 8:44am
Sunday Morning - Every little helps:
Spend some time tidying up the Summer House.


In addition to sorting out the usual mess, I was desperate to find the new number plate bulbs I'd bought.
( As a blown bulb was a problem during my earlier electrical tests. )

It was only after I had worked my way through lots of boxes that I finally found them.


They are actually LED replacement bulbs and I've now fitted one.


Which means that next time I'm out the front, this light & the rear number plate can both be fitted.

Ironically, it was only after I had spend a long time searching that I found these bulbs sitting on a chair under some other stuff. :tape:

Where I had clearly left them previously in order to make it easier to find them when I wanted to fit the number plate light. :frusty:

So I have now got a new box of small, but very important parts, sitting on the same chair.


This included the new rear brake light switch (my 4th!) & the nut that holds it in place.


I just had to remove part of the previous switch that had broken.


I've also put aside all the screws for the rear cockpit wall access panel.


I've also got the new heat fan switch, a couple of Union Jack badges & the head light grilles to play with.
( Amoungst other stuff. )


After the big tidy up, I just had time to peel off the covers to check possible locations for the bonnet straps.


I think I will go with the first option, but I just need to make sure this not foul the locating pin set up.

- - - - - - - - - - - - - - - - - - - - - - - - - - - - - - -

End of Part 1…
4 Jul 2016, 8:47am
Sunday Afternoon & Evening
We went out for a nice family pub lunch to help make up for the amount of time I spend on the car.

Then my wife had managed to get some free tickets to the concert in Hyde Park.

Unfortunately, quite a few people had already arrived before we eventually got there. :rolleyes:


It was actually the main support act she wanted to see, Don Henley, as she is a HUGE fan of the Eagles.
( I didn't earn any brownie points when I was unable to get tickets for their reunion tour. :icon_sad: )

So it was great to see him perform his own songs (Incl. Boys of Summer) and Eagles classics too (Hotel California, Desperado). :cool:


Carole King was the headline act, but we only had time to see the start of her set (Incl. Earth Move, Too Late Baby).


The way I look at it, a happy wife means a happy car build, so it is all good here. :D

- - - - - - - - - - - - - - - - - - - - - - - - - - - - - - -

I am in the middle of some domestic chores at the moment, but will be back on the car later this morning.

Cheers, Paul. :)
4 Jul 2016, 3:58pm
Mixed Monday - Part 1
Ending up spending the whole morning doing domestic chores. :rolleyes:

So it was the afternoon before I could finally do some car work and I started at the rear end.

Fitted the grommet for the rear number plate light.


Drilled the two extra holes need to secure the number plate to the plinth & bolted it all together.


Note:
I've tried to "straighten" the photo to allow for the sloping driveway and the number plate does line up with the lights. :cool:

Next it was time to unwrap the boot lid drain hoses.


These were already secured at the 'boot floor to body shell' panel end and left deliberately over sized.

So I just needed to clean out the dirt from the boot lid drain holes & shorten the hose in small steps.


Until I got a natural curve in the hose & then fixed it to the boot lid drain plug.


Removed the tape from the two 'external' drain exits in the boot floor panels, but just couldn't get a decent photo.


Next it was time to connect the number plate light and the two fog lights.

All of these have simple spade connectors, so I used some of my yoga mat to keep them separated.


Before wrapping them up.


The stop/tail lights & indicators have "proper" connectors, but I taped all the wires together to tidy things up a bit.


I just need to use a few more zip ties to tuck all the wires neatly into the lower recess behind the boot floor.


Rear End - Final Steps:
- Tidy up the wires as described above & give a final test to the lights.
- Bond in a few more plywood panels between the framework and the body shell.

So there isn't much left to do at this end as far as MOT preparation work goes. :cool:

End of Part 1…
4 Jul 2016, 4:00pm
Mixed Monday - Part 2:
The other day I realised that I had forgotten to make some "big washers" for the bonnet straps.

But before I started on those, all the ends of the leather straps needed a small trim, as they were a tad too long.


Which meant that the end cover could not sit flush over the leather below.


I just used a pair of scissors to reshape the ends.


So now the cover sits flush. :cool:


I will be making the washers out of a couple of my old steel fixing brackets.
( And using the leather off cuts that came with the straps as a guide to where the holes need to be. )


But before I got to work on those I wanted to do some work on the bonnet/body shell extension.

So I covered up the end of the car and un-peeled the front.


At which point the first few drops of rain arrived. :icon_sad:

So the covers went back on and I then had to rush to the back garden to rescue the morning's laundry.


It has been "misting" on and off every since, so I'm not sure if I'll get any more done today.

So until next time, take care, Paul. :)
4 Jul 2016, 10:03pm
Monday Night Update:
Ended up moving some stuff down to the Summer House while the rest of the family watched Corrie.

This way, I could make some noise without disturbing them, or the neighbours. :cool:

Started by marking up the "washers" for the bonnet straps.


But then I seemed to make a complete dog's dinner of drilling the holes in the right place. :rolleyes:

So "Plan B" involved a switch to using aluminium instead, which worked out much better in the end.
( Unfortunately, I left my files in the front porch, so I'll tidy up the edges later on. )


Just to give you an idea of how small my working area was…

I sat in the gap between the blue tool box & the mountain bike.


Good night, Paul. :)
5 Jul 2016, 5:19pm
Tuesday - Part 1:
A bit of a frustrating start to the day, as there was yet more drizzle first thing in the morning.

Eventually, it was dry enough for me to start another round of small jobs.

Marked up the rear bonnet edge on the driver's side.


Before trimming it back and rounding off the edges.


At this point I just need something neat enough for the MOT & the final gap will be set before painting starts.

Double checked that I could still get access to all the rear lights with the plywood support panels in place.


In the end, I just had to adjust one jubilee clip, so I could still reach it with a screwdriver after the panel went in.

Then covered all the wiring so no stray bits of bonding paste would end up on the loom later on.


Trimmed the locating pin panel for the driver's side of the bonnet & fixed it into position.


By now I had jacked up the car and removed the wheel...


So I could stick my head inside the wheel arch and check the alignment of the panels.


As I still get flashbacks to the trauma of trying to get locating pins to work on the boot lid. :eek:

I also taped the closing panel for the body shell extension into position.


By now, the sky had got dark again, but I'd taken the precaution of not fully removing the covers, just providing access to both ends.


End of Part 1…
5 Jul 2016, 5:20pm
Tuesday - Part 2:
Eventually, I just took a chance and mixed up some bonding paste and started to fix all these various pieces into place.

Starting in the boot, where these panels should help keep the weight of the body shell off the boot floor panels below. :pray:


Paste was applied to both sides of the closing panel.


The bonnet return lip was also covered on both sides.


Note: I will also be using fibreglass matting on this inside join at some point to ensure it is firmly held in position.

At this point, I had to take a break from car work to do other stuff for a few hours. :juggle:

- - - - - - - - - - - - - - - - - - - - - - - - - - - - - - -

Thankfully, by the time I got back to the car in the afternoon, the bonding paste had already set pretty solid. :cool:
( But I still want to leave that to fully cure over night before removing the brackets. )

I'd lowered the bonnet, but kept it propped up so I didn't accidentally bond it to the body shell!
( I'd also refitted the wheel, hand tight, just to get it out of the way. )


Then I lightly sanded down the "hole" I had to cut out of the side cockpit wall.


Before doing a round of fibreglassing:

Covering the hole.


The join along the top edge of the rear cockpit wall.


Although I'm not sure why this was the only section not covered by a layer of matting?

The rope re-enforcement along the body shell extension.


Plus part of joins along the horizontal panel on the top of the extension.


End of Part 2…
5 Jul 2016, 5:21pm
Tuesday - Part 3:
While that was all setting, I had a quick look at the holes in the floor for the seats.

Then I made a cardboard template to give me the spacing between the holes.


As I plan to cut a length out of the fibreglass floor pans to act as a "spacer".


At this point, I came back in to re-check my build thread for the time when I previous looked at fitting the seats.

Turns out it was just over a year ago, on the 28th June 2015, when my plan was to:

Use one of the spacers supplied with the seats + a penny washer for the front holes.


But then add a couple of extra washers for the rear holes to tilt the seat forward a bit.
( As the angle of the lowered floor pans and the angle of the rear of my seat work against each other. :icon_sad:)


So it was well worth double checking this thread, as I only need to cut out two fibreglass spacers for the rear of each seat.

Which I did around the side of the Summer House to keep the noise & dust down.


I then "softened" all the corners and edges, before drilling the first holes in each "spacer".


I will drill the second holes from underneath the car to ensure they are in the right place.

Anyway, that's all for today, as I have other things to do now.

So until next time, take care, Paul. :)
6 Jul 2016, 7:00pm
Time Out - Part 1
Spent some time in the morning trying to kick start my "real" work.
( As whilst the extra car time is great, it doesn't pay the bills. )

When I did get to work on the car, it was very stop/start…

Removed the brackets from the locating pin panel on the bonnet.


Really amazed at just how solid this feels. :cool:

Then with some masking tape in place, I tried to mark up where the locating pin needed to be.
( Photo taken from inside the body shell extension. )


Drilled a hole and temporarily fitted the locating cone.


I just need to adjust the "hole" in the horizontal panel a bit, but it looks like it will actually work.


Marked up and drilled the extra holes in the seat spacers.


Found a "off cut" of fibreglass to add to the locating pin panel.


To provide my usual "belt & braces" support.


Then did a round of fibreglassing to add matting to the following areas:

Inside of the locating pin panel.


The join between the closing panel on the body shell extension and the Spitfire bulkhead.


The underside of all the joins on the body shell extension.


End of Part 1…
6 Jul 2016, 7:01pm
Time Out - Part 2:
Once that was set enough, I mixed up some fibreglass filler:

For the fixing bracket holes on the bonnet.


The outside surface of the locating pin panel.


Having already re-drilled the hole through the matting applied earlier.
( Sorry, not a great photo. )


The join between the return lip & closing panel on the body shell extension.


I then used up the last of the filler on the underside of the rear cockpit wall.


At this point of the day, the sun was blazing down and I realised that there was more to life than building a kit car. :icon_wink:

So I switched my attention to providing a family BBQ in the evening.

This involved a huge tidy up of all the stuff left in the front porch.

Although it only got as far as the dining room. :rolleyes:


I the mowed the lawn, which is looking very green for July, which shows how much rain we've had lately.


By the time the family was home, the BBQ was under way. :cool:


I've typed this up as fast as I can, so now I'm off to watch Wales in the Euros.

Take care, Paul. :)
7 Jul 2016, 6:00pm
Thursday - Part 1
The morning was lost waiting for the plumber to arrive to sort out our boiler. :icon_sad:

Then it was time to start tidying up both the fibreglass and the filler that I applied yesterday:

Bonnet screw fixing holes.


Locating pin panel (with the hole re-drilled).


Body shell extension closing panel.


Then it was time to test the locating pin again.


I just needed to adjust the locating "hole" a little bit to get a decent fit.


Next up was another round of fibreglass filler:

This covered the join between the body shell extension closing panel and the Spitfire bulkhead.


Also the joins between the horizontal panel and the bulkhead.


A light skim over the low spots on the locating pin panel.


Plus the small end piece next to the locating pin panel.


End of Part 1…
7 Jul 2016, 6:01pm
Thursday - Part 2:
I also added some filler to the underside of the horizontal panel and the bottom of the return lip "blob".

Unfortunately, I couldn't get any decent photos of these areas.

But I did get a good photo showing why you need to be careful working upside down!


When that was all set, there was an epic sanding session.


Still not easy to see, but this is the back of the "blob" at the bottom of the body shell extension.


The underside of the horizontal panel.


I also spend ages tidying up any excess bonding paste around the underside of the cockpit's plywood panels.
( This photo is taken with me flat on the ground looking up. )


With the locating pin back in, this new section of the bonnet looks pretty good to me. :cool:


With the driver's side in position, the passenger side of the bonnet sits slightly pound of the body shell. :rolleyes:


Unfortunately, with all the internal "rope" bracing on the curves, this is where the bonnet now "naturally" sits.

So I intend to simply work with this position, rather than force it back into shape, and it should be OK in the end.
( After all, what is a bit more filler between friends? :icon_wink: )

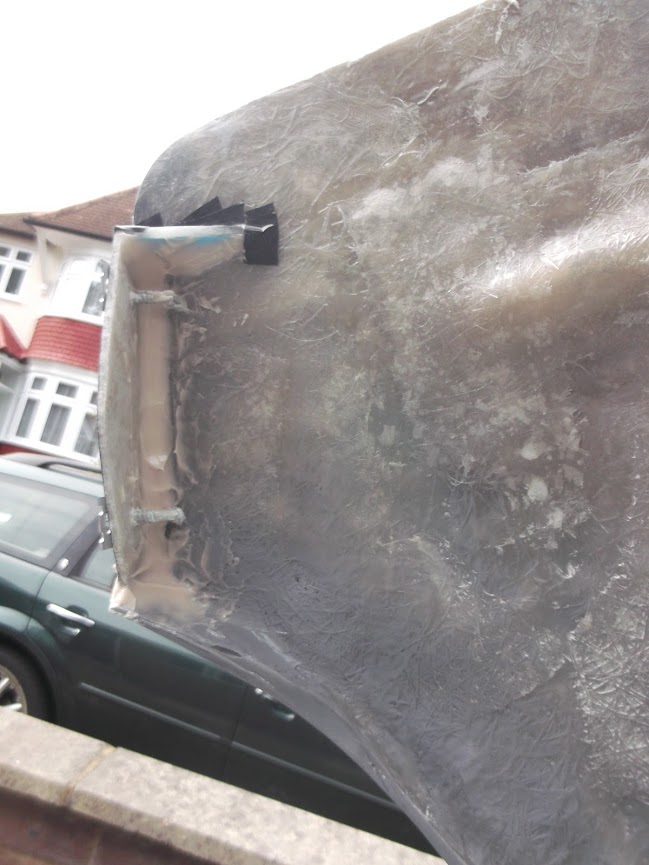
Therefore, I trimmed the locating pin panel to match the bonnet edge and fixed it into position.


End of Part 2…
7 Jul 2016, 6:02pm
Thursday - Part 3:
Then I mixed up some bonding paste and slapped it on.


Note:
I've also fixed the extra small piece of fibreglass into place at the same time.


The last of the bonding paste was used on the rear edges of the panels in the boot.
( Although there is no way of getting a decent photo of that side. :rolleyes: )


Thankfully, I can pop the boot lid back into place and cover the rear of the car up while that sets.


There was a bit of a gap before I got the chance to sand down the rear cockpit edge.


I quite like the way the body shell "overhangs" the rear cockpit wall, although this isn't a great photo.


Finally, I fixed the access panel into position.


Whilst all these little jobs feel like slow progress, it is definitely progress. :cool:

Until next time, take care, Paul. :)
7 Jul 2016, 8:15pm
Well done Paul

I love the confidence you are now showing.
Its coming together really well now - you can see the end is in sight
7 Jul 2016, 9:07pm
Agreed with the positive comments. Great work as ever Paul :)
8 Jul 2016, 6:26am
Roadster & DaveP - Thanks chaps. :cool:

Part of me is a bit frustrated by the amount of time that all of these small tasks seem to be taking. :icon_sad:

But, thankfully, the rest of me is very happy to see more and more of the car slowly reaching MOT ready status. :D

Take the rear end…

Apart from testing the rear lights, the outside is now finished as far as the MOT is concerned. :cool:


And I just need to add some zip ties to tidy up the wiring loom inside the boot for that to be completed too.


Obviously, at some point I need to come back and tidy up* the inside of the boot, but not for the MOT.
( * By tidy up I mean painting and adding some internal alloy panels to protect the wires. )

Similarly, I spend a lot of time yesterday working on the underside of the plywood cockpit panels.
( Which are a real pain in the :tape: to reach and get anything done on. )


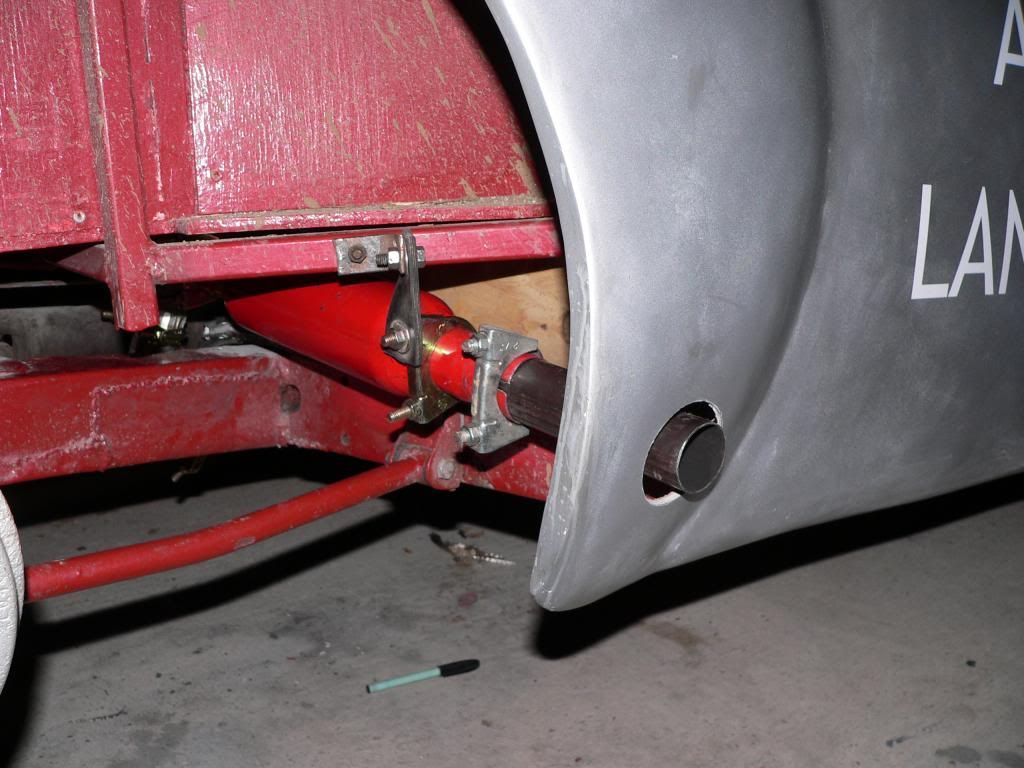
Because the other day, I went back through Mister Towed's 'On the road' thread to find this photo.


Whilst it is predominately of his 'Cherry Bomb' exhaust you can also see his use of plywood.
- The red sections are the outside of his rear "boot" area.
- The "wood" sections are the back of his rear cockpit panels.

Mr T said that the "wood" sections were treated with "… a generous coat of cuprinol clear…".

As I have already treated my plywood panels, they now just need some etch primer & Teroseal and they will be finished too.

I just hope the person doing the MOT appreciates all the effort I have made to improve their view of the underside of my car. :icon_wink:

Cheers, Paul. :)

PS
Roadster - Just seen your link as I was about to post this, so I'll look at that later.
8 Jul 2016, 4:30pm
Roadster - Thanks for the link. :cool:

Mind you, if there was a lottery win to play with, how about a brand new "old" Everoak helmet, only £795!

http://www.everoakhelmets.com/shop/4585643886/classic-everoak/8520372

- - - - - - - - - - - - - - - - - - - - - - - - - - - - - - -

Fiddly Friday - Part 1
Removed the brackets from the locating pin panel on the passenger side.


Marked up the back edge of the bonnet for an initial trim.


Also marked up the bottom edge of the driver's side to get it level.


There is a good reason why I usually take my time to counter sink the fixing screw holes with my drill.

And it is because this is what happens when I decide to quickly use my Dremmel thingy instead. :doh:


At least after a bit more grinding and trimming I was slowly getting there.


Not easy to see, but I added some fibreglass matting to the back edge of the bonnet between the two "rope" sections.


Leaving a small overhang.


I also added matting on the inside of the locating pin plate & beefed up the other side of the section I ground down on the sunny side earlier.


End of Part 1…
8 Jul 2016, 4:31pm
Fiddly Friday - Part 2
Covered the top side of the locating pin "hole" with masking tape.


And roughed up the underside.


Note:
In the photo above, you can see my mini filler applicator made from an alloy off cut.

It is significantly smaller than the standard plastic ones I normally use.


Then I mixed up a small quantity of bonding paste, which also acted as a "self leveller".
( Sorry about the blurred photo. )


This is the side on view of the body shell extension and the "hole" is completely flush. :cool:


Mixed up some normal body filler, for a skim over the screw holes on the outside of the driver's side.


Then made a dog's dinner of applying the filler on the inside. :rolleyes:


Note: The leather bonnet straps will be fixed into position "somewhere" around here.

By now the bonding paste had set hard enough for me to remove the masking tape without disturbing anything.


Next up was some fibreglass filler for the passenger side.


End of Part 2…
8 Jul 2016, 4:32pm
Fiddly Friday - Part 3
Sanded down the filler on the driver's side.


I spend so long on that inside surface that the filler on the other side was ready for sanding by the time I had finished. :rolleyes:


Then, in a change from how I did the other side, I fitted the locating cone first.


Then marked up and drilled the hole second.


Then marked up and hollowed out the shape needed.


By this point I'd got a text from a mate who wanted to meet up for a beer tonight, so I called it a day.

There is still a bit of fine tuning to do on the gap, but I am definitely getting there. :cool:


Right, I've got a train to catch and a beer to drink.

Until next time, take care, Paul. :)
9 Jul 2016, 5:58pm
Saturday - Part 1
It was late morning before I was able to get some etch primer on the bottom corner of the bonnet on the driver's side.


Plus the inside edges of the body shell extension.


Then my day took an unexpected turn, which was quite sad really.

So if want to stick to more up beat car building, ignore the following and page down to the next photo…

- - - - - - - - - - - - - - - - - - - - - - - - - - - - - - -

Perspective:
As I was starting to apply some normal body filler I could hear someone loudly banging on a front door down the street.
I looked up and saw it was an old lady who lives on the street at her next door neighbours' house.
So I thought nothing of it and carried on with the filler, but the banging continued and I figured her neighbours must be out.
However, for whatever reason, at this point I had stopped what I was doing to see if everything was OK.
Just as I did, I could faintly hear the old lady said "Can somebody help me please?".
F***!
So I dropped everything and ran down the road to help, fearing her husband might have fallen (or worse).
She then lead me into the house where I could smell smoke and now thought there might be a fire.
Turns out the poor lady has dementia and instead of turning on the grill, she had switched on a cooking ring by mistake.
Thankfully she had managed to turn everything off but she was clearly both confused and distressed.
Her husband was out and she was very worried that he was going to find out what had happened.
As I got the impression that she wasn't supposed to use the cooker unsupervised.
She also said she was not allow to leave the house by herself, which she had clearly done looking for help.
So I tried to reassure her that she did the right thing getting help and that we all make mistakes.
I then quickly nipped back to my own own house to tell my wife what was going on before returning.
It was hard work trying to talk her into just sitting down to recover and she didn't want a cup of tea or even a glass of water.
I even offered her the chance to come and stay at my house until her husband returned, or I'd wait with her in her house.
But either of the these options would mean that the husband would know something had happened and she didn't want that.
Eventually I was able to convince her that I wouldn't tell him and the cooker ring was now cold, so there was also no "evidence".
This seemed to bring her some comfort and she was now calmer and happy for me to leave her to it.

Clearly this couple are only just getting by with the problems they have and need proper help.
So I will keep an eye out for the husband and tell him what happened, as there is clearly a real fire risk.
Depending on his reaction, I might see if there is anything else I can do to help them out a bit.
As, coincidently, I used to look after their neighbour's garden, on the other side of their "semi" over 10 years ago.
As my wife was friendly with the lady who lived there when our children were very small.
Back then, this couple's garden was immaculate and they were happy to see me mowing their neighbour's lawn.
But today, I could see that their garden is now completely over grown, so things have declined over time.
Their neighbour passed away last year, but she did get proper home help in the end to help her around the house & garden.

Anyway, this lady is only a few years older than my own mum, who is also in her 80s, but is, thankfully, as fit as a fiddle. <Touch Wood>
It really brought home the fact that you should always count your blessings, as things can always be worse.
It certainly puts all my whinging and moaning about the less than perfect shape of my wheel arches into perspective.
Apologies for sharing this in the middle of my build thread, but this whole episode has troubled me for most of the day.
At least writing it all down helps me a little bit, so I'll now return to a normal build update.

- - - - - - - - - - - - - - - - - - - - - - - - - - - - - - -

Normal body filler was added to:

The bottom corner of the bonnet on the passenger side.


Although I didn't get to finish off the horizontal panel on the driver's side.


End of Part 1…
9 Jul 2016, 5:59pm
Saturday - Part 2:
Still, at least it looked a lot better after sanding down.


As did the bonnet.


Note:
I have no idea how Swifty had the patience to smooth out the inside of his entire bonnet! :eek:

Then it was etch primer time and I've painted over the shiny "hole" on purpose.


Then the "hole" for the passenger side was bonded into position.


Next, I found a fibreglass off cut that I could use to test the bonnet straps.


As it occurred to be that I needed to set the distance between the straps correctly…


Because if they were too far apart, then the buckle couldn't be opened.


So they need to be close enough so that they can actually work.


End of Part 2…