MadaboutKitcars

This is a read-only archive of the old Madabout Kitcars forum. New posts and replies are no longer possible, but every thread is still here to browse and read.

A Triumph Swordfish 1500 - On The Road

27 Jan 2019, 9:44am
Oxford & Molleur - Will you two behave, as you are going to make me blush. :icon_redface:

Jokes aside, I found other build threads really helpful so it seemed only fair to me to cover my build in the same way.

Initially, I just wanted to show that if an accountant with no car building experience could do this, anyone could.

Little did I realised at the time just how much work my unconventional Frankenstein HillBilly build approach would take. :eek:

But the one thing I hope came across from my build that was that if you keep chipping away then it will get finished eventually.

Sure I made mistakes, went down blind alleys, completely underestimated how difficult building outside (on a sloping driveway) would be, etc. :doh:

However, the bigger the obstacles during the build, the bigger the sense of of pride at the end when you know you overcame them.

I'm currently working on a reply to a thread on Rods 'n' Sods' about why so many projects don't get finished?

As I've come to the conclusion that, at some point, the sheer scale of the work left to do makes builders lose heart.

That, and the fact that 'Life' has a habit of getting in the way and a car project must always come second to family & health.

I remember posting about reading the Harry Potter books to my children and I would never trade that time for a faster build.

Which leads me to one of my favourite build motivational quotes:

How do you eat an elephant?

One bite at a time."


The reality for me is that as long as you are making some progress, no matter how small, or how slow, it all counts towards finishing.

I've also come to the conclusion is doesn't actually matter how long a build takes, the real achievement is getting the car on the road.

One of the best builds on Rods 'n' Sods took over 20 years to get from this…


To this…


And that included retro-fitting stuff to pass BIVA after the DVLA withheld his V5C.

Anyway, my apologies, I seem to have started rambling. :rolleyes:

- - - - - - - - - - - - - - - - - - - - - - - - - - - - - - -

Oxford - Great news on the garage building. :cool:

I am really looking forward to seeing work on your car resuming, as your own take on how to build these cars will be special when done.

- - - - - - - - - - - - - - - - - - - - - - - - - - - - - - -

Jag - How exactly will this save me time and trouble after I have finished making my own versions?

:icon_wink:

Jokes aside, the headlight covers were really just a stepping stone to making the headrests.

- - - - - - - - - - - - - - - - - - - - - - - - - - - - - - -

Some progress…
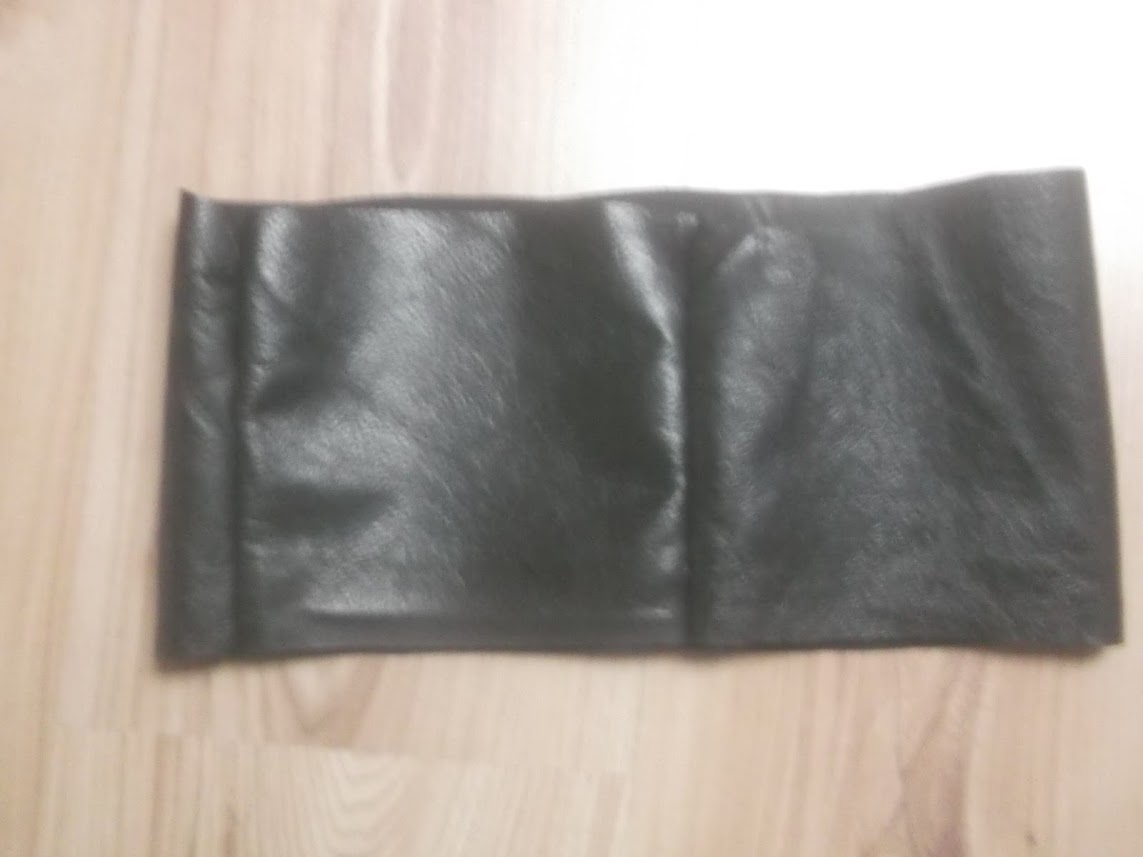
Sorry about the terrible photo, but I started by joining the two edge pieces for the driver's headrest together at one end.


I then wasted some time trying to position the two joins evenly along the bottom edge.


As after lots of measuring and re-pinning and more measuring I finally realised I could just move the material after it was joined. :rolleyes:

Therefore, all I really needed to do at this stage was get the length right and mark up the lines needed to sew and cut along.


As you can see below, once I had finished sewing the other join, the position of the joins relative to the corners can just be moved along.


With a bit of luck I will get a chance to join this edge to the 'face' later today.

So until then, take care, Paul. :)
27 Jan 2019, 3:01pm
Apologies - Yet More Bad Photos…
As soon as I started to pin the pieces together I realised I had made yet another schoolboy error. :rolleyes:


As I forgot to take into account the effect of sewing around the corners which puts folds in the leather.

By the time I had sewn together a section of the bottom edge it was clear the edge piece was slightly too long.


So I had to sew the pieces together from number of different starting points until I was left with just this corner to do.


Impossible to see from the photo, but the holes for the stitches on the face are further apart than those on the edge.

So for the same number of stitches, I was joining the longer edge piece to the shorter face piece.

This resulted in the collection of 'extra' folds in the bottom left hand corner when looking at the inside.


I then pulled it all inside out and put the foam back in.


Which left the front of the headrest looking like this.


Thankfully I gave up any noble quests for perfection in my build many years ago, so this is certainly good enough for me. :cool:

Next steps are to sort out the final plywood shapes and test/drill holes for the fixing 'Fir Trees'.

So until then, take care, Paul. :)
28 Jan 2019, 4:22pm
Just a quick update...

I spoke to the garage earlier today and I have an impressive mix of leaking oil seals and gaskets in both the engine and gearbox. :rolleyes:

So it is definitely engine out time! :eek:

Based on my previous chats with them, I fully expected this, especially as I occasionally get the feeling of clutch slip too.

So I've authorised them to do whatever is required to sort this mess out once and for all <Touch Wood>.

Even though the final bill will be in the eye watering category, it will be well worth it. :cool:

As the reality is that even if I had the first clue about fixing engines, I have no where to do the work.

I would also like to travel longer distances with confidence and do a track day at Goodwood.
(And know from my motorcycle racing days that those who leak oil on a race track should burn in hell! :icon_twisted:)

Cheers, Paul. :)
29 Jan 2019, 7:14pm
And still the bad photos come…
I had a chance to take some photos of the headrests in the daylight which I hope makes them easier to see.
(Obviously, I can't pull the leather tight at this point.)


As there is snow promised I had to get side tracked for a bit clearing twigs & leaves and other crap off the lawn.


This makes it safer to walk across the grass down to the Summer House when it is covered in snow.

By the time I'd finished, it was dark, which is the signal for more rubbish photos to appear.

The tidied up garden.


One of the plywood headrest pieces after smoothing the corners with my angle grinder and sand paper.


I don't have an upholstery stapler, so I wanted to test if the 'tacks' I do have would hold the leather in place.

So some spare leather and plywood were joined together.


The good news is that I was able to pull the leather tight over the edge with no problems. :cool:


Finally, I tested two layers of leather as I am sure there will be some folding going on when I actually fix the headrests in place.


Next job will be testing hole sizes for the fixing 'Fir Trees'.

Until then, take care, Paul. :)
31 Jan 2019, 4:52pm
OCD Relapse :icon_sad:
After all this time building, you would think that I should be able to leave little problems alone by now.

But no. :rolleyes:

Unfortunately, the more I looked at these little ripples in the driver's head rest, the more I knew I couldn't live with them.


So I marked up the offending section.


And removed the stitching.


As I'd already trimmed off the excess material I came up with the idea of bull dog clipping the leather together.

Do not adjust your eyesight, the photo is blurred.


The good news was that by pulling the face to meet the edge, it looked like the ripples could be removed.


The bad news was that this would cut a chunk off the corner of the head rest. :frusty:

This crap photo is showing where the original line of the corner was on the plywood vs. the leather.


Now if the small ripples were going to bug me, there was no way that I could live with this odd shape on one side.

So I decided to resew the face in its original position while trying to 'tuck' the ripples behind the corner.

This this sounded like a plan in theory.

It even seemed to work went I held it all together by hand/clip.

But in practise, there was no way that I could excess material 'go away' neatly .


Remind me whose dumb idea it was to do this job myself?

End of Part 1…
31 Jan 2019, 4:58pm
Day 2:
Having walked away from a mess of my own making, I came back for more self inflicted punishment.

I had actually convinced myself that I needed to unstitch the whole thing and start again with two new edge pieces.

Thankfully, it dawned on me that just lengthening the bottom section would be enough.

So after more removing of stitches, the old bottom panel was out and a longer piece prepared.


With one side done I was facing this corner for at least the fourth time. :rolleyes:


At long last the face was all sewn back together and at least looked 'flat' on the inside.


Which corresponded with a much smoother looking front side too. :cool:
(Remember the leather is just folded over the foam and not pulled tight.)


The only fly in the ointment came as I remembered why I was going to remove both edge pieces.

Yes, the joins on the both are not equal distance apart. :doh:


Yes, the ripples had bugged me so much that I'd forgotten that the joins weren't 'right' either. :frusty:

However, when I rediscovered this as I was sewing I may have turned the air blue for a prolonged period. :rant:

But, I do here by solemnly swear that I will leave this head rest as it is, fit it and forget about it.

Until next time, take care, Paul. :)
31 Jan 2019, 5:23pm
High marks for persistence Paul!
1 Feb 2019, 7:26pm
Molleur - Thanks. :cool:

- - - - - - - - - - - - - - - - - - - - - - - - - - - - - - -

Quick Update
The good news is that I heard from the Triumph garage today that my engine is back in the car. :cool:

So subject to a final check and engine set up I might get the car tomorrow.

The bad news is that my garage currently looks like this. :rolleyes:


At least I shouldn't need the oil drip tray any more.

Until then, take care, Paul. :)
3 Feb 2019, 8:31am
Honey, I'm home!
As always, there was a nice collection of cars in Enginuity when I went to collect my car.


Including this Trident Venturer.


But their Instagram account gives you a much better idea of how packed their workshop was.
( The Daimler 250 was particularly nice. :cool: )

https://www.instagram.com/p/BtYB9pllcDg/

Actually, my car made their Instagram page too.
( The Winter sun makes my car look more 'survivor' than usual. :icon_wink: )

https://www.instagram.com/p/BtYCy0RlDV3/

Despite the cold, the car ran really smoothly on the short(ish) journey home.
( Unlike the bag of nails it was when I took Mister Towed for a spin. :rolleyes: )

The garage replaced countless oil seals and gaskets and repaired a number of stripped threads.
( Which should mean that everything is now joined together tightly the way it is supposed to be. )

Also, a closer inspection of the carbs revealed this bent needle, complete with mole grip marks. :eek:
( Not a great photo, but hopefully you get the general idea. )


Thankfully, all the roads were clear of snow with the exception on my own driveway.
( Which spends most of the Winter months in the shade. )


I took it very gingerly parking and aimed high up the slope just incase the car started to lose grip.
( As I had a real fear that the car would simply slide gently down the slope into the side of the house! )

My wife and I were heading out shortly after I got back, so no chance to check the headrests, etc.

So until next time, take care, Paul. :)
5 Feb 2019, 3:37pm
A bit more done&#8230;
These are the 'fir trees' that will hold the head rests to the aero humps.


So I took a scrap piece of plywood and drilled a test hole.


Which turned out to be the perfect size for a friction fit. :cool:


Then it was time to cut yet another piece off what remained of my bulkhead.


And put a test hole in that.


I then put a hole in the bit of plywood I had been testing leather tacks on.


As the leather will be pulled over the back of the plywood, I joined the two pieces together like so.


The front face would look something like this.


Except that there would be the foam and leather in front of the fir tree 'dome'.


Despite the fact the fibreglass off cut was not completely flat, this was a very solid join. :cool:

I then drilled four holes in each of the real plywood head rest pieces and sanded all the edges down.


Before adding the first coat of wood preserve.


Given the cold weather, it may take a while to get a couple of coats on both sides.

So until next time, take care, Paul. :)
6 Feb 2019, 4:59pm
Watching wood preserver dry…
One more coat after this one should do it.


Had just enough time to unwrap half of the car.


And to start mocking up the gear lever gaiter.

My current plan is to leave a big enough gap at the top to slip over the gear knob.


Then use some elastic to pull the material closer together over the lever itself.


I then make a few rough and ready markings to give me an idea of the material required.


Which looks something like this when unwrapped.


So that will be the next sewing project when I get the chance.

Cheers, Paul. :)
6 Feb 2019, 5:48pm
Paul, did you get the cloth from Turin by any chance?
7 Feb 2019, 3:35pm
Barber - You're not the messiah, you're a very naughty boy.

:icon_twisted:

- - - - - - - - - - - - - - - - - - - - - - - - - - - - - - -

Odd Jobs:
Test fitted the headlight grille covers and they seem to work OK.


Because I need to align the 'ears' I made with the three fixing clips, I have marked the covers like so.


I just need to sew this into the material and trim the excess elastic and that job is done.

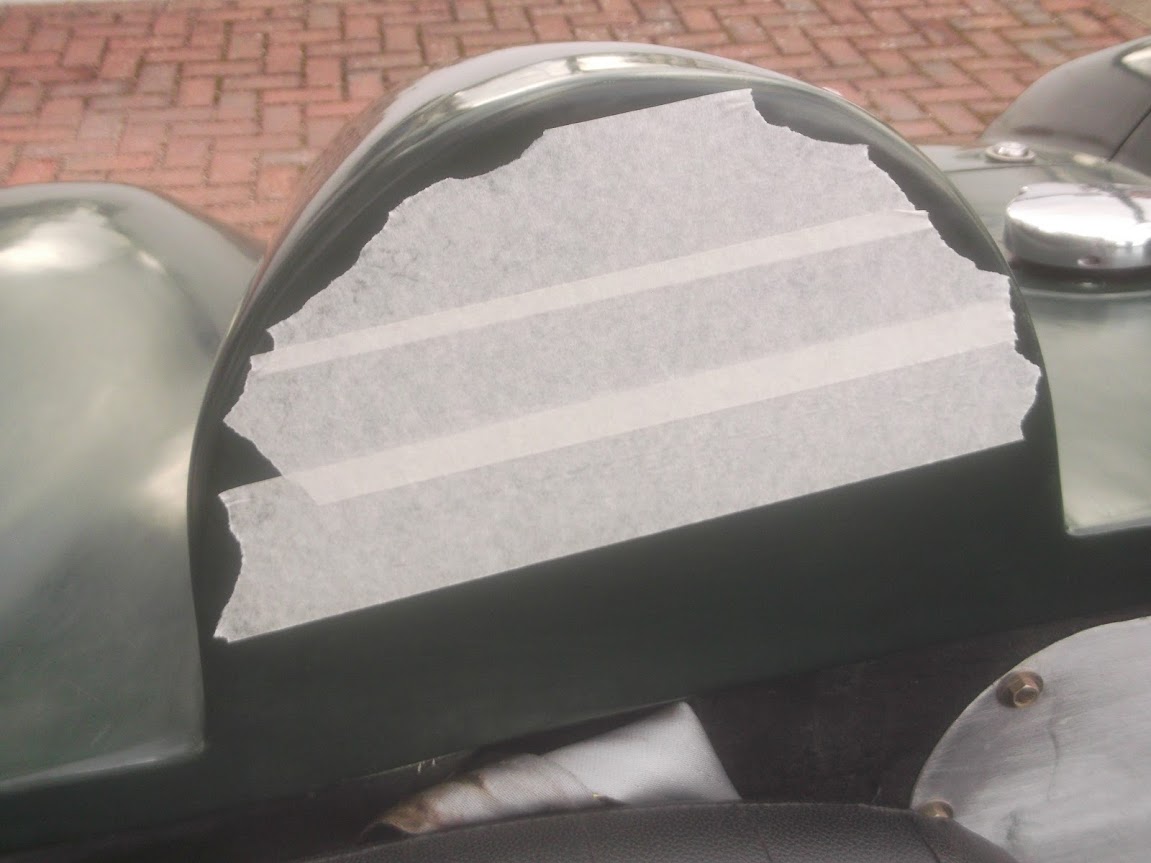
Next I put some masking tape on the aero humps.


Before test fitting the plywood from the head rests.

In this layout, the bottom corners are equal distances from the body shell on either side of the hump.


But this just looked a bit odd. :icon_sad:

So I switched back to a layout where the bottom edge is vaguely horizontal.


Whilst this does highlight the 'step' in the body shell, from one side of the hump to the other, it will do.

As the bottom line is I should know better than allowing a straight edge to come anywhere near the car.

:icon_wink:

So before I could change my mind, I marked up the holes for drilling.


In the photo above:
- The bottom edge of the masking tape runs parallel to the bottom corners of the hump.
- Where as, the bottom three holes align with the bottom of the headrest (middle hole is lower on purpose).

The good news is I keep coming back to my real world experience that no one else will care!

End of Part 1…
7 Feb 2019, 3:38pm
Part 2:
Unfortunately, by now, the clouds were beginning to gather overhead.


So I quickly switched to mocking up the leather gear lever gaiter…

I started by making a rough cardboard circle to match the widest part of the gear knob.


Which will leave me with this much material to 'gather' once the gaiter is slipped into place.


I am now thinking I might simply use a cable tie to pull this together, rather than elastic.

As the cable tie could be simply cut off and replaced if I ever need to removed the gaiter.
( A bit like the one that was holding the overdrive wires to the lever. )

I still have too much leather at this stage, so I had to mark the join like so.
( With the tape on the outside of one edge and the inside of the other. )


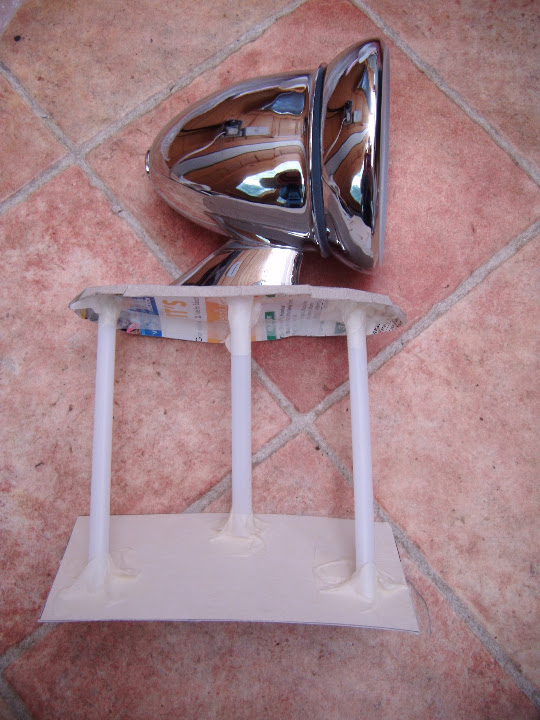
Last job of the day was to have a look at how a mirror plinth made of alloy sheeting might work.
( As I currently have more than I need to panel the cockpit interior. )


Note: I want to reuse the existing mirror holes in the side of the body shell.

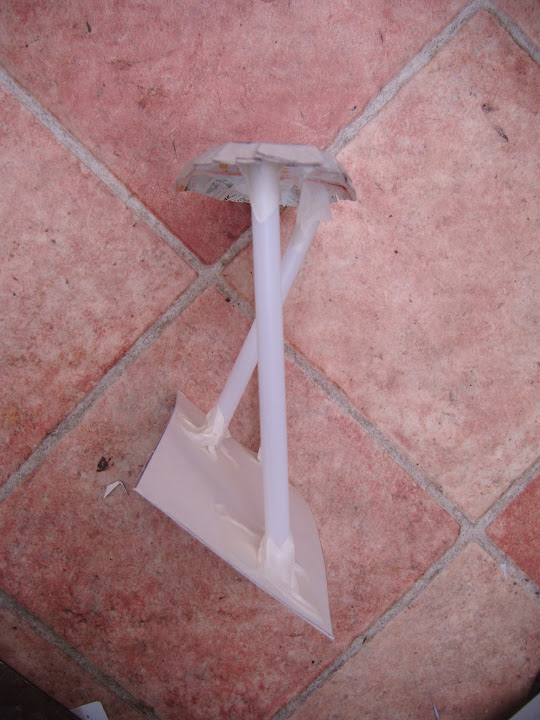
But I think this will lead to a clumsy design, so I dug out the photos of my last design idea.

Which was going to be done in metal, with a couple of tweaks to the rod layouts & lengths.


The scary thing is that these photos were taken in March 2015!

So lets see if I can finish the job before four whole years have passed. :rolleyes:

Anyway, at this point it started to spit rain, so I put the covers on.

Until next time, take care, Paul. :)
7 Feb 2019, 3:48pm
"Barber - You're not the messiah, you're a very naughty boy."

Hard for me to deny that. Having retired, I resolved one of life's imponderables, and no longer fret about what I am going to do when I grow up.
7 Feb 2019, 5:00pm
I'm 75 and still wonder what it's like to be "grown up"!
7 Feb 2019, 7:22pm
molleur wrote:
I'm 75 and still wonder what it's like to be "grown up"!


The difference between men and boys are the size of their toys!!!!
7 Feb 2019, 9:25pm
micky1mo wrote:
The difference between men and boys are the size of their toys!!!!


Yes, but this kit car stuff is a sickness that won't go away!
Built my first at age 16.
8 Feb 2019, 8:52am
Barber, Molleur & Micky1Mo - Heres to a happy and healthy retirement for all. :cool:

With a bit of luck, I might even be allowed a new project when I'm old and grey.
( OK, older and greyer. :icon_wink: )

- - - - - - - - - - - - - - - - - - - - - - - - - - - - - - -

Thursday Night Sewing Circle:
The cardboard circle allowed me to check the size of the top edge of the gaiter.


Note: I will trim the bottom edges of the leather to size once I have finished stitching it together.

Which meant this was the shape I started off with.


For now, I am just using some string as a guide for where the cable tie will eventually go.


On the headlight grille covers, this 'overlap' of material is on the 'inside' and therefore not seen.


But on the gear lever, it will be 'on show' so it needed a much neater solution.


So I folded the edges of the leather back inside itself like so.


Which meant trying to line up holes and sew through four layers of leather in one go! :eek:

Unfortunately, I only realised this work was needed after I cut the material out. :rolleyes:

This meant a bit of extra trimming and some difficult sewing to join the two sides together like so.
( As before, this is sewn together inside out. )


I then trimmed off the excess material on either side of this join.

After that, I was able to pull the gaiter inside out to give me this. :cool:


Obviously, I still need to trim the excess material below the bottom edge of the 'sunny side' up face.

But I want to do that in the cockpit of the car and it looks like it will be raining all day. :icon_sad:

So until next time, take care, Paul. :)
8 Feb 2019, 9:28am
Your talents never cease to amaze me!!
I am sure if you had the facilities to work in you would have done the oil leaks yourself as well.
9 Feb 2019, 10:41am
Froggyman - I think my only talent is not letting the fact I don't know what I am doing stop me! :icon_wink:

Although, following on from my previous comments above...

I really hope I get the chance to do a 'retirement project' where I would be tempted to give engine rebuilding a go.

After all, what could possibly go wrong? :rolleyes:

- - - - - - - - - - - - - - - - - - - - - - - - - - - - - - -

Frustrating Friday:
I fitted the 'fir trees' to both headrest panels, making sure they were all straight.


Then I had a play with a couple of strips of aluminium to see how I might hold the gear lever gaiter in place.

As there are currently only 4 bolts holding the rubber gaiter in place and that doesn't seem enough for the leather.

So my plan is to create a gaiter base made of two layers of alloy, with the leather in between.

Then this base will be fixed into position with the four bolts.

So I set up a test piece with three different sized rivets.
( Obviously the real leather would be trimmed to be hidden under one edge. )


The two smaller ones have the same size head, but different depths (if that makes sense).

I really like the big head rivets, but there is a lot of material left on the inside.


After a liberal application of some hammers on either side, I was left with this.


So I just need to check if I can get away with the extra thickness of the big rivet.

As the outside edges of 'top' layer of alloy would be bent over both the leather and 'bottom' layer to hide the join.

Note:
Regardless of the final rivet choice, this 'sandwich' approach really does hold the leather solidly. :cool:

Finally I spent ages trying to work out hold to fold the leather over the back of the headrests' plywood panels.

Something along these lines, but with everything pulled tighter.


That was proving tricky enough, especially with the thickness of the joins along the bottom edge. :icon_sad:

But the real problems was I just couldn't hammer a single tack into place, as the foam was acting as a shock absorber. :doh:

I abandoned the headrests last night, but, thankfully, I've just had an idea while typing this up.

So I am off now to see if I can finish off these headrests, or at least make a start on the gear lever gaiter base.

Until next time, take care, Paul. :)
10 Feb 2019, 9:05am
Mike - Thanks for the link. :cool:

I am sure the staple gun would have done a better job than my hammer and tacks approach (see below).

But as I already had the hammer and nails lying around, I wanted to see if that would work.

- - - - - - - - - - - - - - - - - - - - - - - - - - - - - - -

Saturday Struggles:
In between domestic chores, and the Scotland vs Ireland match, I managed to make progress on two jobs…

Hobnail Headrest
My initial brain wave was to hold the edges of the plywood in a work mate and then hammer the nails in.

But after dragging it out from the back of the shed it didn't open wide enough. :frusty:


At which point I was thinking about giving up and buying a staple gun (without having read Mike's reply).

But as that would take a few days to arrive, I decided to have one last go, adopting a brute force and ignorance approach…

I put a towel on the paving slabs around the Summerhouse to protect the face.

Then I held the leather in position and squeezed the foam, which allowed the tacks to be hammered in like this.


And when the foam was released, the 'excess' leather went back into position.


There was a lot of trial and error and, thankfully, just one hammer vs. thumb incident. :eek:

Eventually, I finished the driver's side and it looked pretty good on the sunny side. :cool:


Not perfect by any means, but for my first attempt at head rest making, I'd call that a solid pass.

But the really good news is that no one, apart from those of you reading this, will see this dog's dinner on the back. :rolleyes:


At least some tape tidied it up a bit.


Given the lessons learned, I should be able to do a better, and quicker, job on the passenger side.
( The fact it is a smaller area will also help. )

Then I just need to drill some holes in the aero humps and fit them.

Unfortunately, the 'Yin & Yang' nature of my build meant that if this job was going well…

- - - - - - - - - - - - - - - - - - - - - - - - - - - - - - -

Gear Lever Gaiter
This is where I plan to fix the gaiter in place.


So I made a cardboard template to help.


End of Part 1…
10 Feb 2019, 9:07am
Saturday - Part 2:
The first problem I had was too much leather at the top of the gaiter.

It slipped over the widest part of the gear knob with ease, but wouldn't gather tight. :icon_sad:


So I knew that I needed to make some changes, or switch to a MkII version.

But the overall design principle is sound:
- Hold the top tightly in place where the string is located.
- Hold the bottom in place by fixing the leather to the base.


I am sure I have a spare (broken) fixing plate for the gear level rubber gaiter 'somewhere', but I couldn't find it.

Actually, I stopped looking when I found a spare rubber gaiter.


Which, together with the cardboard template, let me cut this out of aluminium.


Not easy to see in the photo, but this alloy panel is/needs to be curved.


There is still some tidying up to do around the edges, but this was good enough for more testing.

I also butchered the original leather gaiter to shorten the top edge and open the sides.
( As there needs to be a 'gap' to allow the gaiter to slip over the gear knob. )


This allowed me to get one step closer to the final shape required.


But it was actually getting very dark outside and the street lights had just come on.


In the end it was going to be quicker to start again, and this is the MkII design.


Where the two sides would only be joined from the bottom up to the 'arrows' and then left open to the top.

The second line above the arrows is where I plan to fix an extra layer for a second fixing point in the middle of the 'open' gap.

By the end of the night I had sewn up the top edge, but was getting confused about this 'new' second fixing.

So I decided to wait and have another trial fit around the gear lever before I do any more sewing.

Until next time, take care, Paul. :)