MadaboutKitcars

This is a read-only archive of the old Madabout Kitcars forum. New posts and replies are no longer possible, but every thread is still here to browse and read.

Mick O'Malley's Moss Monaco

19 Oct 2018, 7:29am
Those wheels have certainly changed the look of the car which is really taking shape now. Keep plugging away at it.
19 Oct 2018, 10:57am
Looking good, Mick. I always enjoy your early morning updates :nod:
19 Oct 2018, 3:05pm
Very nice with the larger diameter tires & wheels.
21 Oct 2018, 6:23am
Friday's Progress

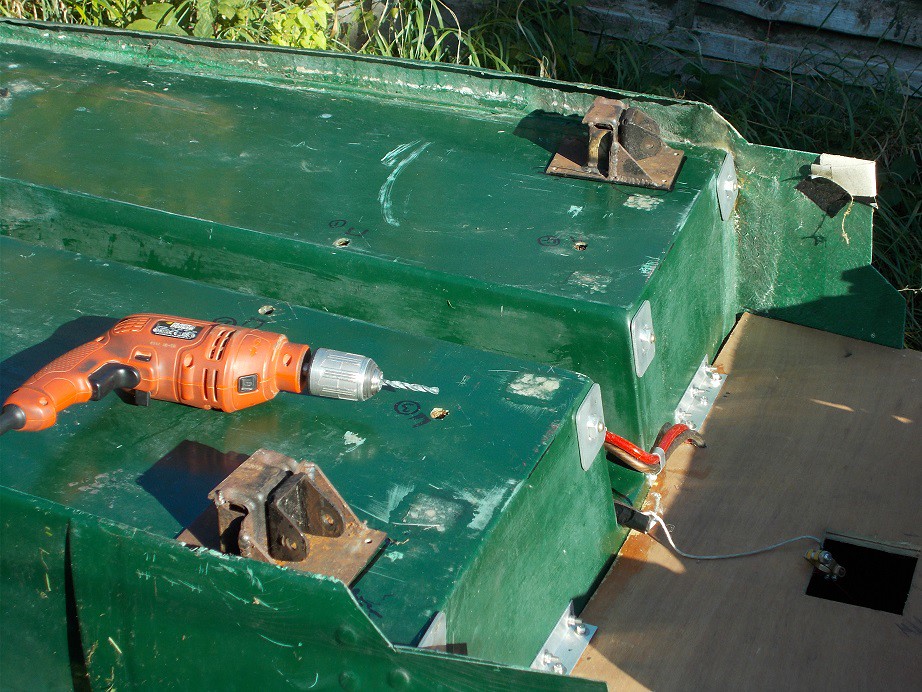
Help was available early, so off with the body which I rolled over to drill the radius arm bracket holes. The outlines I'd marked more or less blind proved to accurately match the mounting plate profile on both sides, so I was happy to proceed in the knowledge that rear wheel alignment would be within manufacturer's tolerances.


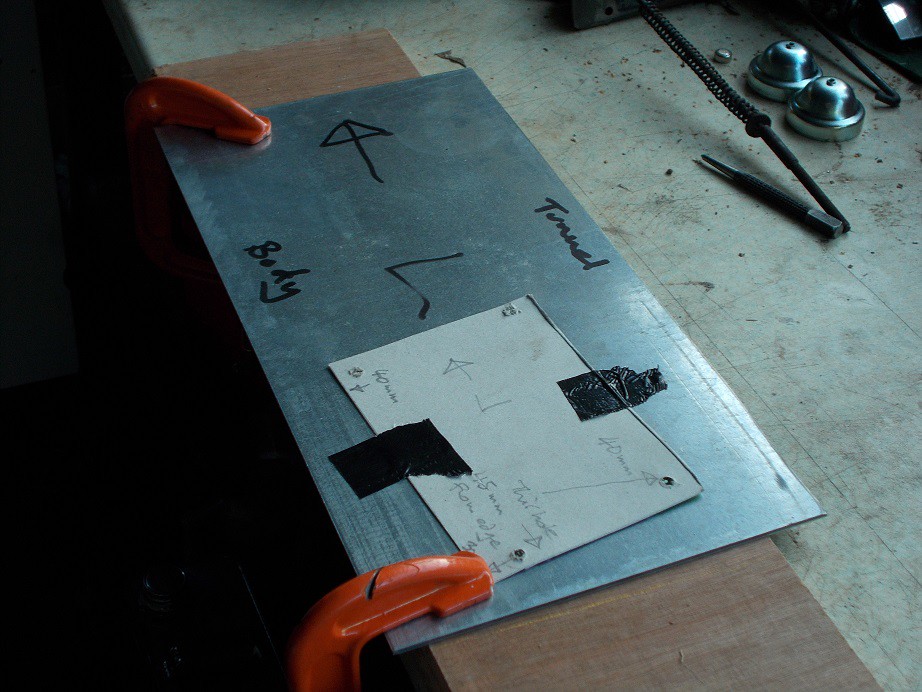
Once I'd drilled the eight 6mm holes I turned her right side up and made stiff card templates of the disposition of the cockpit side holes to use marking out the sandwich plates. Help was then leaving so we replaced the body.

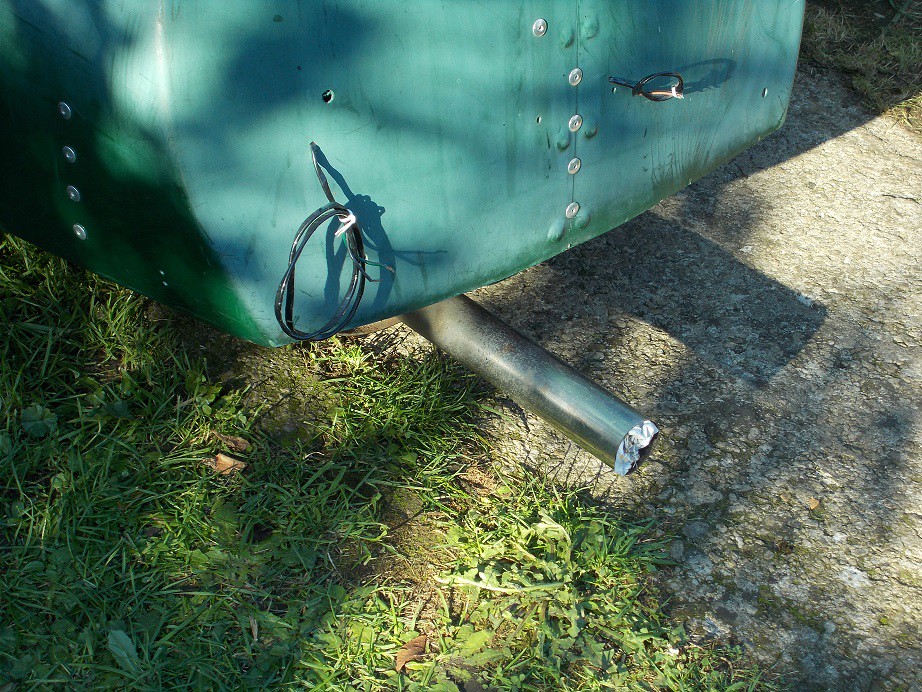
I then turned my attention to the silencer, which I'd earlier offered up to the long under body pipe to find that the tail pipe stuck out a good foot. Its mounting bracket was also exactly under where the floor meets the back body, so I decided to cut the long pipe back as far as possible. The required cut's location was right under the rear frame crossmember: I briefly considered removing the long pipe but instead plumped for taking the side handle off my angle grinder, starting the cut with a worn down disc, and finishing it with a new one. After tidying the edges with files I replaced the silencer. Some six or seven inches will need to come off the tail pipe which I'll do on the bench to ensure a tidy cut. It's also a little too low so my centre hanger will need re-thinking.


That was it for the day.

Regards, Mick
23 Oct 2018, 6:03am
Freezing to Frying

An early start in the cave yesterday saw me shivering as I sorted out my collection of sheet metal parts. I decided to finish off the cockpit side sandwich plates using the card templates mentioned above. I gaffa taped them to the blanks which I'd inscribed with side and direction to avoid one of my most common mistakes: getting the orientation wrong. I offered up the one below to find I'd stuck it on about 60° out. Unsurprising!


Correcting this schoolboy error I then drilled, disced, flapwheeled and sprayed it, then repeated for the other side. The gusty wind made sure that sundry garden debris stuck to my paint :rolleyes:.


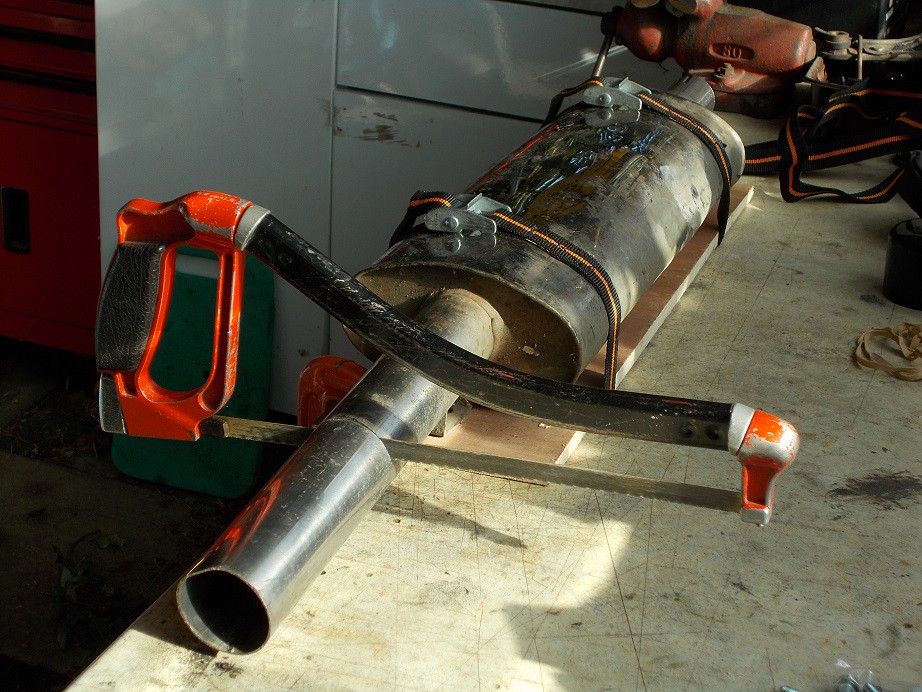
A quick check with some long M6 bolts dropped though each plate and the floor beneath confirmed the accuracy of my measurements. By now the cave had turned into an oven so I decided to chop the tailpipe as this job would be partly in the open. I securely strapped the silencer to a scrap piece of 12mm ply which I then clamped to the bench. Five minutes with the hacksaw, job done :).


Being a coffin dodger, I was now feeling the heat so I packed up for the day.

Regards, Mick
27 Oct 2018, 7:44am
Bits and Pieces.

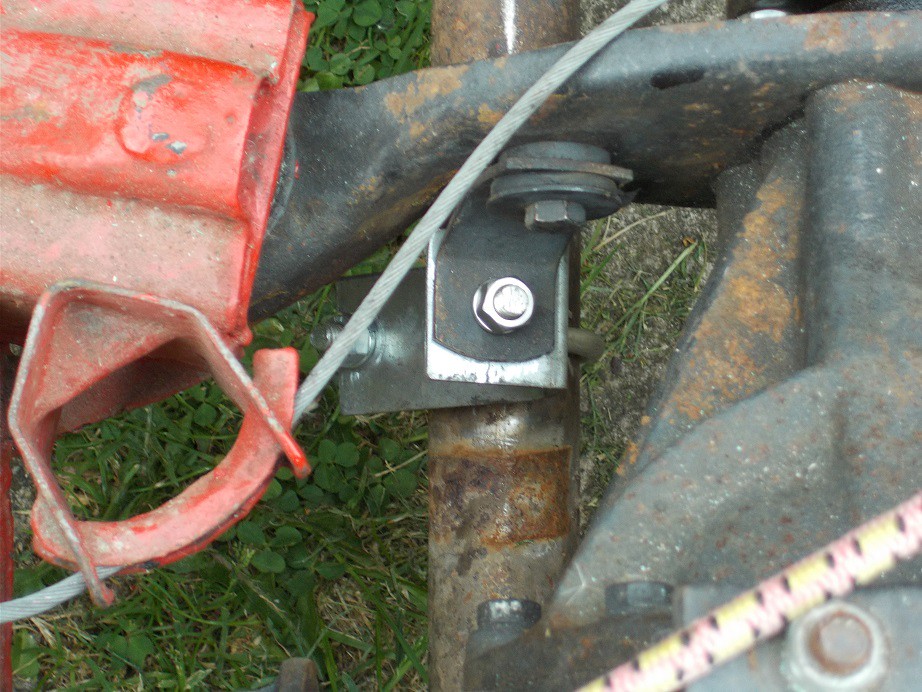
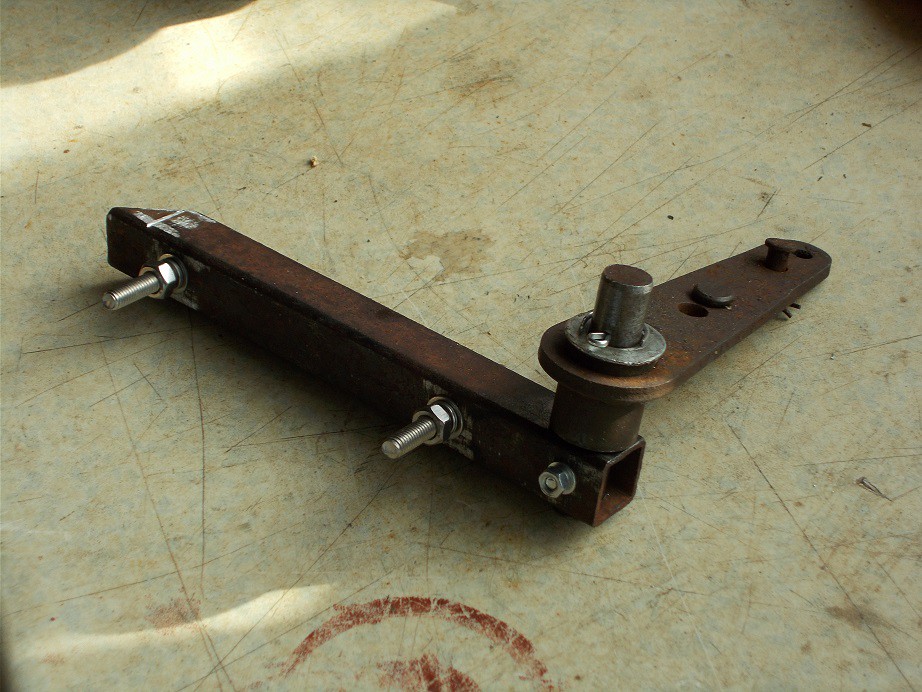
Finishing off my handbrake linkage was a task I'd been putting off, as even the original Spitfire installation when working perfectly was little more than marginal. I re-thought the mounting for the multiplier lever using ¾" box and ½" rod. Careful drilling, sawing, filing, bolting and cotter pinning resulted in this masterpiece, which will be bolted through the inside of the body tunnel.


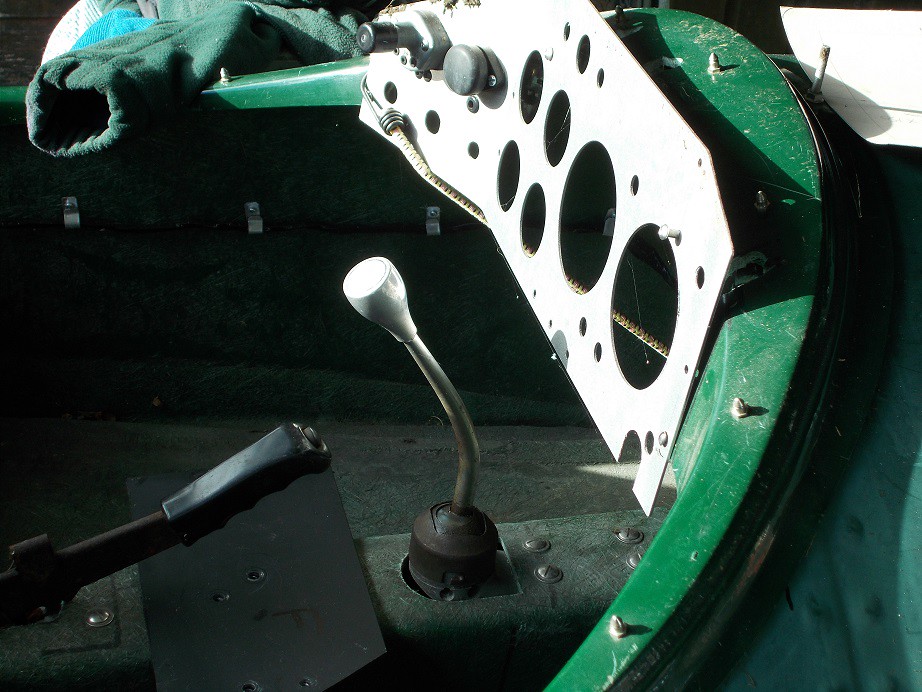
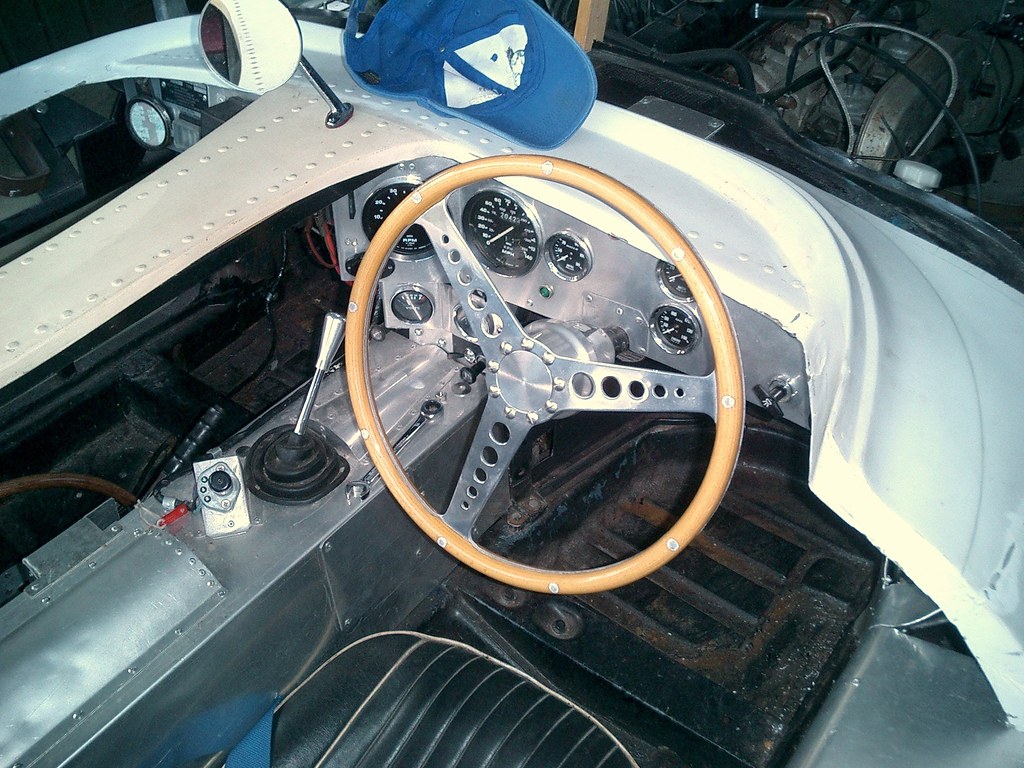
My next job was to bend the top of the gear stick back a couple of inches as my knuckles hit the dash in reverse, 1st and 3rd. After removal, I clamped the base firmly in the vice, slipped a piece of narrow steel tube over the top to protect the thread, then an 18" length of ¾" box. I was surprised just how easily it bent. Reassembly confirmed my knuckles were now safe.


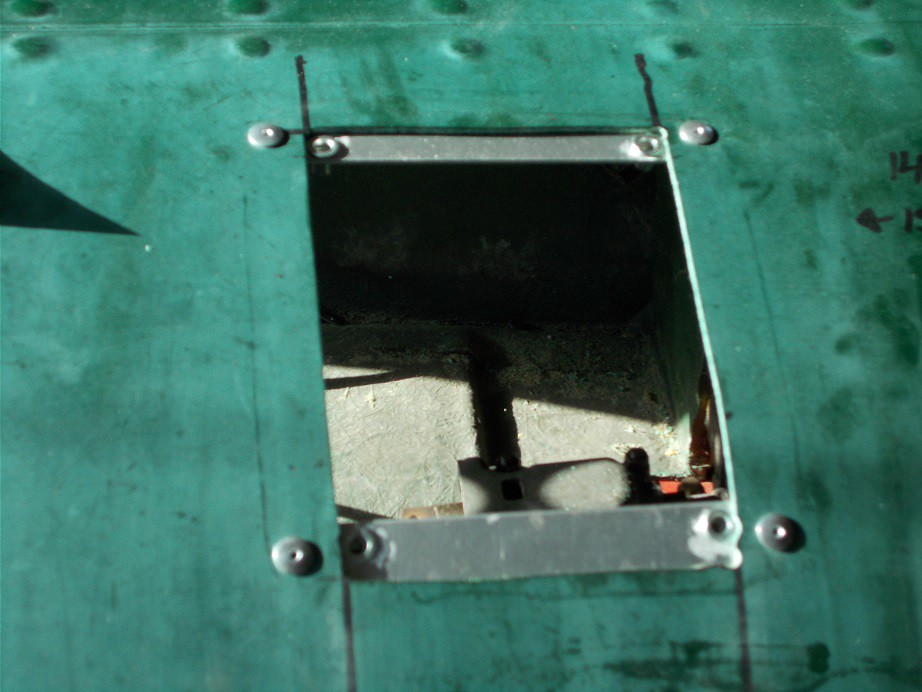
Next job was to make an easily removable panel for the master cylinder access hole. I looked at Dzus fasteners but was put off by the price. I hit on the idea of using Rivnuts, some of which I had left over from my A352 build. I cut a couple of lengths of 3mm x 25mm aluminium flat, fitted the Rivnuts, then drilled and rivetted them into position.


Careful measuring, cutting and drilling had the cover plate fabricated. I'll stick some rubber strip to the back of the edges sometime to ensure wind and waterproofing.


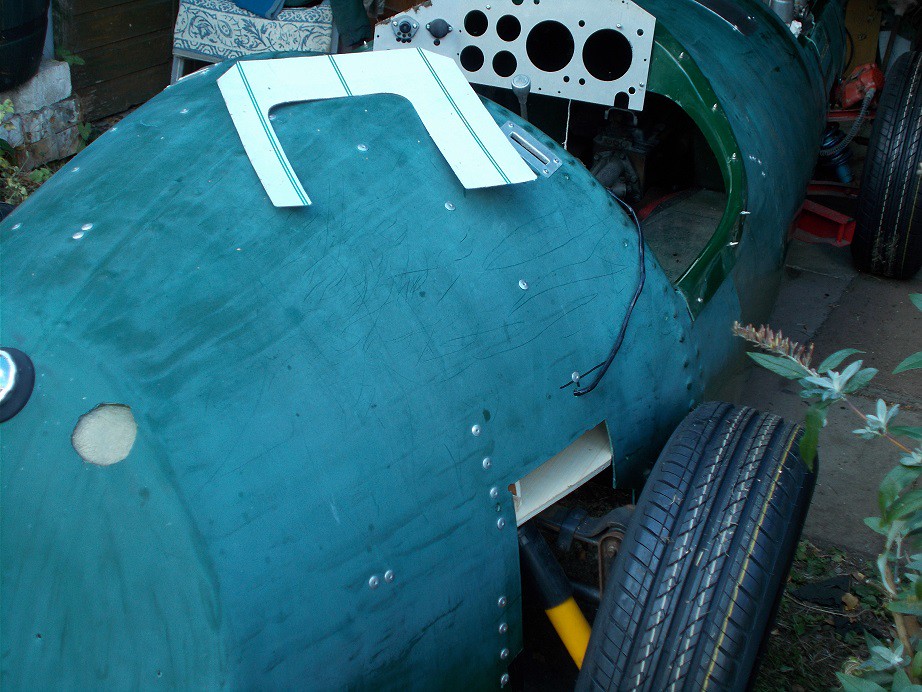
While the Machine Mart tin snips were out I decided to make one of the plates to tidy up the massive suspension holes cut in the body by a previous builder. Cardboard Assisted Design resulted in this which I'll rivet on with its unmade as yet siblings after painting.


Regards, Mick
27 Oct 2018, 9:23am
Coming along very nicely, Mick. Love both the term Cardboard Assisted Design and the low-tech nature of it.
27 Oct 2018, 7:30pm
slotted raised countersunk fixings look cool too ....I try to use slotted fixings in visual areas as opposed to posi screws etc . when I can ...just one of my things ...
2 Nov 2018, 7:39am
Feeling Eclipsed!

I belong to a Facebook group titled 'Homebuilt Cars, from scratch or kits', and am in awe of what some members are achieving across the pond, unhindered by SVA. Today I came across this video which features a Stateside Monaco of sorts.

Brilliant!

Regards, Mick
2 Nov 2018, 7:55am
Utterly bonkers. I love it.
2 Nov 2018, 7:57am
lancelot link wrote:
slotted raised countersunk fixings look cool too ....I try to use slotted fixings in visual areas as opposed to posi screws etc . when I can ...just one of my things ...


Just make sure all the slot heads are pointing in the same direction. Stepfather rebuilt an Austin A40 Devon pickup, the rear deck was wood and every slot head screw was in alignment, really was a finishing detail and it was amazing how many people noticed it.
2 Nov 2018, 11:51am
Fastidious fixings
6 Nov 2018, 8:15am
Some Progress

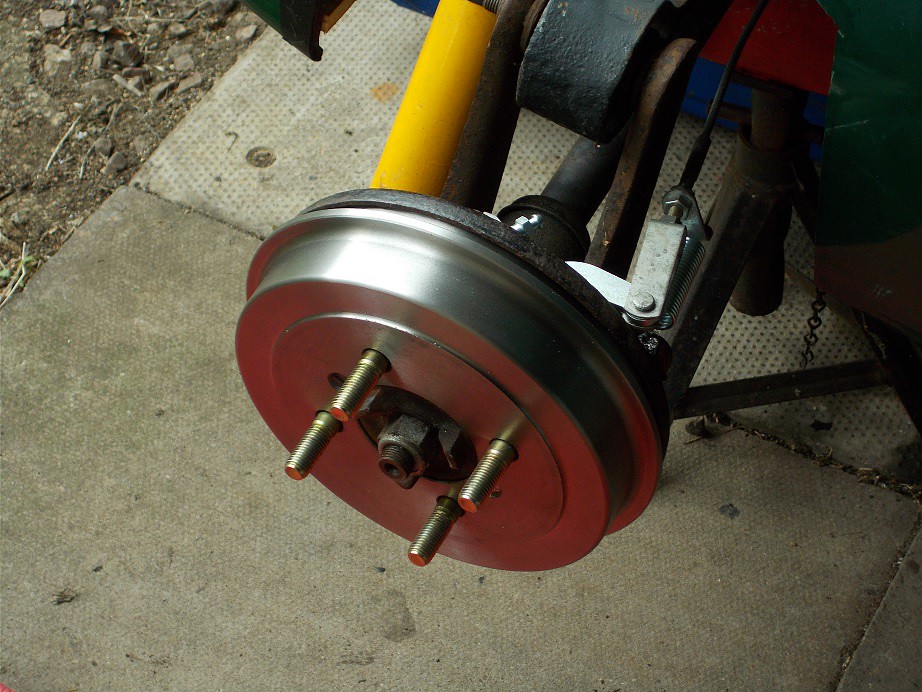
Progress has been slow over the last couple of weeks whilst I've concentrated on the back brakes. To make absolutely sure that my demon handbrake effort multiplier is mounted optimally, I realised that the rest of the linkage back to the shoes would need to be in place. I checked my mound of parts to find that I had no backplate levers, so these I ordered. I examined the four drums and decided they were too worn to use in that condition. When building the A352 I'd come to the same conclusion and had them skimmed and faced locally. I just was about to march down to the engineering workshop with them when I thought to check the price of new ones, which was considerably less than I'd paid for machining. These I ordered. Once they'd arrived I assembled my bits, jacked up the back end and removed the wheels, only to find no adjusters :rolleyes:. More ordering, more delay.

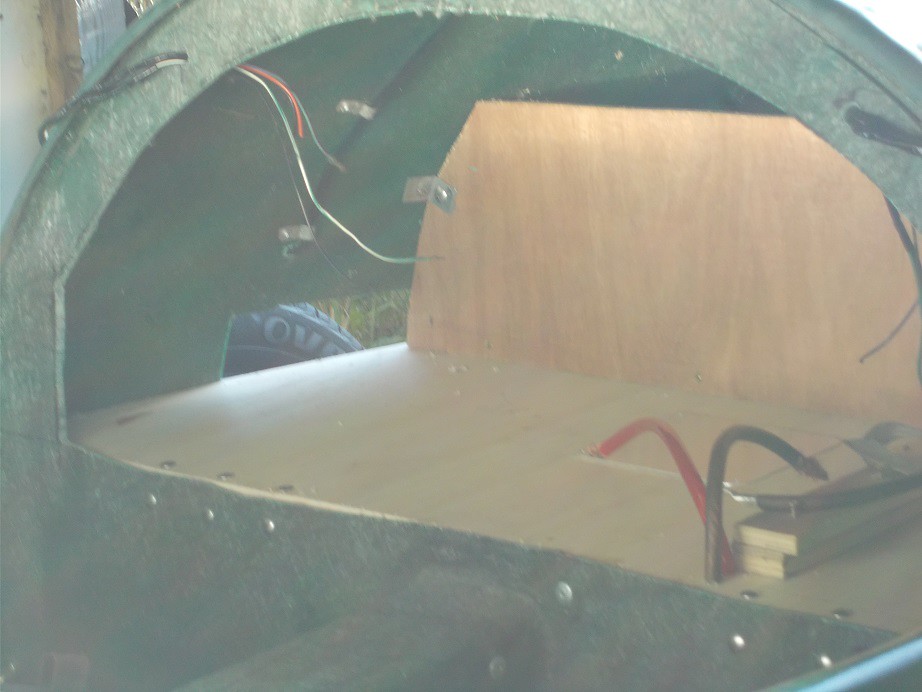
In the meantime, having noticed some de-lamination in the edges of my plywood 'floors', I purchased some superior marine ply (buy cheap, pay twice!), removed the existing which made handy templates, and cut and fitted the new ones. This time I corrected a previous omission and screwed on a vertical back for the luggage area behind the seats. Thinking that this might drum, I made a pair of angled brackets to prevent this. Excuse rubbish picture.


Yesterday, at long last, all the new brake bits were to hand, and were successfully fitted.


Another Spitfire based Monaco had come up for sale in the Moss FB group, so I gave the vendor a ring for a chat about a possible viewing for ideas, as it was dismantled after being on the road. In particular, I was interested in the windscreen from which to take a paper patten as my efforts were rubbish. He said he'd have a look for it and get back to me. However, in the interim, I'd scrolled back through this thread and decided to go down this route....


Moss (bizarrely) in Bristol only had one in stock, and this I received yesterday. I'm hoping that I can get the second at the Classic Car Show this Friday, especially if there's a 'show deal' available :).

Regards, Mick
6 Nov 2018, 9:21am
If you give the edges of the plywood a coat of grp resin it will stop any water creeping in later on. In fact, it is probably worth giving all the plywood a coat.
8 Nov 2018, 8:18am
Small Steps

The weather hasn't been helping, but on Tuesday I trial-fitted the radiator by standing it on a wooden block, fitting the top and bottom hoses, and fabricating brackets to locate it to the U shaped support which bolts to the frame. The upright arms of this provide attachment points for the engine bay splash guards on a Spitfire, not needed on the open-wheeler Monaco, so I'll cut off the redundant portions. Not really worth a picture, I may post one once everything's in place.

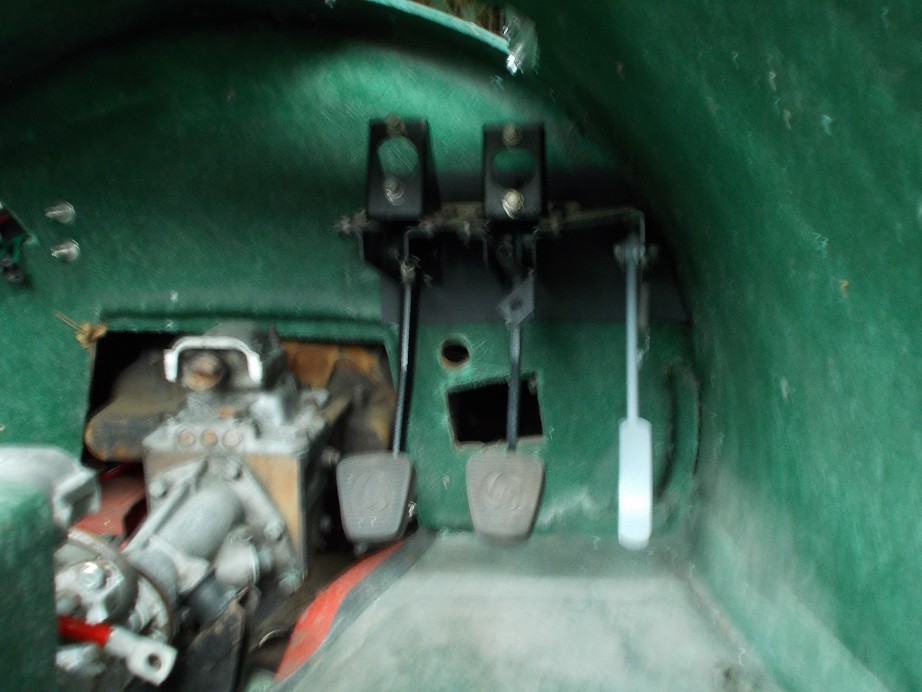
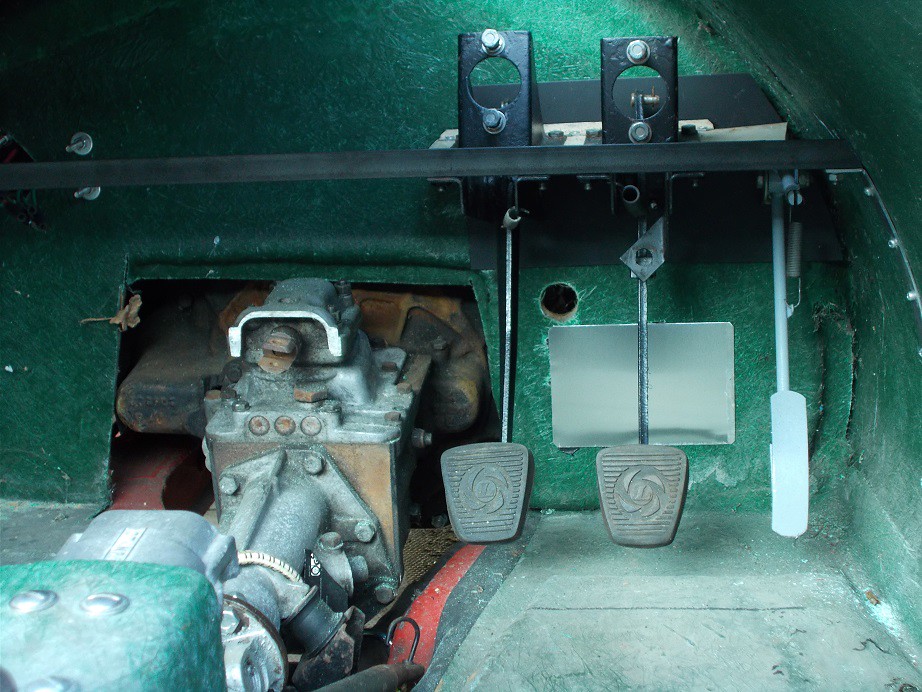
Looking at the weather forecast I realised that plonking the body on the grass wasn't going to happen so I set to fitting the pedal box with the body on the chassis. The footwell side had good access through my master cylinder servicing hole, but the engine bay side was severely restricted by the rear SU which had worn holes in my forearm by the time I'd finished. This was a very fiddly job as the ¼" UNF bolts had to be the exact correct length so that they didn't interfere with the pedals. The solid part of their shanks also needed the die running down them to get them fully home in the captive nuts. After a couple of hours trial and success all was finally in place. Excuse yet another crap photo'.


Filling that lower hole will definitely have to wait until the body's off.

Regards, Mick
9 Nov 2018, 7:52am
A Slow Day

Yesterday I fettled the top radiator supports a little more, and trial fitted them: all good. The bottom supports will need to be more substantial, but a search of my metal heap failed to locate anything suitable - the 3mm steel falling into the 'overkill' bracket. Ebay will doubtless come to the rescue.

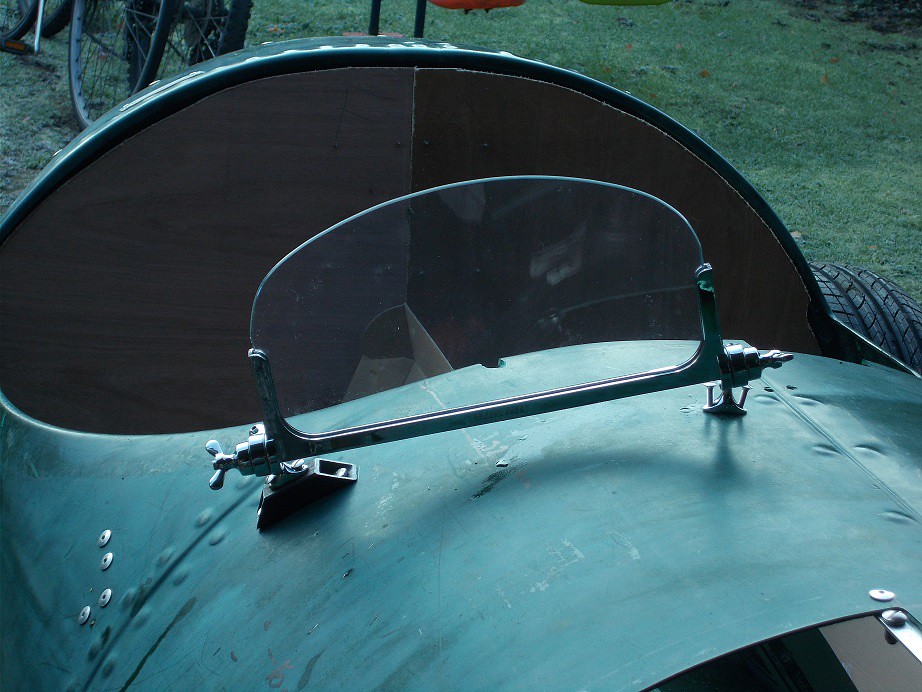
I turned my attention to the aeroscreen supports, which don't seem man enough for the job. The two holes through which each is mounted to the body were between 4 & 5mm diameter (see the 'Bananarama' picture above) and at right angles to the stresses they're supposed to resist. I ran my 5mm tap through them which removed only the chrome plating. More Ebaying will provide A2 countersunk screws which, when fitted, will perform as studs. Small pedestals, again as in the picture, will be needed for the outer mountings so I trial made one from 2" of ¾" box with 45° ends. The light was fading by then so I called it a day.

The one really bright spot was the nice man bringing this :). I hope its application will be soon!


Regards, Mick
11 Nov 2018, 2:05pm
Small Steps

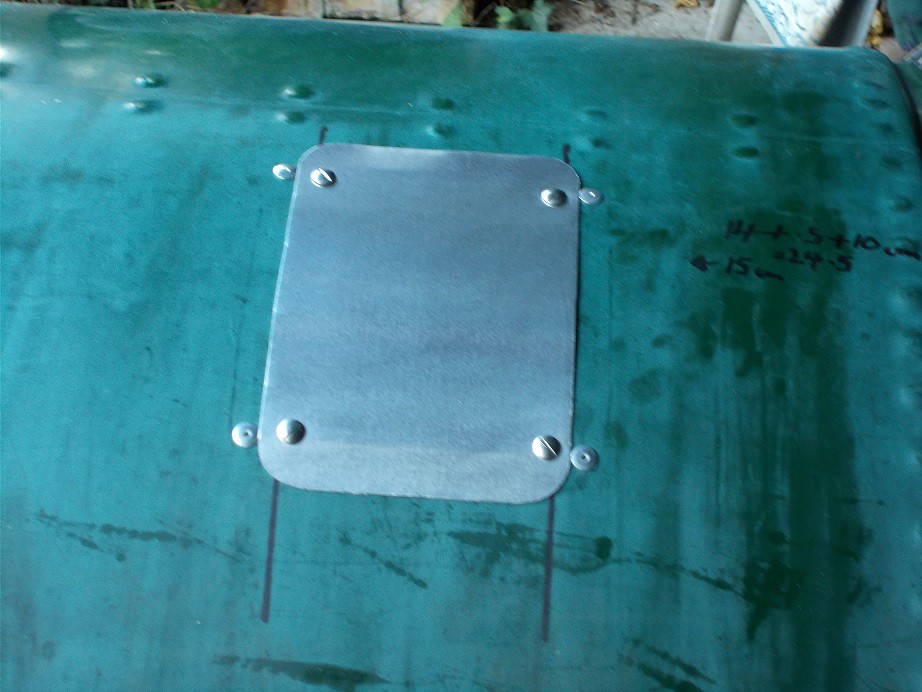
Yesterday morning I wandered down to the cave through the downpour with my newly delivered A2 M5 countersunk bolts, fully intending to trial fit the first aeroscreen (I'd ordered the second on Friday using the money I saved by not going to the Classic Car Show - a whopping £33 entrance + the train fare = 60 quid. In contrast, the Motorbike Show, same venue Monday week £15 entrance). Enthusiasm at a low ebb, due to the foul weather, I decided to limit myself to something simple. Blanking off the hole in the driver's side engine bulkhead seemed to fit the bill. I'd previously thought of filling it but, on reflection, simply fitting an ally plate each side would do as good a job. I cut two 15 x 10 ally rectangles, ran a bead of Sikaflex around one edge of each and, after roughing up the GRP and wiping with acetone, gently pressed each into position. Job done. Even worse photo' alert!


Today, enthusiasm was higher, and I set to fettling my demon aeroscreen pedestals. The above mentioned bolts needed cutting to length, and the 6mm holes, through which the pedestals themselves will be mounted to the body, drilling. I then trial assembled them. I think the supports are little more than pathetic, given the job they were so say 'designed' to do, definitely form over function. They wouldn't last five minutes on a Blower Bentley clocking the ton on the Brooklands banking! Anyway, I'm stuck with them so will have to press on regardless.


You can see from this marginally less rubbish photo' that the shape of the casting prevents the bolts from sitting right down. Hex or button heads would be even uglier :(.

After paying my 1100 respects, I decided to have yet another look at the wing supports. This was about the fourth time as they were clearly intended for a different chassis frame, and I'd feebly put them back in store each time after unsatisfactorily offering them up. This time, however, I was more decisive and decided to make them fit. Two of the four each side could be used, with a little imagination, as they were. One each for the front and rear wings. A third I cold set at both ends in the vice until it also was serviceable. The fourth, however, had to be cut and will need a new body end plate welding on. They're not really worth a photo' until they're in situ. Pleased with this unexpected outcome, I called it a day.

Regards, Mick
12 Nov 2018, 8:56am
Mick O'Malley wrote:
You can see from this marginally less rubbish photo' that the shape of the casting prevents the bolts from sitting right down. Hex or button heads would be even uglier :(.


Hi Mick
Would countersunk bolts such as these fit?
https://www.ebay.co.uk/itm/M4-M5-M6-M8-M10-COUNTERSUNK-BOLT-CSK-ALLEN-KEY-SOCKET-SCREWS-A2-STAINLESS-STEEL/181276846436?_trkparms=aid%3D555017%26algo%3DPL.CASSINI%26ao%3D1%26asc%3D55149%26meid%3Df857896efcb24469bd84cb9de2effd9f%26pid%3D101006%26rk%3D1%26rkt%3D1%26%26itm%3D181276846436&_trksid=p2045573.c101006.m3226
13 Nov 2018, 7:04am
NeilF355 wrote:
Hi Mick
Would countersunk bolts such as these fit?

Hi Neil

Thanks for that, but the problem is the profile of the casting, any M5 CSK would foul on one side long before it was fully home. If the casting were more substantial I'd consider relieving it, but it's so small that it would lose what little strength it has.

Regards, Mick
17 Nov 2018, 6:25pm
Chipping Away

This week's progress has been bitty, with not a huge deal to show. I bought sundry fixings, including spring catches in black for the bonnet, plus black bolts for fixing them. This will be post-spraying, which doesn't seem that far away. I'll go and see my man next week to discuss. I whizzed over to see my welder on Thursday in the A352 and, fortunately, he wasn't busy and welded my last two wing brackets on the spot. Excellent!

On the way there the Turner I'd seen at a spring show passed the other way with a wave.


I made and fitted the two bottom radiator brackets, then turned my attention to the transverse support for the pedal box. I don't think it's really necessary, as the mounting to the bulkhead is extremely rigid, but, belt and braces, as ever. I roughly measured the length of ¾" angle that I would need across the top of the footwell and cut a length of batten oversize which I shortened by small increments until it sat perfectly in position - wood assisted design! Laying it on the steel, marking and cutting took moments. More careful measuring and drilling and the screws into the horizontal mounting points were in place. The ends I attached to the body with strip bolted to the angle and Dreadnought rivetted through the sides as I'd done elsewhere.


I was thrilled with how well it had all gone together until I noticed that I'd neglected to make allowance for the end mounting of the throttle cable outer. Another day!

This morning, body removal assistance yet again being unavailable, I measured my seats and ordered the black faux leather vinyl with which they'll be covered. I then decided to make the two front plates to tidy the holes hacked in the body sides to clear the front of the frame. Once again CAD came to the rescue and a careful hour with the tin snips had them made. These again won't be fitted until spraying and final bolting down of the body. I'll need to cut off a couple of the moulded in rivets, and use 4mm ones for attachment.


I deliberately made them rough side out, as I like the 'hasty mid-race paddock repair' look :)

That was it.

Regards, Mick
18 Nov 2018, 7:14am
Mick – Lots of good progress. :cool:

This is not a great photo, but one of my Brooklands screen brackets broke and it really is a poor design.


Good luck, Paul. :)
18 Nov 2018, 11:41am
Paul L wrote:
Mick – Lots of good progress. :cool:

This is not a great photo, but one of my Brooklands screen brackets broke and it really is a poor design

Thanks Paul :)

I've imagined a scenario where the completed Monaco hits a speed bump or pot hole and I get the aeroscreen in the teeth. Not a happy prospect. I noticed at the foot of the instruction sheet (which one would have to be fairly stupid to need), that they're Made In China.

Nuff said.

Regards, Mick
22 Nov 2018, 6:04am
And still they come........

A link posted on the Moss Owners' FB page took me to this.

A barn find in a barn! How cool is that?

Regards, Mick
22 Nov 2018, 9:53pm
A lot of unkind things said by ignorant people on that site. I did love the Brookland screens on top of the windscreen. Tint them for sun visors. Yours is comming on a treat. How come you have hot weather in November?
23 Nov 2018, 7:03am
Nibbling away......

This past week I've been chipping away at some of the minor purchasing and fabricating tasks. After reversing the top seatbelt mountings, I've been unhappy with my seat back, so decided to make a replacement. As the body is far from symmetrical, I made it in two halves to sit inside the rear body lip, and was pleased with the outcome. I next cut the two squab bottoms which again were asymmetrical. I then bought the 3" thick hard foam which is coming today.

My 2mm thick steel plate for the wing stay backing plates having arrived, I disced it into eight and drilled the 8mm fixing holes. Fortunately, I'd checked the hole spacings on the wing stay flanges, which clearly hadn't been drilled on a jig, so I numbered everything in pairs. I'll trial mount the wings and post a picture when weather allows.

Yesterday I bit the bullet and decided to trial mount the aeroscreens. As they're quite heavy and unwieldy, I cut a strip of ply to get the spacing of the mounts right without chucking one of the screens on the floor in a moment of inattention :rolleyes:.


Once the bolts were nipped up I substituted the real thing.


Happy with this, I did the passenger side.


I then cut the backing plates for their mountings and quit while I was ahead. Once back in the warm, I bought a Spitfire gear stick gaiter. I used them on both my Marlin and A352 as they have a retro look.


That was it for the day.

Regards, Mick