This is a read-only archive of the old Madabout Kitcars forum. New posts and replies are no longer possible, but every thread is still here to browse and read.
Very neat now!
And as they say - if it looks right, it probably is (right)
Have a great Christmas
Robin
Thanks to you and Amir for your Christmas wishes.
I think your so right about it looking right.
really wasn't happy with my first attempt so getting the Klarius was a lucky moment!
Hi Peter, Have been contacted by a ex Marlin fan who now has a Sabre Royale which needs a new hood as well someone to talk to.
Any help from you Royale enthusiasts appreciated. <b.caswell@virgin.net>
Hi Peter, Have been contacted by a ex Marlin fan who now has a Sabre Royale which needs a new hood as well someone to talk to.
Any help from you Royale enthusiasts appreciated. <b.caswell@virgin.net>
Hi Ben,
Automotive Creations Ltd ( http://www.automotivecreation.com/) are the current manufacturers of Royale Sabres, spares and support to existing owners. Malcolm Badger is the owner and I believe he can supply hoods for existing cars and new builds. I have always found Malcolm very helpful with Sabre specific technical questions. You can contact Malcolm through the ACL website.
There is also an active owners club that has a wealth of knowledge and experience going back to the launch of the Sabre is 1994. http://royaleownersclub.org.uk/index.asp Peter Gibbons is the chairman and contact numbers for the club committee members listed on the 'Club Officers' button.
cheers, Peter
Thanks Peter for the info which I will pass on. Your project does look interesting if not a bit daunting compared to the simple Marlin Roadster with a Triumph six purring under the bonnet ;-)
thanks Ben
Temporarily fitted today just to check the bush sizes are correct, etc. The coils are much shorter than the original ones which are prone to being coil bound on compression.
Happy New Year, Peter - I hope you had an excellent rest. All best wishes for 2016 and I look forward to further missives from your build!
Fingers crossed that this year is the year I'm able to get back on the Sabre wagon.. ;-)
Cheers!
Ivan.
Happy New Year as well! I hope no-one minds if I temporarily hijack this thread for that too.. ;-)
All the best to you as well Amir, I wish you many happy hours of driving the kids round in the special '+2' seats!
Ivan.
Thank you Ivan, and happy new year to you.
Making my Sabre into a 4 seater was not practical and without seat belt mountings, unable to fit seat belts, without them I wouldn't have liked to carry my grand children and if I did would have been totally wrong, I decided to have a bench on the back with storage spaces within. Now anything placed on the rear bench will not be creeping down under the front seats.
I also found a solution to having my grand children in the car with me. I am refurbishing a Royale Drophead, which when finished, four of them can come with me and it can also be used for wedding hire. Right now I am looking for good condition front and rear sub frames of 1974 Jaguar XJ6 to help me complete the mechanical of the drophead. All the best to you and Peter who's work I have been following with great joy.
I am refurbishing a Royale Drophead, which when finished, four of them can come with me and it can also be used for wedding hire. Right now I am looking for good condition front and rear sub frames of 1974 Jaguar XJ6 to help me complete the mechanical of the drophead.
Amir,
so you really have got the Royale bug!!
Would love to see you start a new thread following your Drophead refurbishment.
cheers, Peter
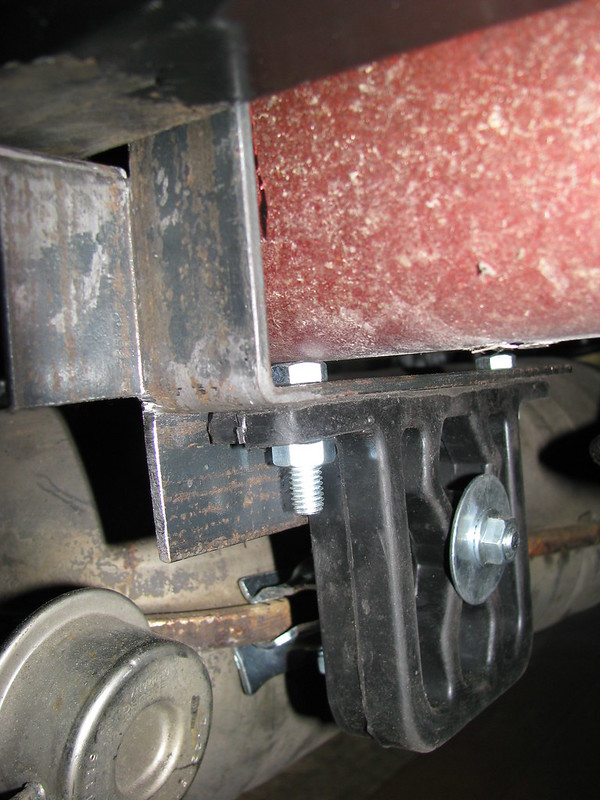
After I have finished fitting the exhaust system, I plan to refit the body tub again to check all the clearances between the tub and the fuel, brake lines and the exhaust mountings, etc. Fingers crossed that there won't be too much re-work needed
Well.....I said that back in November last year before I decided to rework the exhaust system.
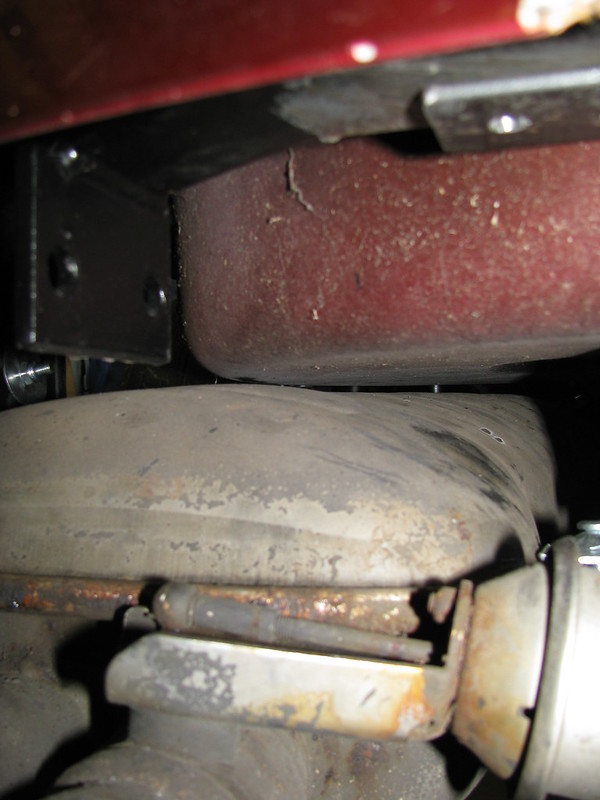
That's now all finished so last weekend I got my son to help me refit the main body tub to check the clearances, etc.
Firstly, the tail pipes exit nicely just beyond the rear tub.
But,,,,,there is currently about a 6mm gap between the bottom of the spare wheel well and the top of the exhaust rear silencer box. I think I will drop the rear box by about 14mm to give a 20mm gap and for safety glue a heat reflective shield on the wheel well.
Peter,
you are absolutely right, I really have got the Royale bug. And the deeper I go into it the more I like John Barlow's creations.
I would have started a new thread if I wasn't so involved with my business, which fills my time from 6 AM, right up to about 7 PM. And only Saturday afternoons is my own time.
Right now I have striped the rear seats and making them foldable to allow long objects fit in the boot, and while at it, doing a bit of wiring, a provision for a better sound system.
With regards to your exhaust rear silencer, as you have the flexible pipes as down pipe, the movement at the back section of the exhaust would be minimal, hence a 10 mm clearance would be more than adequate, but with stiffer rubber mounting and of course the heat shield. Keep up the good work.
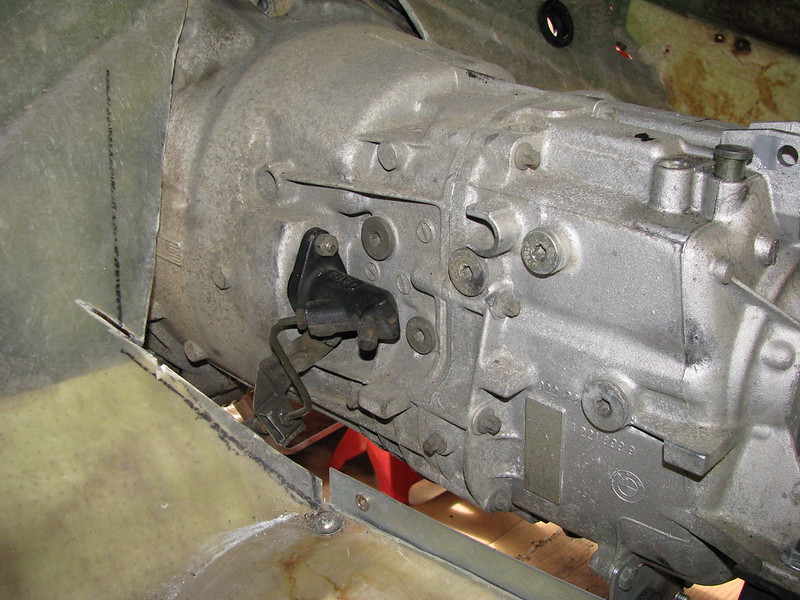
Progress since Christmas slowed to a crawl but I'm now returning to finishing the gearbox tunnel modification. Just to recap the Royale Sabre was designed for Ford engines and gearboxes but I'm fitting a BMW 2.8 litre M52 straight six engine and its matching gearbox. The BMW gearbox is slightly fatter than the Ford 'box so the GRP tunnel needed to be modified.
Back in March 2013 (gulp!!) I started modifying the tunnel but didn't finish it because I hadn't finalised the position of the engine and gearbox. That's all done now so time to crack on and finish the tunnel.
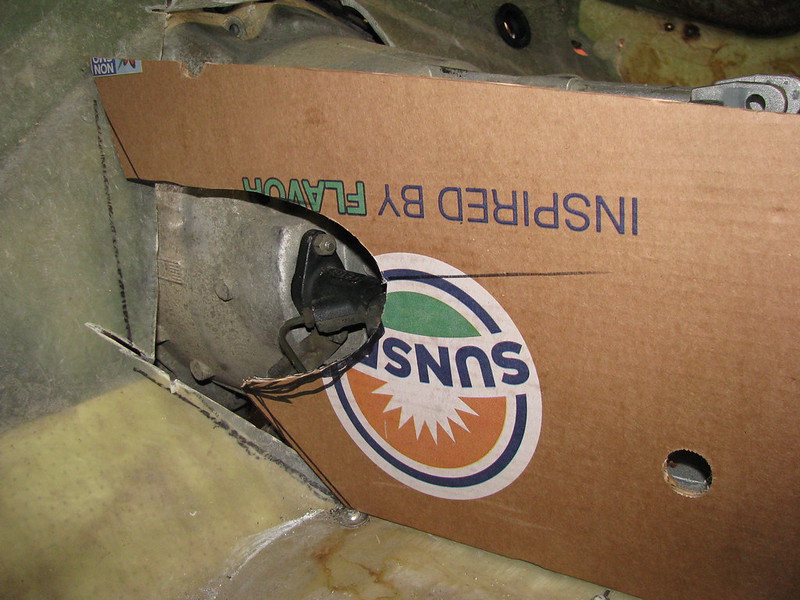
I need to modify the tunnel to clear the sides of the gearbox and the clutch slave cylinder. The idea is the insert a hump on each side to improve clearance.
I cut the shape out with a jigsaw with a metal cutting blade and cellotaped it to the cardboard to check the shape. Unfortunately my first attempt is too shallow and it doesn't give sufficient clearance to the clutch slave cylinder pipe. I'm now making up some more sections with a deeper profile.
Have you considered making the "bulge" in aluminium. I can tell you, from experience :-), it is pretty easy with just basic tools. I have plenty of offcuts if you want to try!
Have you considered making the "bulge" in aluminium. I can tell you, from experience :-), it is pretty easy with just basic tools. I have plenty of offcuts if you want to try!
Cheers, Robin
Hi Robin,
to be honest, no I hadn't thought of using aluminium. The bulge doesn't need to be very pretty as it will be covered in carpet but, I'll bear it in mind if it doesn't work out with the GRP.
thanks, Peter
The principle is pretty easy. Two pieces of 18mm mdf. Cut matching holes in them the shape of the bulge. Sandwidge the ali sheet between them and clamp well. The ali needs to be about 50mm bigger all round than the hole. Belt with a soft headed hammer.
To make it easier you can anneal the ali first. Smear if with bar soap. Heat it with a blow torch until the soap goes brown. Allow to cool. Bar soap goes brown just before the melting point of ali so don't overdo it!
Now my engine and gearbox are mounted in their final positions I could turn my attention to writing a specification for a propshaft. This needed to have a suitable flange at the front to match the BMW gearbox and a standard four bolt flange to match the Ford Sierra diff at the back. Royale specified a 2" tube to allow the 'shaft to be removed through the top of the transmission tunnel. Alternatively, you have to remove the engine and gearbox to get the propshaft out. I hope I will never have to replace the propshaft in my lifetime but I still wanted to retain the ability to remove it without taking the engine and gearbox out.
I sent my spec to four suppliers and made my decision based on the quality of their response and price. Bailey Morris and D&F (Dunning and Fairbank) both raised an eyebrow about building it with a 2" tube but when supplied with with further details about the gearbox, diff, tyre diameter, etc they both confirmed that this would be safe up to 85mph cruising in fifth gear.
In the end I chose D&F who were very helpful, knowledgeable and came back with a keen price.
It arrived last week and I'm very pleased with the quality and finish.
Front end is a flange to match the BMW gearbox. Sliding joint to allow variation in length under acceleration. Propshaft by marlinpeter, on Flickr
Final drive/diff flange to match Ford Sierra diff. Propshaft by marlinpeter, on Flickr
I've been working on the pedal box and brake master cylinder mounting.
Before mounting the pedal box and brake master cylinder, I needed to clean up this area of bodywork. It was a bit of a mess from the original builders holes plus some holes I made trial fitting other types of brake servos. First I sanded off all the original paint and primer. I chamfered the holes and screwed a piece of MDF covered in packing tape behind the holes.
I've mounted the brake master cylinder on a 6mm thick steel disc (from Lasermaster.co.uk). The holes for all the bolts are threaded so that I don't have to be Houdini and get to both sides at the same time. The bolts will be threadlocked in the disc during final assembly. There are three M8 bolts that go through the GRP bulkhead and connect with the Sierra pedal box. Longer m/c bolts will be used during final assembly.
The m/c reservoir isn't quite at the right angle but I think it will work OK.
The pedal box is fixed by three M8 bolts through the bulkhead to the steel disc plus a single M12 bolt to the substantial scuttle bar. I need to replace that rusty rectangular spreading plate.
Hi peter, Good to see you are back on the project. And must say, it is a brilliant way of mounting the Brake master cylinder onto the bulkhead.
I had a thought about the gearbox cover which you had to modify. Have you considered making it a removable cover, like that of the old Triumphs and Morris minors? It would make the removal of BMW Gearbox a much simpler job, should a new clutch be required. It can be done without jeopardising the integrity of the body tub.
Just a thought.
Wishing you all the best with the project.
Amir
I had a thought about the gearbox cover which you had to modify. Have you considered making it a removable cover, like that of the old Triumphs and Morris minors?
Hi Amir,
progress on the Sabre has been unfortunately slow due to too many other projects!
And yes, my plan is to make the gearbox cover removable but things were not going to well with the re-shaping, so I've decided to leave it for now and come back to it later.
best regards,
Peter
Whilst the brake master cylinder clears the engine OK, one of the ports is directly opposite the rocker cover. Even with the tightest bend, the pipe still wouldn't fit even if I carved a slot in the cover. The solution I came up with is to use a banjo fitting.
Having decided to use a banjo fitting but I found the price of separate fittings so high that I decided to go for some complete custom flexible lines from HEL. The banjo fitting fitted just fine but an unforeseen issue is that the other end doesn't fit my Iruna brake servo slave cylinder.
Despite remembering to order 3/8" UNF to match the Iruna servo the HEL fitting doesn't tighten before the threads bind at the bottom of the hole. I think the issue is that the HEL fitting is threaded right to the end whereas some fittings have an unthreaded section just before the flared end of the pipe.
To solve this issue I've made up this short adapter but its not a very eloquent solution and not very mechanically strong. (By now I was wishing I bought separate fittings and ran the lines in Knufer pipe.)
Could you not run the hel pipe to a three way bulkhead connector to allow you to use a goodridge style hose onto the slave and blank one of the outlets on the three way. Car builder solutions sell a three way bulkhead fitting and a blanking fitting for the unused 3rd outlet.

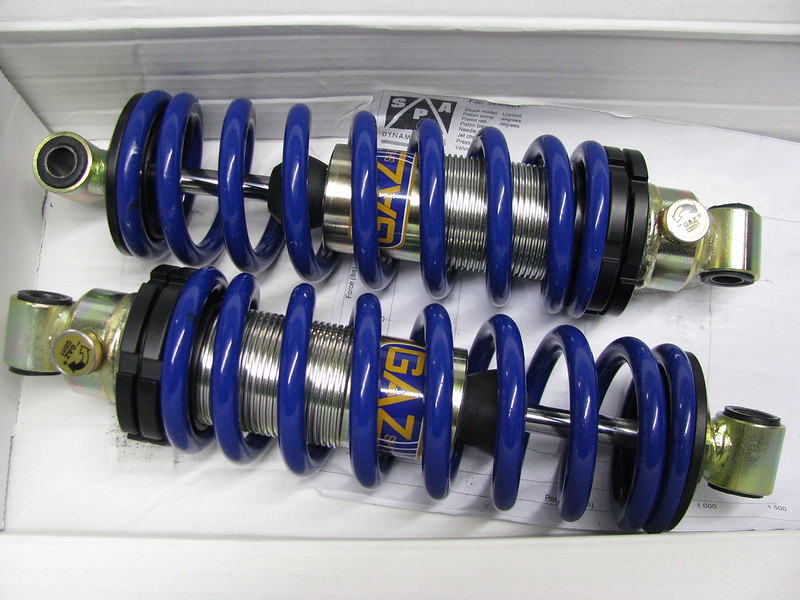 New Front shocks and springs by marlinpeter, on Flickr
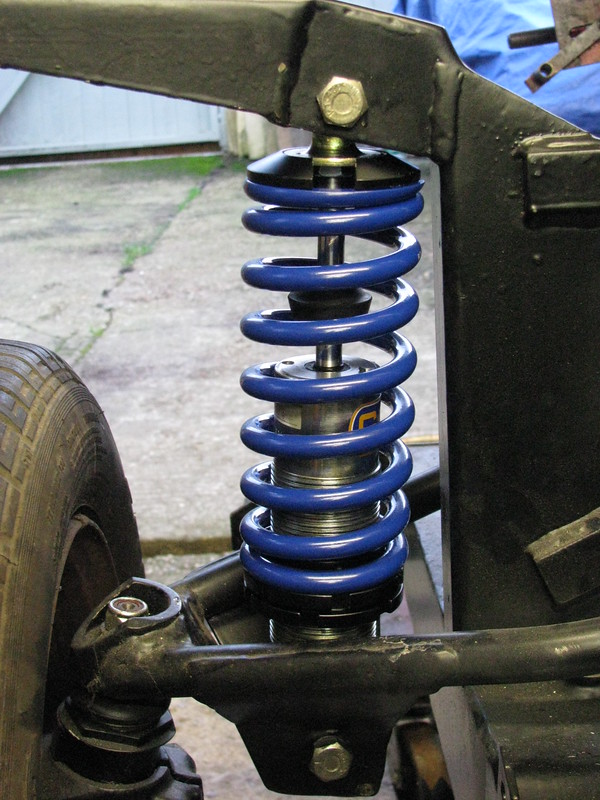 New Front shocks and springs by marlinpeter, on Flickr
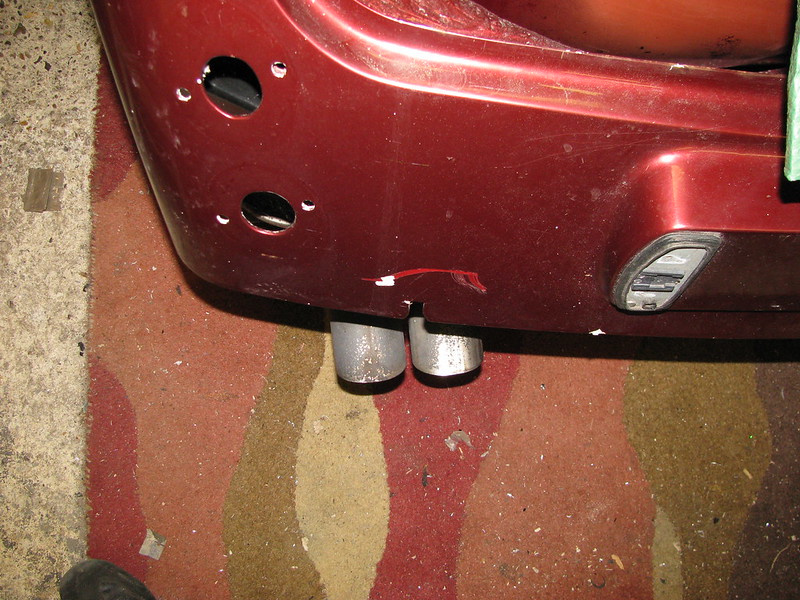 Body fit Jan 2016 by marlinpeter, on Flickr
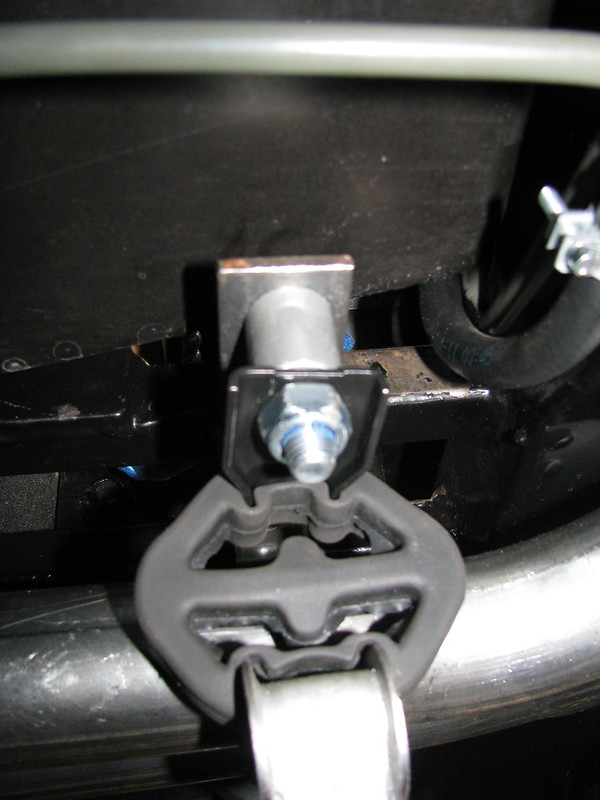 Body fit Jan 2016 by marlinpeter, on Flickr
 Body fit Jan 2016 by marlinpeter, on Flickr
 Body fit Jan 2016 by marlinpeter, on Flickr
 N/S side extension by marlinpeter, on Flickr
 Gearbox tunnel mods by marlinpeter, on Flickr
 Gearbox tunnel mods by marlinpeter, on Flickr
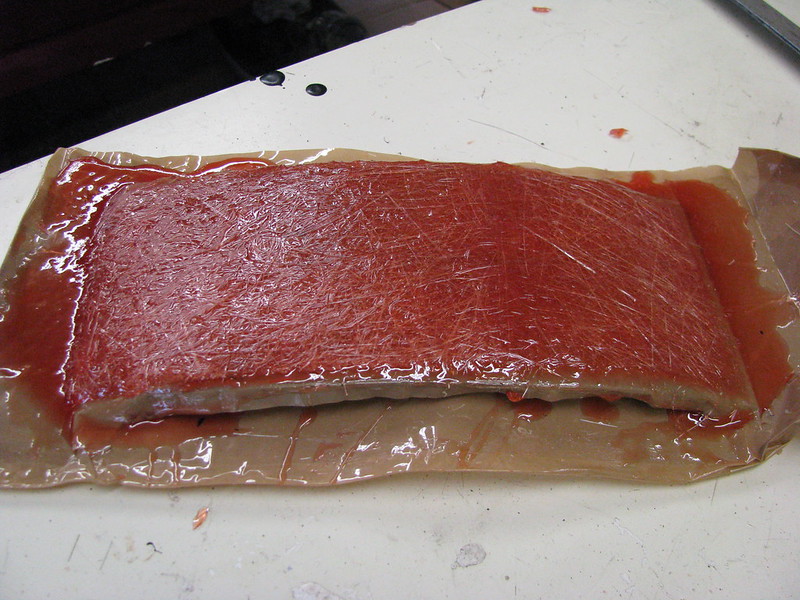 Gearbox tunnel mods by marlinpeter, on Flickr
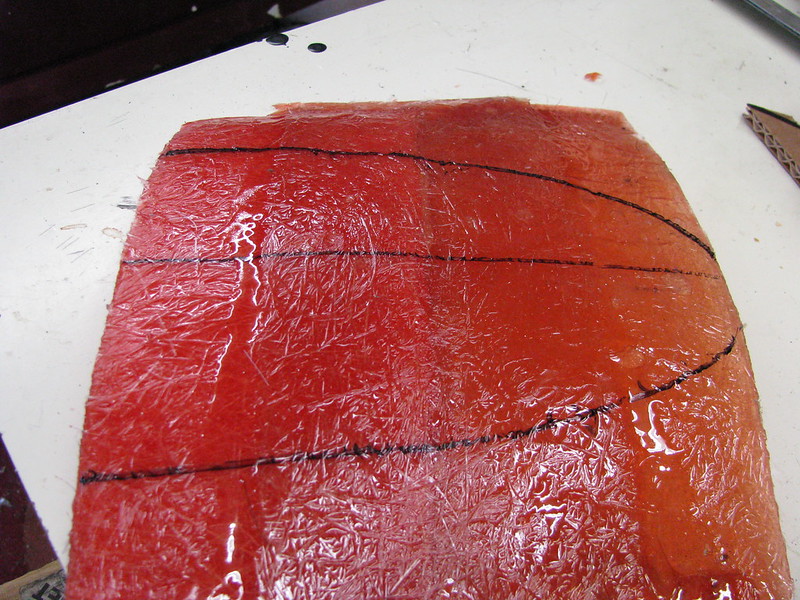 Gearbox tunnel mods by marlinpeter, on Flickr
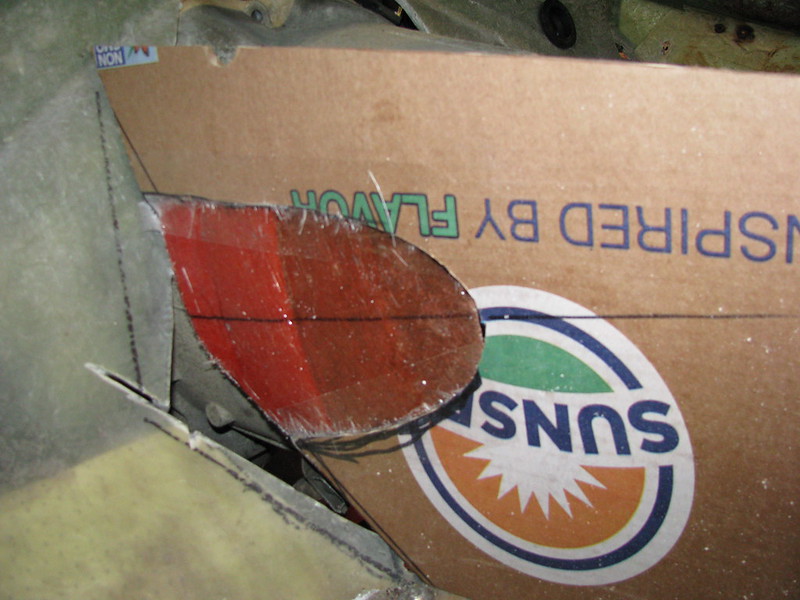 Gearbox tunnel mods by marlinpeter, on Flickr
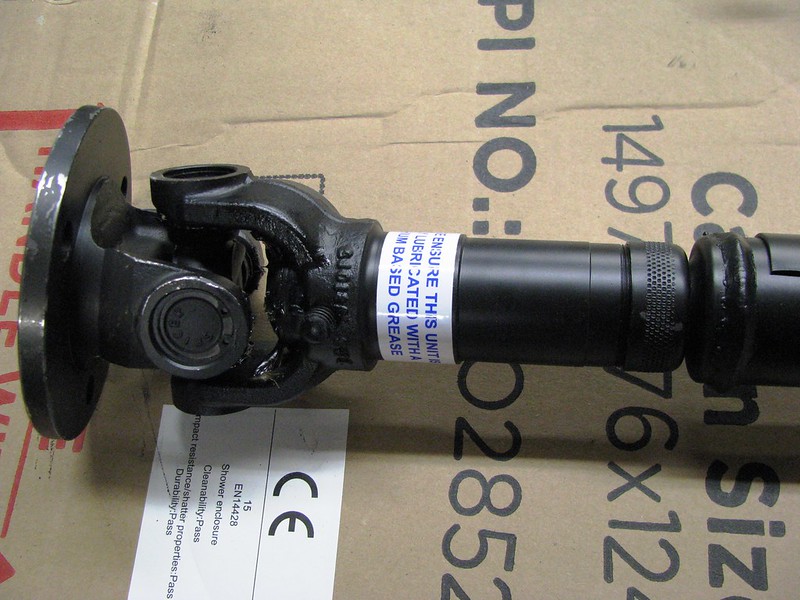 Propshaft by marlinpeter, on Flickr
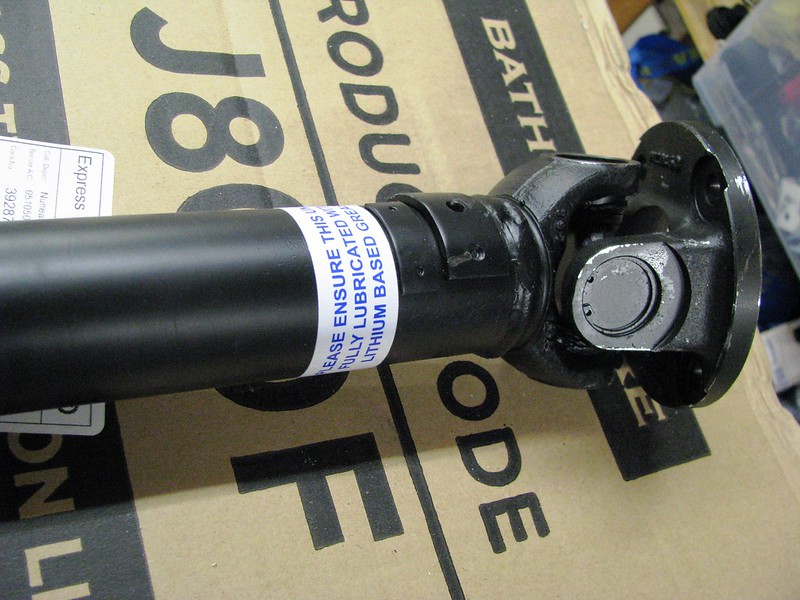 Propshaft by marlinpeter, on Flickr
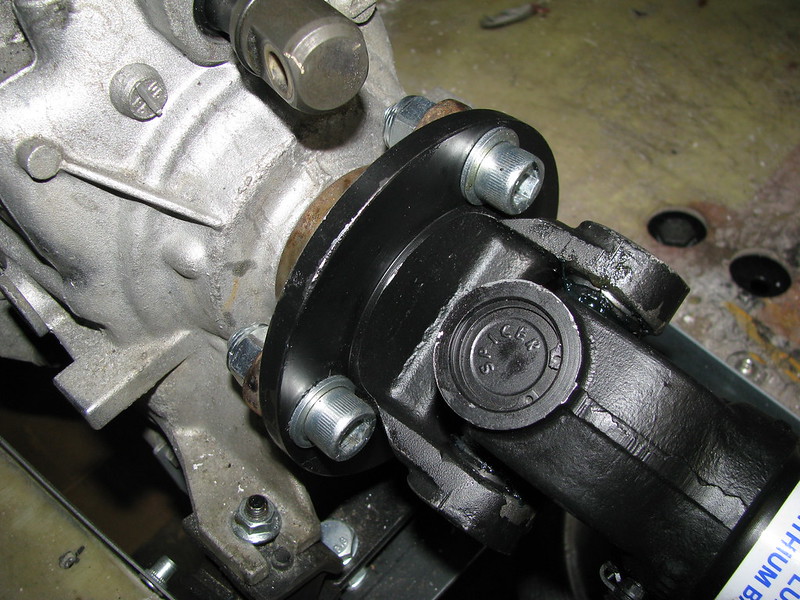 Propshaft bolts by marlinpeter, on Flickr
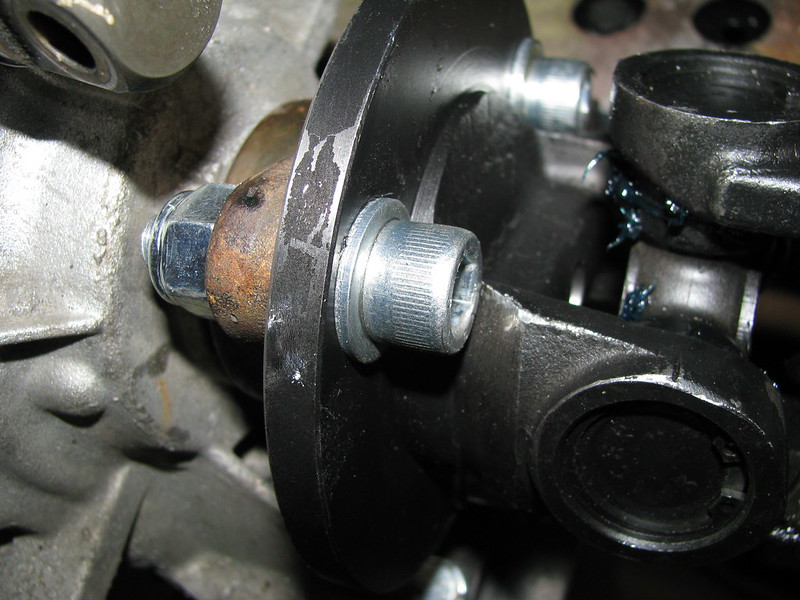 Propshaft bolts by marlinpeter, on Flickr
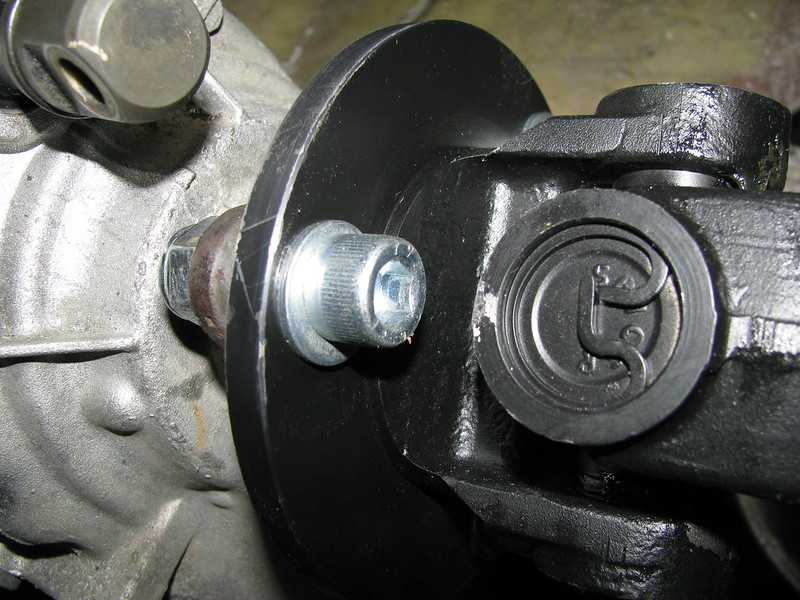 Propshaft bolts by marlinpeter, on Flickr
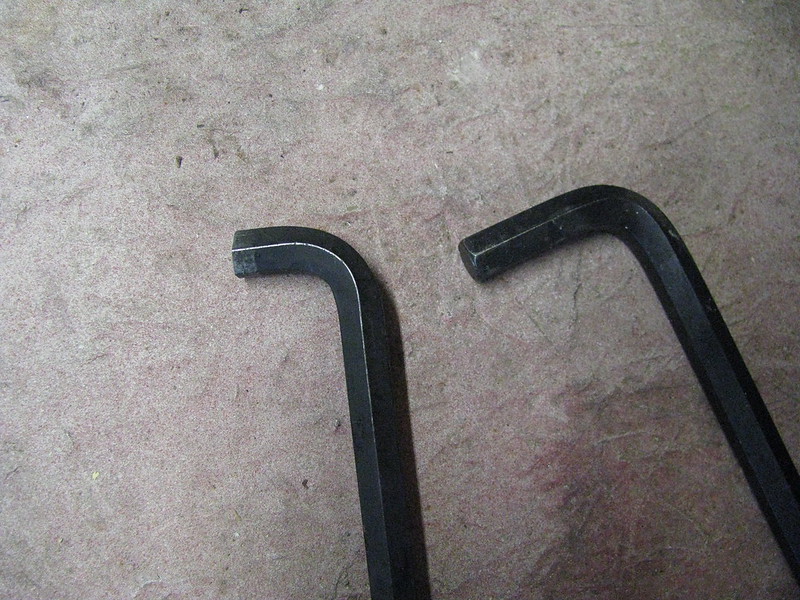 Propshaft bolts by marlinpeter, on Flickr
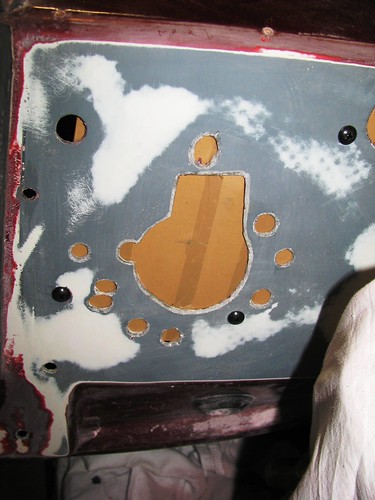 Brake M/C mounting area repair by marlinpeter, on Flickr
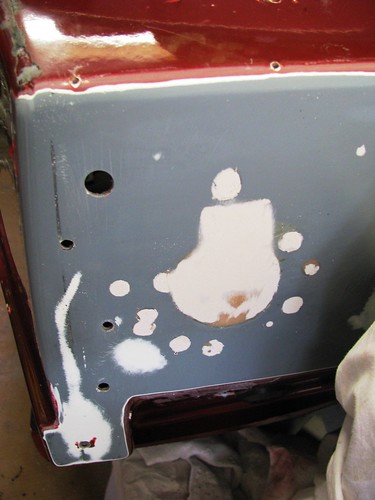 Brake M/C mounting area repair by marlinpeter, on Flickr
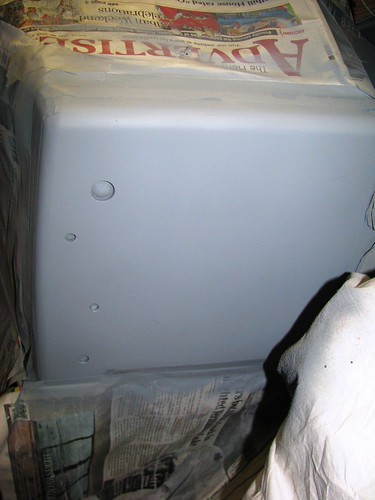 Brake M/C mounting area repair by marlinpeter, on Flickr
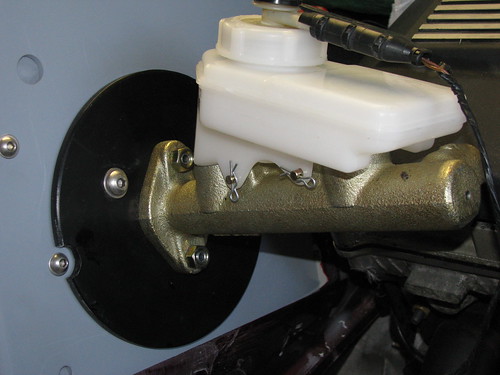 Brake Master Cylinder mounting by marlinpeter, on Flickr
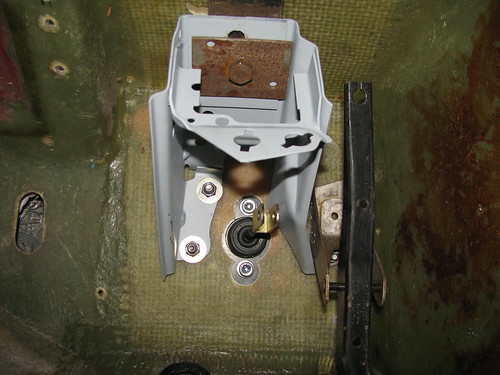 Pedal box mounting by marlinpeter, on Flickr
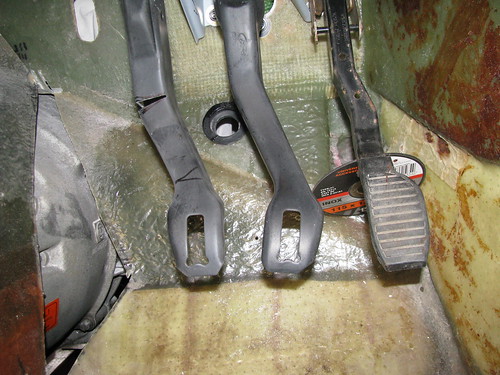 Pedal Spacing by marlinpeter, on Flickr
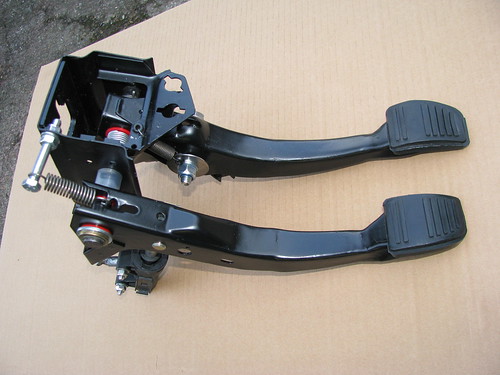 Pedal Box by marlinpeter, on Flickr
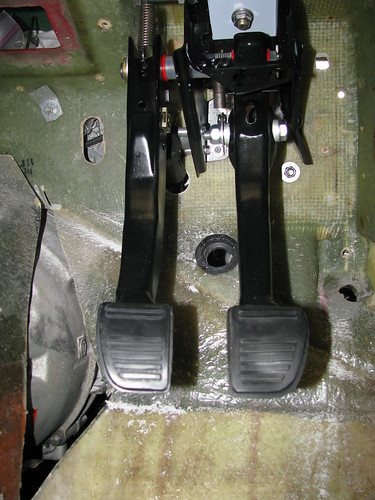 Pedal Box by marlinpeter, on Flickr
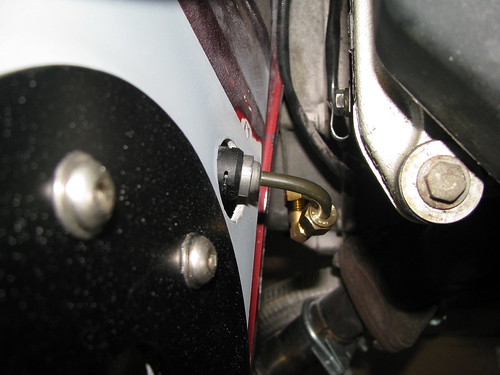 Clutch M/C by marlinpeter, on Flickr
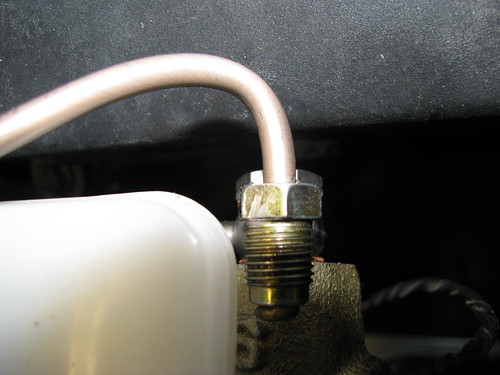 Brake M/C to Servo lines by marlinpeter, on Flickr
 Brake M/C to Servo lines by marlinpeter, on Flickr
 Brake M/C to Servo lines by marlinpeter, on Flickr
 Brake M/C to Servo lines by marlinpeter, on Flickr