MadaboutKitcars

This is a read-only archive of the old Madabout Kitcars forum. New posts and replies are no longer possible, but every thread is still here to browse and read.

New Cordite Build, with a twist....

29 Sep 2013, 7:25am
Mister Towed wrote:
Yes, I have to say that body shell looks to be top quality. I like the integrated dash panel - should make the shell stiffer and less like an angry blancmange while you're trying to fit it.

Keep up the good work, not sure if I've seen a finished Cordite yet...


Towed

Yes the dash is a great idea all that rigidity and I assume you and cut and shape it into what ever takes your fancy.

Yep the finish on the Ribble and Miglia kits are something to enveny

Look forward to seeing picture of your run out today
29 Sep 2013, 1:29pm
Thanks chaps, yes the lowering of the dash and the cockpit sides was something that Andy and I discussed during the making of the buck, if you pick it up one person each side its almost impossible to put any twist in it so I think that's mission accomplished.
I will be finishing of my custom frame next week buy putting in the front and rear door shuts and adding reinforcement and belt mountings, Once that's done the frame will be painted and permanently mounted and the body glassed on, only then will I be cutting the door apertures so that everything remains rigid.
5 Oct 2013, 4:47pm
Another good day and a few decisions made.

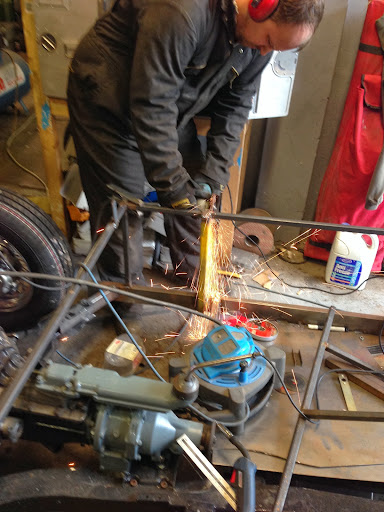
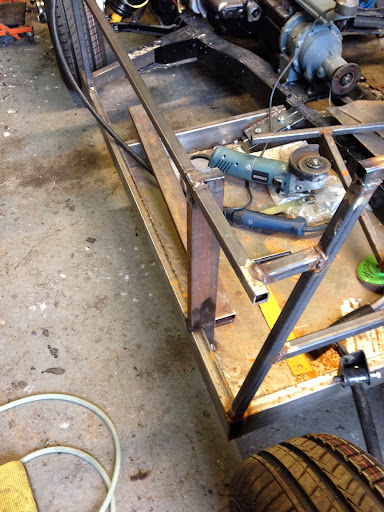
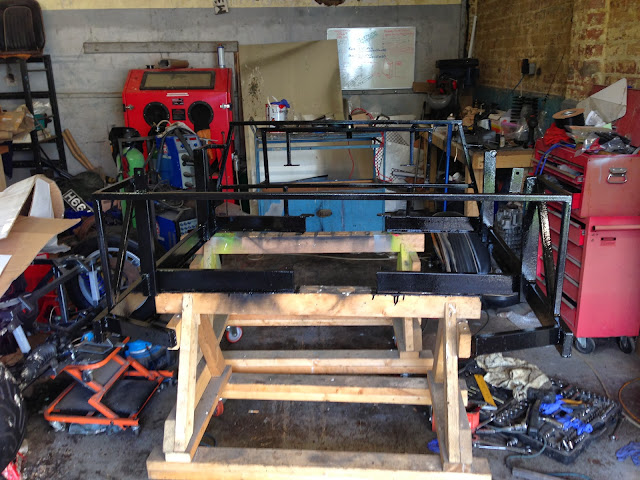
More work welding up the basic frame reusing some of the original but also adding a few bits. Rear door jambs are now in:


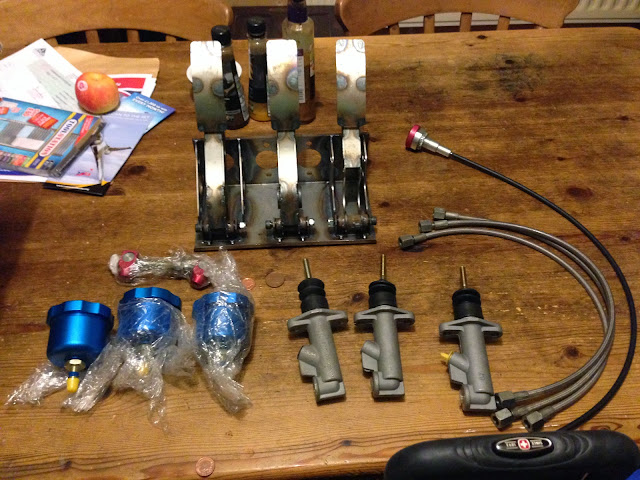
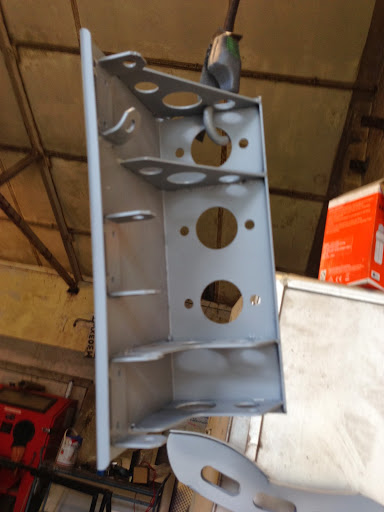
Have also decided that i cant really work out any tidy and safe way to mount the plate that the standard pedals attach to that I'm happy with so have ordered one of these:


Have also decided that i will be fitting a chequer plate ali floor, to this end 3 sides of the floor perimeter will have some 19mm angle welded in and 3mm chequer dropped in and bolted to the angle.

Also made a mod to the body as i wasn't happy with the rear drivers side quarter as it showed a lot more of the tyre than the other side, at least after working on the buck fibreglass holds no fears so slit the body and reaffixed the quarter in a much better position, dropped it outside the unit next to mine where very handily the ribble shells are made so hopefully my friendly fibreglasser will have the rear glassed up for next weekend.

Next weekend i should get the front door jams in and will add some additional triangulation then it will be onto fully welding it ready for painting and fitting.

Also received a pair of second hand front uprights so have stripped and blasted / painted a replacement for the front offside which as you may or may not remember wouldn't run true so hopefully next weekend will see that fitted and the final wire wheel in place.

As i am going for a floor mounted pedal box now i have a full set of pedals that have been stripped blasted, painted and bearing, bushes and bolts replaced where necessary, they also come with a pair of new uprated master cylinders, new dust boots and the brake pedal has a new brake switch fitted, anyone want to make me an offer?

Till next weekend


Mac
6 Oct 2013, 7:48am
Mac - Looks like your build is gaining some momentum. :cool:

Looking forward to seeing how the frame, doors, floor & pedals all work.

Particularly the pedals, as if I ever get the rear frame in place, the bulkhead is my next project.

Good luck, Paul. :)
6 Oct 2013, 8:39am
Fitting the floor mounted pedals will mean some modification of the lower half of the drivers side front bulkhead Paul, The pedal box needs a vertical face to bolt to and mount the master cylinders but i plan to overcome this by fabricating an ali box then recessing it into the bulkhead. Doing away with the underslung pedals will also give me a cleaner look to the bulkhead which i don't mind either.
6 Oct 2013, 3:41pm
I'd be interested to see how the floor mounted pedals work out...I was thinking exactly the same for mine. I'm nowhere near that part of the build but I was wondering how it might fit around the front outrigger?

Are you having a dual master cylinder setup?
6 Oct 2013, 4:02pm
Adam, i have actually decided to put the rear floor down low but am going to floor the front half on top of the frame which will mean i effectively have a flat floor to mount it to, the difference in hight will also suit floor mounted rather than underslung.
12 Oct 2013, 7:16pm
Well a good day today the basic frame is pretty much done with door mods.
Measured and cut the front shut supports:
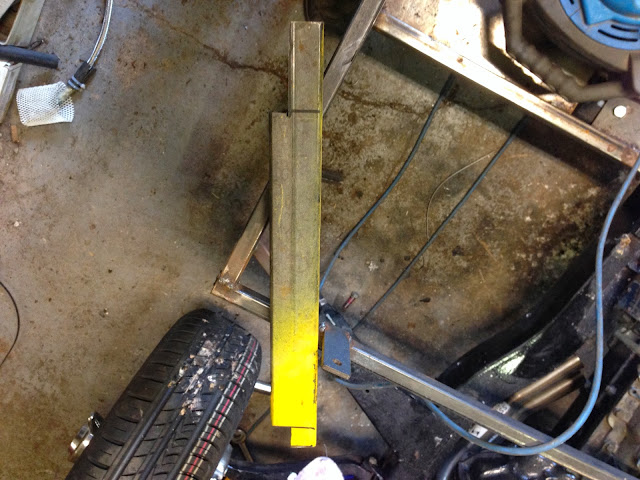

When I cut this one I forgot to leave the tongue at the back to tap over to close! Doh!
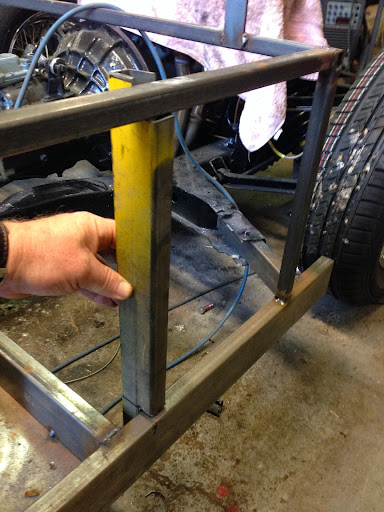


Checked for square and welded in the front offside one:
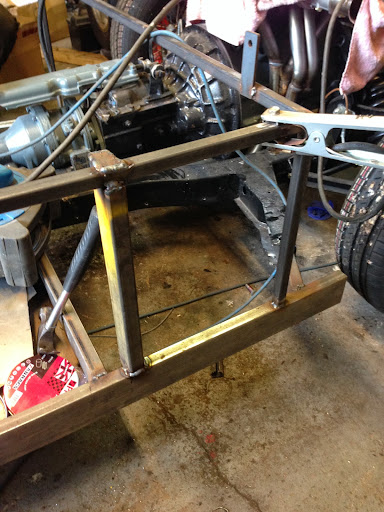


Then started adding some triangulation to replace the rigidity once the door section is removed, Rear Offside:
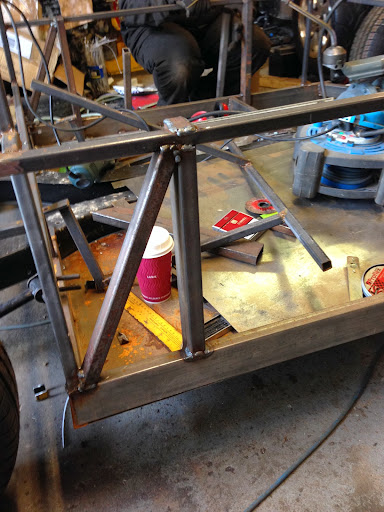


Then the rear nearside:


Then the front nearside, cut and checked for fit:
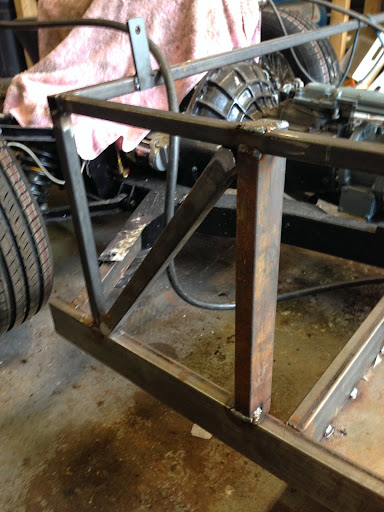

Then tacked in place:


Nearside all braced and ready for the big moment:


Removed the top rail and there was not tension in any direction as it was cut through, very very happy:


Dave did the honours with the nearside:


We then removed the frame for final welding as its so much easier to finish off welding when you can get at the joints comfortably, and yes it was at this stage we realised that in our excitement we had forgotten the offside front triangulation, hey ho!


Also got round to assembling the front offside replacement upright, you may remember that the original ran about 10mm out of true1 thank god when it all when back together this time its all good so the final wire wheel could go on.

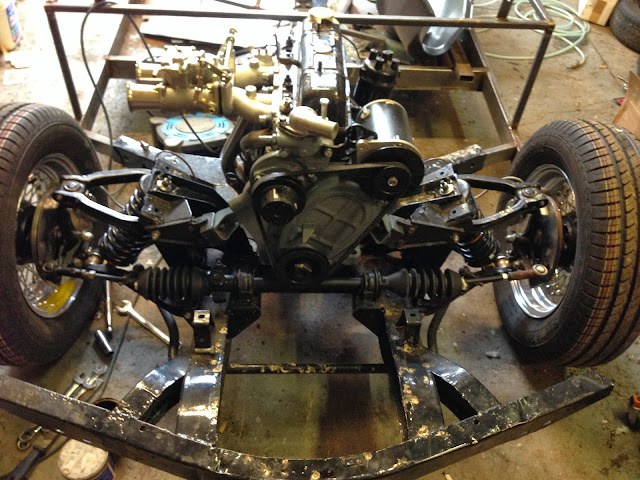


Cant remember if ive posted about the high torque starter before, this engine has had its compression raised considerably and experience on track has taught me that a lot of high compression engines don't like starting when hot of the standard starter, I only plan to build this car once, unlike most of my other vehicles so have gone with a Brise high torque rather than take any risks.
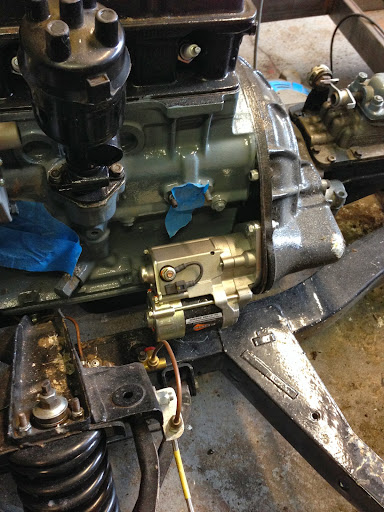


And an engine shot just because I felt like it....:-)
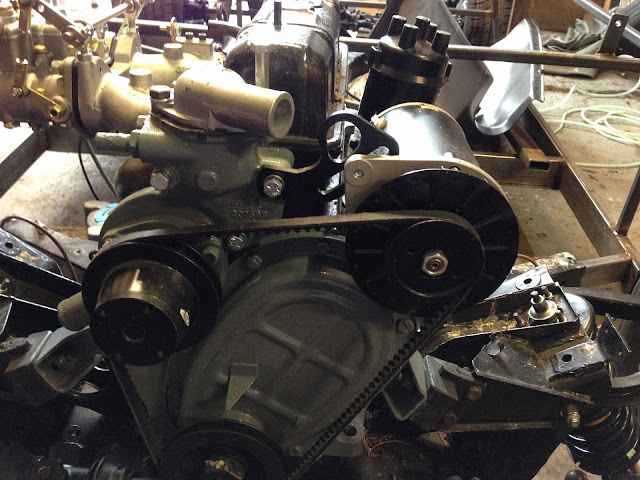

Sean next door has glassed up my modification to the rear offside quarter so a bit of P40 next weekend shall see that done. This week he is going to lay 2 more layers of CSM into the side of the shell where the doors are going as I'm hoping that if thick enough and cut carefully enough I may be able to use them as door skins, I have a cunning plan involving foam and fibreglass.......

Had an apologetic call today from the company supplying my pedal box explain that painting issues have delayed it, have agreed to take it unpainted and by way of compensation they will supply the reservoirs in billet Ali and also supply some master cylinder to reservoir hoses in stainless braided. Suites me as it means I can do any mods I need on the pedal box and then either paint it myself or send it out to get powder coated in a nice shade of blue grey :-)

Good news is that my diary has freed up a bit and next week I will be in the workshop Saturday, Monday and Tuesday so am hoping to make some good progress.

Oh and lastly I have now decided on what Ali I'm going to use for the floors, and its not 5 bar tread plate, its this:


Just have to find someone who stocks it now....

Till next time
Take care
Mac
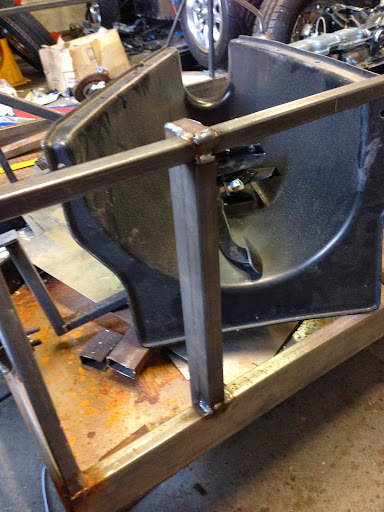
13 Oct 2013, 8:20am
lookin the dogs dangleys buddy.
13 Oct 2013, 8:23am
Nice work Mac. :cool:

It is interesting to see the differences between the new style frame and the old one.


Especially the absence of the "angle iron" section in the middle of the old frame that sits on the Spitfire chassis...
( Note: This is the rear section, the bulkhead frame would have "joined" the driver & passenger sides together at the front. )


So does this mean I would be able to remove a small section of this angle iron?
I am just thinking about the the very end of the frame which does not sit on the chassis...


My original plan was going to involve hitting it with a bit hammer until it was a better fit.

Cheers, Paul. :)
13 Oct 2013, 8:34am
To be honest i dont know what the factory frame will end up like mine, was a pre production mule and not much of its left. I was considering adding some angle but have decided instead to make a custom seperate angle pieces that will be bolted to the side of the chassis to support the floor on the insides, i wasnt happy with adding extra thickness on top of the chassis as per the Sammio version as i think it may make getting the tunnel to sit flat a real pain.

The frame still has some other bits to sort such as the steering column mount and i think the bottom of the door gap will end up with another piece of oblong box section on top of the bottom rail but turned 90 degrees to add more rigidity as i dont want a problem with the door gap flexing especially as i intend to suicide the doors.
13 Oct 2013, 8:40am
Paul, how much effort does it take to move the misaligned piece? If its not too much i would ratchet strap it down and bolt it up, not sure how much it actually adds to the rigidity but the other option would be to just trim it back.
14 Oct 2013, 4:15pm
Mac - Rather than hijack your build thread, I've moved this debate back on to my build thread.

Cheers, Paul. :)
17 Oct 2013, 6:53pm
Finally made a decision today on heating, the pretence of building this is that it is actually a gift for Mrs V to attempt to compensate for the amount of time i spend on my other wheeled projects...notice the word pretence!
But that in mind it will need some heating, don't know about the rest of you but my experience with those possessing two X chromosomes is that they should come supplied with a vivarium and a hot rock....

So have just ordered one of these, i think its the big brother to the one Mr T fitted to his Navigator.
http://www.t7design.co.uk/index.php?main_page=product_info&cPath=65&products_id=192

And a picture for those who cant be arsed to follow the link:


I have also ordered a set of these to build into the seats:
http://www.ebay.co.uk/itm/261078399036?ssPageName=STRK:MEWAX:IT&_trksid=p3984.m1423.l2649

And again a piccy:


If she dares complain about being cold after this lot then it will be time for a viking burial.....
18 Oct 2013, 6:51pm
Got home tonight and my pedal box has arrived, I accepted some upgrades rather than wait for it to be powder coated, the reservoirs are very nice and begging for some engraving on the lids!


Sadly enough I actually think the slightly industrial ends on the hoses will look very period correct rather than the usual Aeroquip look

Up the workshop tomorrow so another update tomorrow night
19 Oct 2013, 4:11pm
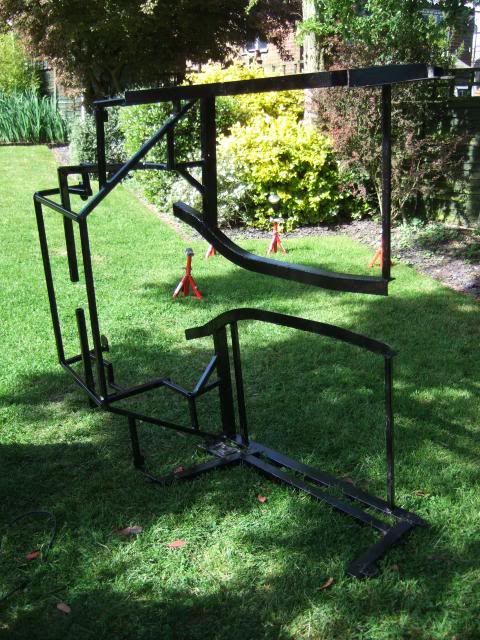
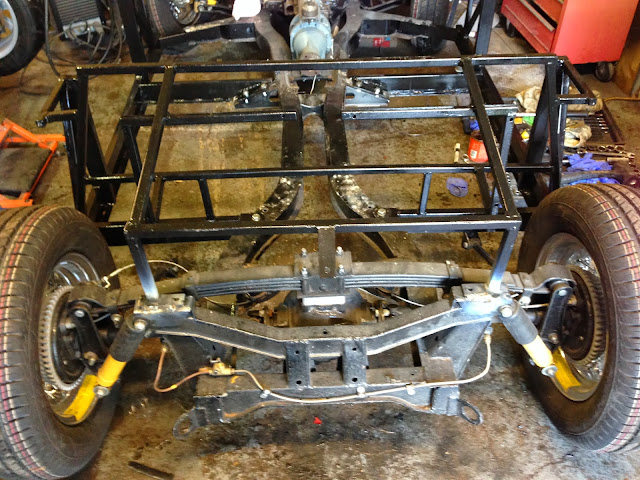
Frame is now fully welded and the lip for the floor support is in place, pic below shows the floor edge support in place, had to use some flat bar in the end as my stock of angle was more reduced than I thought.


All tube ends have been capped so hopefully the frame will not rust too much from the inside.


Managed to get 2 coats of paint on it which will hopefully be dried by Monday so I can flip it over and give the underneath a couple of coats.


Also managed to start painting the pedal box, have decided that I will paint rather than powder coat but stick to my plan of keeping them blue grey.


Hopefully Monday or Tuesday will end with the frame permanently fitted and maybe even the floors in and pedal box fitted. fingers Crossed
19 Oct 2013, 4:41pm
Mac - Looks like lots of good progress being made. :cool:

I forgot to mention last time that your suicide doors will be interesting to see too.

Good luck, Paul. :)
22 Oct 2013, 3:43pm
So the frame is finally on!!!
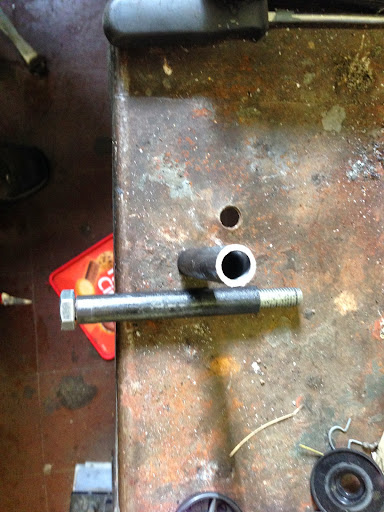
I had to re-drill the 2 rear mounting holes as my chassis had been used by Ribble as a chassis mule and they had drilled 2 mounting holes, unfortunately they turned out to be in the wrong place! The purchase of a brand new drill bit paid dividends as drilling steel and galv can be a bit tiresome.
Borrowed next doors lathe, mine is still waiting for me to get round to dropping the motor off for a rewind, and turned up some spacers out of bar stock as I didn't have any tube the right size.


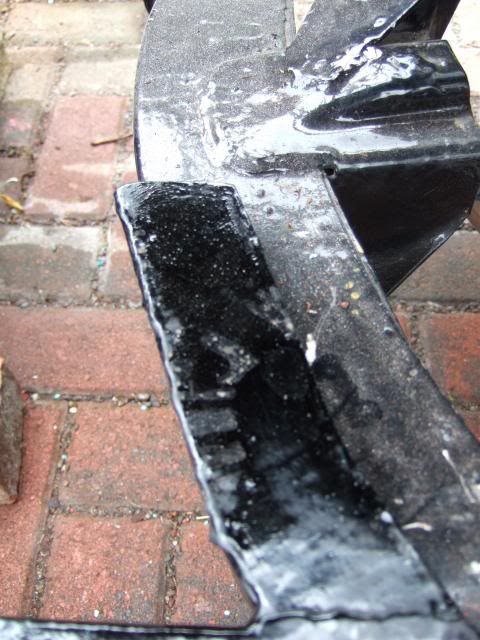
The hole in the top of the chassis has been opened out using a Christmas tree bit so that the tube drops in, the tube has been trimmed to sit fractionally below the top of the chassis to allow a little bit of pull down.


One disadvantage of having the chassis galvanised is that the 2 plates the rear is supposed to bolt into have been locked in place by the zinc, no amount of hammering will move them and they are way off centre so in the end was left with no option but to weld the rear mounts to the chassis.


End result though is that the frame is now permanently mounted to the chassis, just in time for me to disappear for the next 10 days as I have a contract that includes the next 2 weekends...rats!


also got to paint the stripped down pedal box but forgot to take pics.
22 Oct 2013, 5:13pm
Hella Mac,

It look pretty good. I reckon The benefits of a galvanished chassis lay in the future!:icon_eek:
Michiel
23 Oct 2013, 4:32pm
Mac - Thanks for the photo of the chassis spacer/crush tube fitted.

Can I just check if you left it like it is in the photo, or did you weld it in place?

Cheers, Paul. :)
23 Oct 2013, 7:57pm
Left it as is, being about a millimetre below the chassis level meant it all nipped up tight and the underneath of the plate came down flush with the top of the chassis
HTH
Mac
5 Nov 2013, 11:08am
Finally got some time back in the workshop but wont be much progress for the next day or so as we have decided to reorganise a bit as the workshop is a tip and its getting both Dave and myself down, we also have to make room for our new scissor lift and my new 542 tool box, anyone interested in a Snap on roll cab and top box?
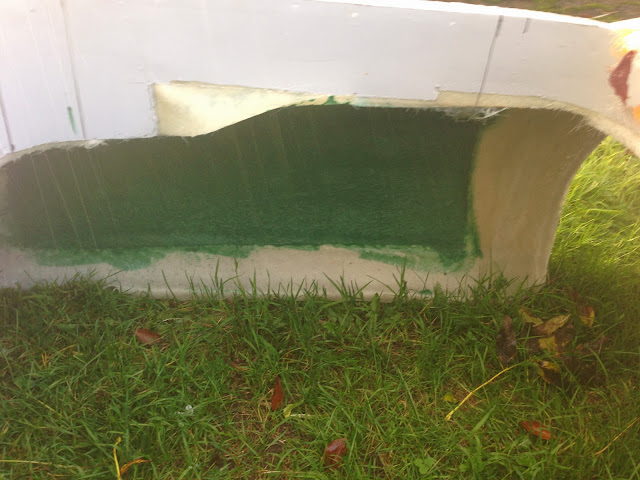
Whilst I have been working though Sean next door has beefed up the sides of the inside of my body with another 3 layers of fibreglass. The plan is to cut the door apertures and use the cut out parts as the door skins and I was worried that unless reinforced they may not retain their shape.

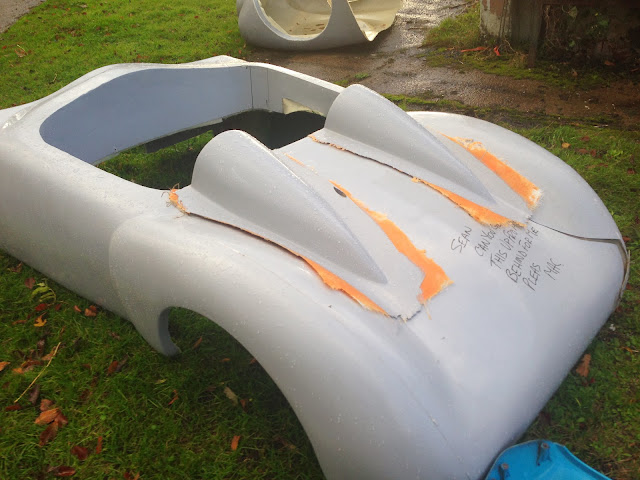
Sean has also now finished the moulds for the humps and I have the first 2 out of the mould.


Very pleased with the fit, will get them trimmed up this week so will post more pics.
On the way home tonight I will be dropping off the Ribble supplied floors to have them used as templates for new floors in 3mm Ali which should be done by the end of the week.

Well I cant put it off any longer need to start tidying the workshop.

TTFN
Mac
5 Nov 2013, 2:18pm
What a fantastic looking body you have !!!!!! No pain no gain. lol.
5 Nov 2013, 2:24pm
The wife says the same thing...........
5 Nov 2013, 2:37pm
That bulkhead to body join does look seamless. Keep up the good work and good luck with the doors. :juggle: