MadaboutKitcars

This is a read-only archive of the old Madabout Kitcars forum. New posts and replies are no longer possible, but every thread is still here to browse and read.

Another Cordite Is Born ...

25 Jan 2013, 12:20pm
I am sure Mike will point you in the right direction with the doors. As a quick fix Andy bonded his in. However I think it's worth spending some time on, to get them right, especially if you set your heart on doors in the original plan of things. You seem to be overcoming a lot of hurdles in far from ideal working conditions so I have every confidence you will find a solution.
26 Jan 2013, 1:37pm
Weather Watch:
Well it arrears to have rained quite heavily over night...


[Thinking Positively] Well, at least it got rid of the last of the snow. [/Glass Half Full]

:rolleyes:

Jokes aside, I managed to grab a few minutes outside this morning...

Front Indicator Mountings - Part 2:
I had my first attempt at shaping the back of the foam to "blend in" with the contours of the bonnet.
This involved removing a bit at a time, offering it up & repeating until I had a half decent fit.
I've taped things in place for now, as I can't fit the rubber seal until I've drilled a hole in the bonnet.


But this wasn't quite right, as although it looked OK from the front, it was not vertical.


So I had another go with my other mount (originally intended for the passenger side).
I got a bit closer to the shape I had in mind, but it still wasn't quite what I wanted.
( Red circle marked around edge of vertical surface just to highlight the angles. )


The good news is that this looks like a good way to build the indicator mounts.
Although, as I look at the photos, I think I might lower the position a little bit.

So as I have got plenty of foam to play with I will have another go.
But this time, I'll shape the back to match the bonnet first, then sort out the front.

I've got more things to update today, but that will do for now.

Cheers, Paul. :)

Replies:
Froggyman - Cheers & thanks for the vote of confidence.
I would like the doors to work if possible and will be updating more on that later today. :pray:
26 Jan 2013, 10:29pm
Mind The Gap - Part 2:
Before my quick check the other night, I was convinced this was going to be an easy fix using my jigsaw.
But the cold light of day confirms a fundamental problem that I need to take more time to resolve correctly.
This "three way" join in the frame protrudes beyond the body line of the dash & really needs to be moved.
( Photo taken underneath the dash, looking up. )
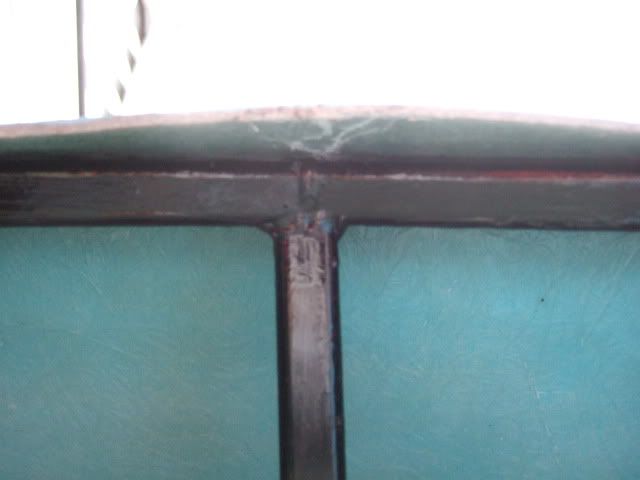


So I will add cutting & re-welding this section to provide a better fit to my list of frame mods required. *
Until then, I will not start taking any chunks out of the dashboard body work.

* It looks like my welding lesson will now take place in early February, which is fine by me.

However, not all of the bodywork was safe from my jigsaw as I returned to the perennial thorn in my side…

Doors - Again!:
It is clear that I really need to decide whether I am going to keep working doors, & if so, how will they work?
( As potential changes to the existing door cut outs may give me a better overall fit of the body shell. )

AndyP57 has effectively abandoned this design on both his own build & future Ribble kits.
Given that he'd already told me he had spent a long time trying to get the doors to fit, I was losing faith a bit.
But the photo of Barry May's build (see earlier post) actually gives me a small glimmer of hope.

Door Opening Lip:
I think one of the reasons that I was convinced the "lip" around the door cut was important was this...
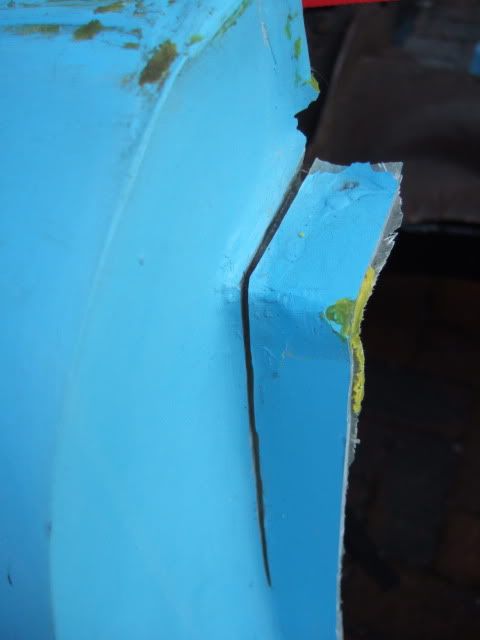


This is how my body shell arrived & to me, it looked like the start of a cut in the wrong place that was stopped.
So part of me kept thinking it should remain for some reason, but now I know it needs to go.

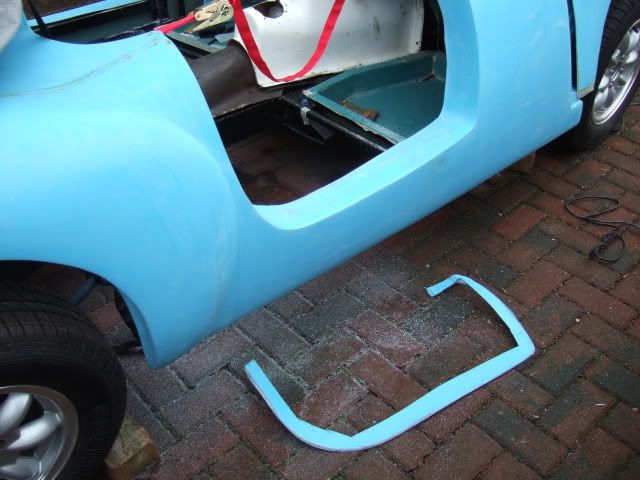
Therefore I took a deep breath and removed the passenger side's lip completely with my jigsaw.

Before:
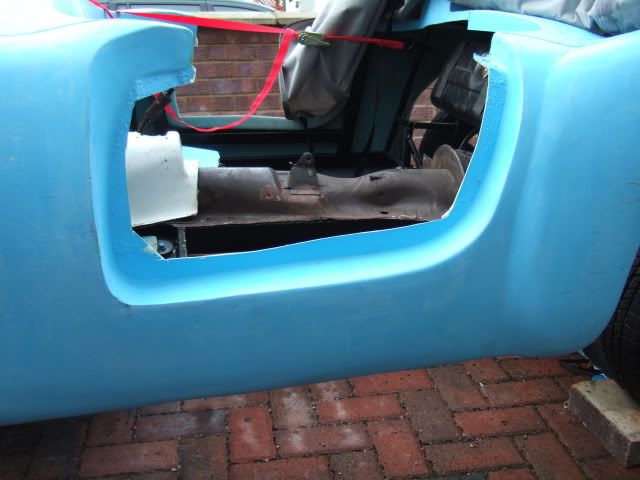


As I started to cut I found it hard to see where the lip & body joined, so out came my marker pen.


This made it much easier to see what I was doing.

After:


Doors:
I finally removed the yellow releasing wax that has been on the doors since they were delivered.
I figured it would be easier to see how well the doors were fitting without yellow blotches everywhere.

Before:


After:


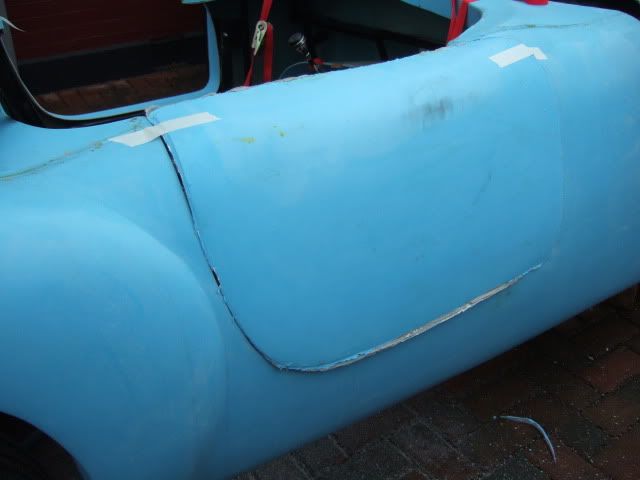
Whilst this looks a lot better from a distance, both doors are actually in pretty poor condition.
They are splitting apart all over the place and there is "daylight" in some of the gaps (spot my orange glove).
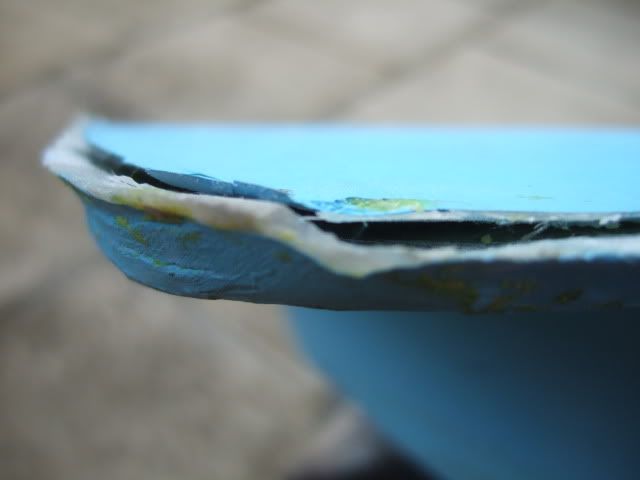
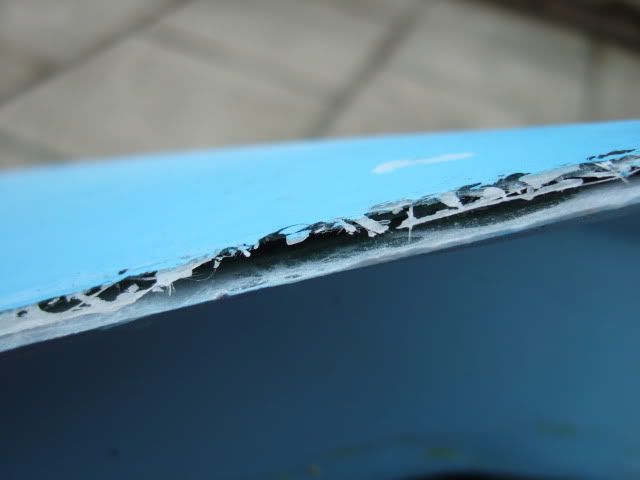
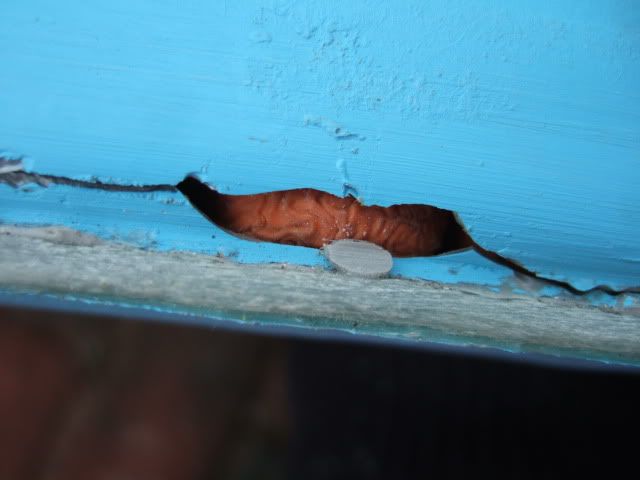


Plus some missing gel coat (I have similar "bald" patches on the body shell too).
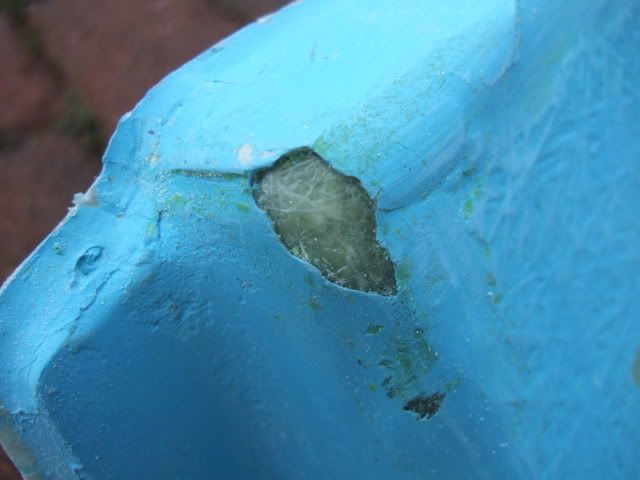


There was a time where finding this kind of thing would knock me back a bit.
But these days I just want to find out what needs to be done, add it to the list & keep going forward.

Door Fitting - Take 2:
I'd already done some basic "mock up" work with the doors, but removing the "lip" made things clearer.

This was the passenger side:


What I cant understand is why the inner door's leading edge bears no resemblance to the door cut out's profile?
External hinges allow the door to swing out without any danger of catching anything along the way.
And the forward edges in the Barry May photo posted previously clearly join up nicely.

The other thing visible in the other Barry photo was a "strip" added to the body opening.
There is plenty of room on the inside edge to do something similar on this car too.
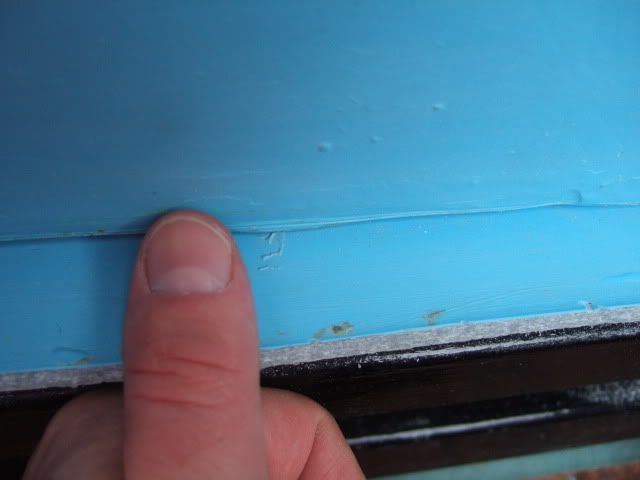


This was the view of the outside of the passenger door:
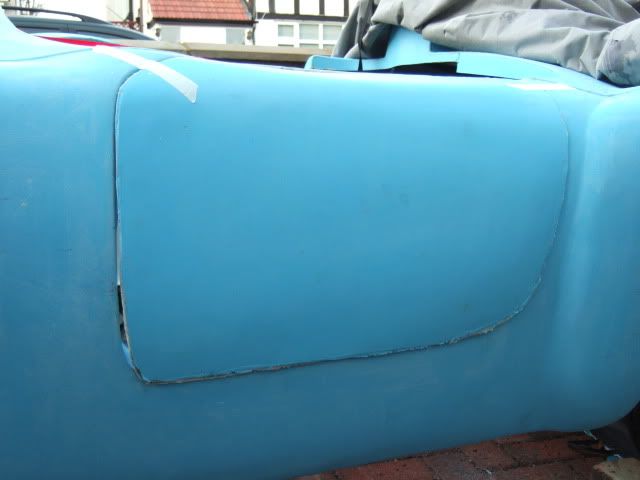


The good news is the outer door skin is generally bigger than the opening, so can be trimmed to fit.
The only down side is the condition of the edges themselves (see above), but they can be fixed.

Top Tip:
One thing I always remember from reading another forum was to fit the passenger side door first.
So when you fit the driver's side, you will have learnt from the experience & hopefully do a better job.
Given that the driver's door gets used more, & by you, that is the more important one to get right.

Driver's Side:
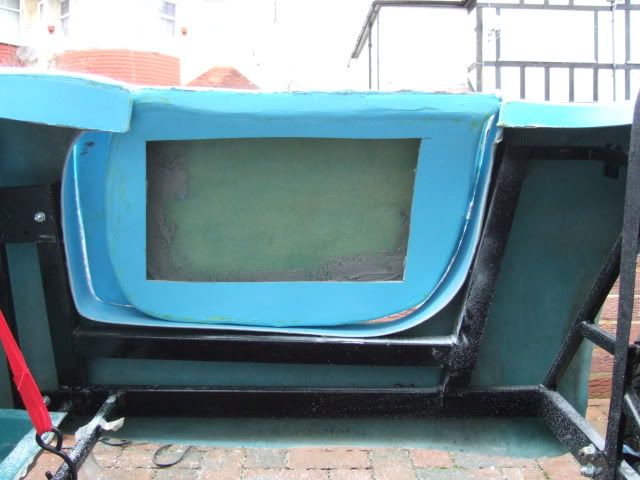
As I was happy with the stage I'd reached on the passenger side, so repeated it on the driver's side.


Mirror Images:
I know that you can't see both sides of the car at the same time. :icon_wink:
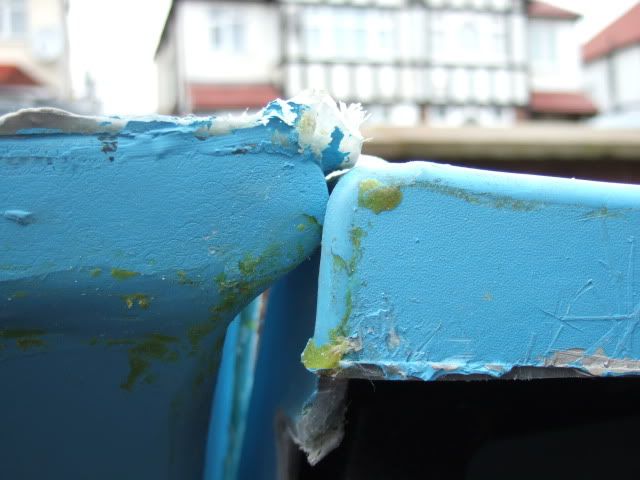
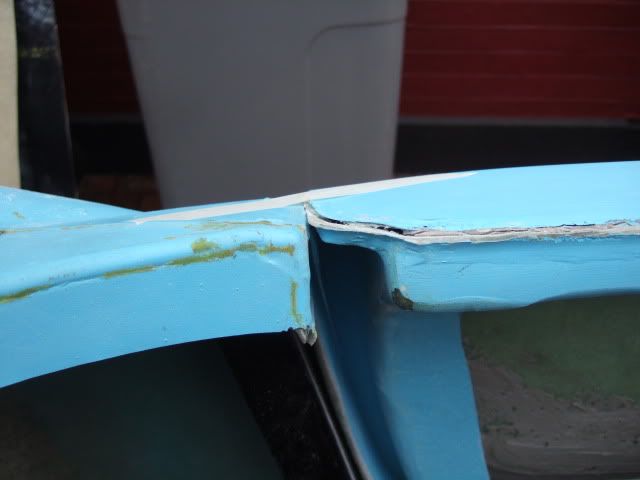
But you can see the insides of both doors, so why don't the trailing edges have the same set up?

Driver's Side - Rear of door on the left, bodywork on the right, not a great join, but a start:


Passenger Side - Not even close:


I have got more build news from today & more thoughts about what to do about the above.
But it has been a long day and I am going to call it a night now.
( Plus my first attempt to post this exceeded the 20 image limit. )

More tomorrow, cheers, Paul.
26 Jan 2013, 10:40pm
Keep going, Paul. I can feel your frustrations but it will be worth it in the end. I like your "There was a time where finding this kind of thing would knock me back a bit." A project like this certainly builds resilience.
26 Jan 2013, 10:50pm
I would do whatever it takes to keep the doors (more in a bit).
If you have doors you can still get in with a soft or hard top fitted. Whilst you may not be planning this at this stage, I found after a wet summer I was tired of leaving the car at home if rain was forecast for the evening run home. A modified midget hood would probably fit.....

With the doors you have, keep the outer skins and junk the rest. Make new frames by adding an inch spacer all round to the body aperture, face them up with Formica, then you have the basis for a plug (or buck) from which you can form a mould. Make mould, then make new inners that actually fit.
Alternatively, make new inner frames from ply and glass over.
At least if you do this you will have frames that can come up against the lip with a door seal, which umm....you have just cut off...:sad:
27 Jan 2013, 8:58am
Hi Paul, PM in your inbox
27 Jan 2013, 9:08am
Seanick's tip about junking the inners is a good one.

I have similar door issues on the G46 which although I may (or may not) be selling, I keep thinking about. The fit on mine isn't so bad but could be a lot better.

My doors are good enough to make fit but if I redid the inners I could get the door much better and get door bins like I want. I could also glass in reinforcement points for the slams and catches in exactly the right place at the right angles.

Nothing like being unable to walk to give you time to think
27 Jan 2013, 10:34am
My sole reason for going doorless was that they're notoriously difficult to install, even in high cost kits, never mind a budget special where you do everything yourself.

Have you considered having just a driver's door? If you look at the original Lancia D24 it only has the one door on the off-side which looks race car cool imho. Phil J's probably going that way with his third build so you'd be in excellent company.

It'd give you the access you want while only giving you half the installation headaches. 99% of the time you'll be the sole occupant anyway and it's easier to climb into the passenger side as there's no steering wheel in the way.

As for weather equipment, I'm going with a zip centre tonnaeu cover, a gore-tex suit, goggles and just drive faster when it rains so the flyscreen swooshes the rain over your head into the slipstream. Oh, and a bucket and sponge in the passenger footwell :(

Best of luck and I know you'll get there in the end. :)
27 Jan 2013, 10:51am
Had a similar door issue on a mates car some years ago, can't remember the make now but they weren't around for long as the bodywork was awful. We ended up glueing foam all around the outside edge of the door shell then sanding it till it fitted nicely, we then just glassed over it finished with some tissue for a decent surface finish, obviously this relies on having a decent fibreglass backing to glue and glass to, no good if your filling thin air. As per the cordite the hinges were mounted on the door skin so before we glued the foam we bonded metal plates where the hinges were to go and made a cutout in the foam to still allow access to the back of the plates for doing up nuts, hope that makes sense?
27 Jan 2013, 11:19am
Whilst tidying the kitchen....I had a better idea for making door inner frameworks.
Use the door aperture on the car as the mould, gel and lay up your grp and make a new inner. Pop these out. When done you will need to shorten the length by say 2" and the height by say 1" for clearance of hinges and catch. Morris Minor hinges are an easy internal fit.
To reduce the frame simply cut into quarters on the straight sections, feather the edges of the joins (12:1 ratio) and glass over internally. Hang this frame without the skin, and when all good fit the skin, holding in place with small blobs of filler. Carefully glass skin to frame when this has set.

The wet weather gear and drive fast bit is fine until you come up behind a slow moving car, then you just sit in a puddle. The seats take weeks to dry, and the dashboard electrics corrode. I felt like a prate at traffic lights too! Totally different to motorbiking. I have the t-shirt!
Back to the housework......
27 Jan 2013, 11:45am
Viatron wrote:
I have one of these from my racing days, very good at keeping the rain out, also retry good at keeping the sweat in though....

http://www.ebay.co.uk/itm/OMP-Kart-Racing-Wet-Weather-Rain-Suit-Overalls-Transparent-Large-L-/121056034865?pt=UK_Car_Parts_Vehicles_Automobila_ET&hash=item1c2f808031


Ah yes, the plastic onesie. Probably not the most breathable garment available.

And Seanick I take your point about the impracticalities of driving an open car in the wet. I feel a mount for a golf umbrella that automatically deploys at under 50mph could be on the cards...
27 Jan 2013, 11:57am
Umbrella...mmmmmm, never thought of that!
27 Jan 2013, 12:17pm
Or alternatively emigrate to the south of France!
27 Jan 2013, 1:07pm
You're coming on good Paul. I'd say what you've encountered is just a chance to personalise, rather than a problem!

As far as wet weather is concerned, I drove through rain and a sleet storm in my old Spyder and I found a sponge or microfible cloth tucked behind the seats is invaluable for bailing out. And having a pair of flying goggles to hand just in case is also a good idea as hail stones REALLY hurt! But then again, it was a laugh! :)
27 Jan 2013, 1:26pm
Even in the south of France they use the umbrella solution


Yes, a golf umbrella is the best idea they could come up with for the Bugatti
27 Jan 2013, 2:59pm
First of all, thanks for the feedback gentlemen, anything not covered below, I'll pick up in another post.
( As I have too many domestic chores to sort out today. :icon_sad: )

This is what remained of my thoughts on doors and other news from yesterday...

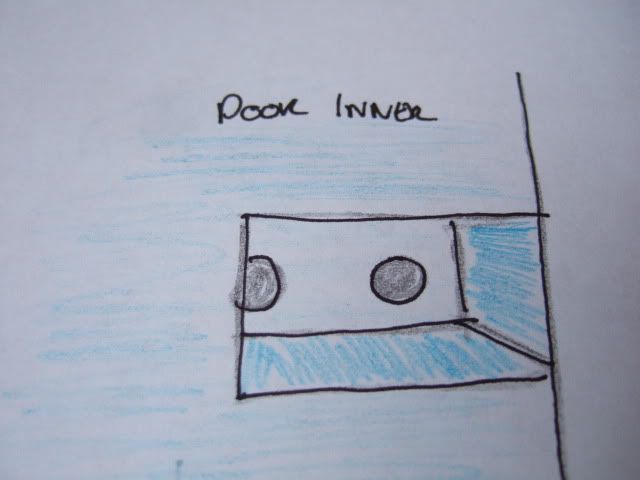
Door Hinges:
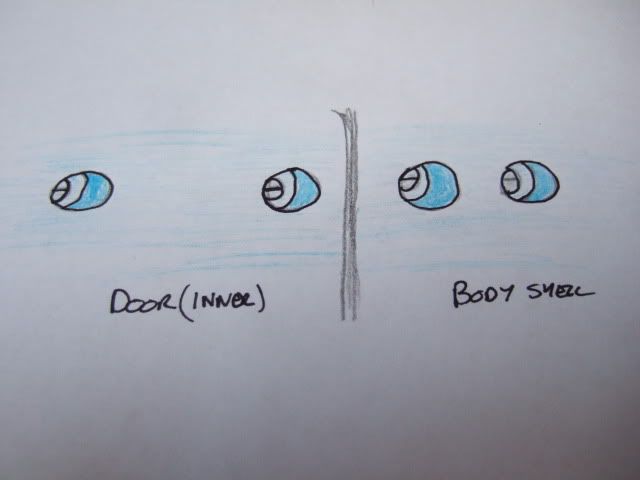
Mike's advice was to provide access to the hinges so they could be tightened up periodically if required.
Initially, I intended to cut out sections of the inner door to expose the hinges bolted through the door.
( Please remember that these sketches are from the impressionist era, not tech drawings. :icon_wink: )


This was fine for the doors, but the bolts through the bodywork had the issue of the frame to deal with.


So I figured I would need quite a big access panel to get a spanner behind this framework.

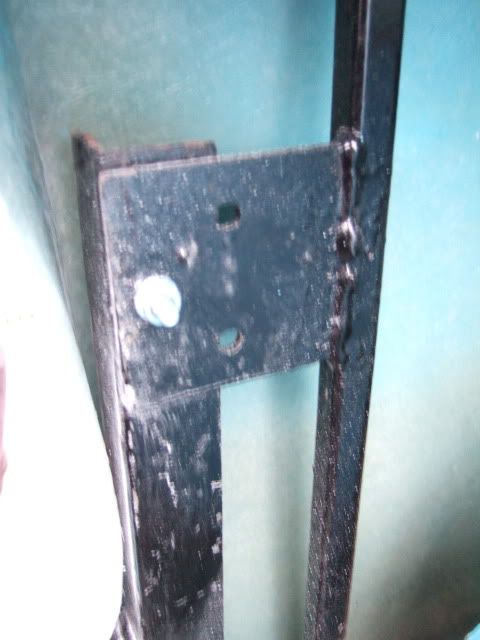
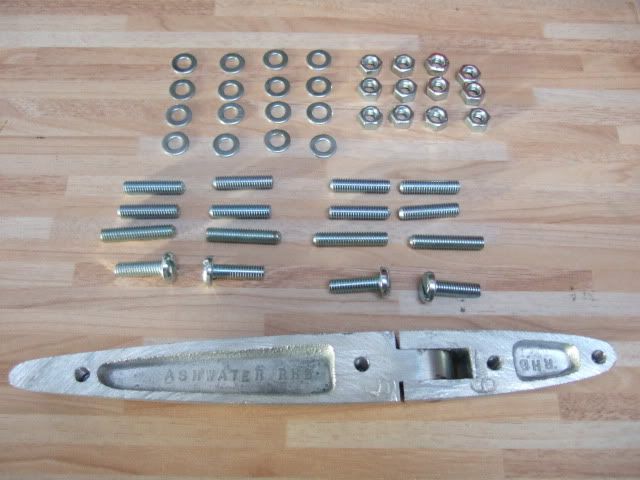
However, I removed all the fixings for the hinges yesterday and noticed a few differences.
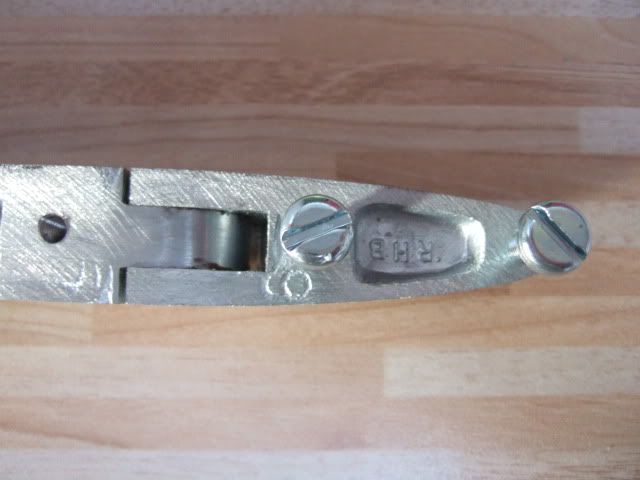
Not sure how they fit to a Mini, but there are 3 x 10mm nuts & 1 x slotted head bolt per hinge.
( I was planning to replace the original nuts with Nyloc ones. )


So the question is whether I could use 4 x slotted head bolts (with thread lock) per hinge?


This would mean I would only need simple access "tubes" through both the body & doors.
I would simply need to drill holes straight through the frame if any part of it is in the way.


If these bolts are not suitable, then I would need slightly bigger tubes to accommodate a 10mm bolt tool.
I would look for a very thin T-Bar type tool as I only have a large socket set at the moment.

Door Cut Out & Door Profile:
There are two issues at play here, the first is connected to the doors (obviously).
But the second, is wanting to more the body forward to fix the rear cockpit's "hump" pressure point.

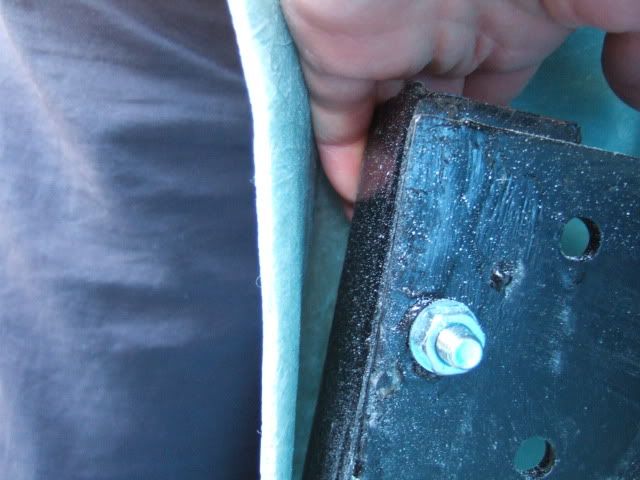
The bad news is the door cut out hits the frame, but the good news is the space "behind" the frame.
I couldn't get a decent photo, so here is my hand in between the back of the frame & side of the body.


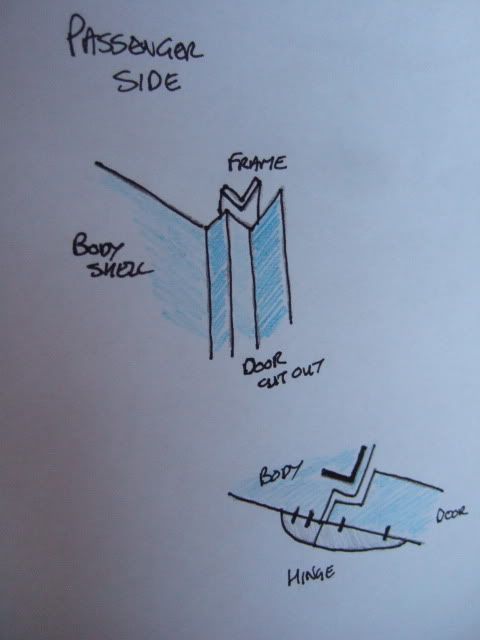
This means that I could retain the original line in the body shell that turns into the opening.
But then cut out the rest & build a new step in the opening to go around the frame.
This should allow the body shell to move forward & provide a better door closing "lip".

Hopefully these basic drawings might make more sense that the words above...


Clearly there is a lot to do to create matching "ying & yang" profiles between the door & opening.
I will need to think about the trailing edge of the door some more to take account of the latch required.

Cutting Fibreglass:
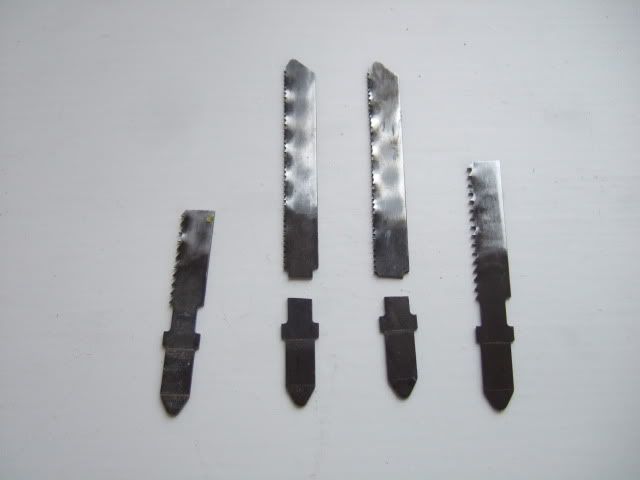
It looks like I need to either improve my jigsaw technique or get some heavy duty blades.
Removing the two door opening "lips" yesterday broke 4 blades designed to cut metal.


Spitfire Rear Section:
I am now on a quest to follow DonnySoutherner's solution for the back of my car.
This also raises the possibility of a small "cubby hole" for storage linked to my rear cockpit access panel.


Spitfire Graveyard:
They supplied the above section & I sent them some photos before I rang.
I figured the phone conversation would be easier if I knew we were both talking about the same thing.
Unfortunately, they had just been forced to clear their yard and didn't have anything I could use. :icon_sad:

SpitBitz:
I've not used this company before, but gave them a try after missing out at the Spitfire Graveyard.
Again, I sent a photo ahead before giving them a ring and this worked out well as they can supply a section.
However, I need to visit them to check the condition & agree the final cutting points.
So that will be a job for next Saturday morning. :cool:

Sorry for the flying visit, I'll be back either late tonight, or tomorrow evening, Paul. :)
27 Jan 2013, 4:57pm
Previous Replies:
Oxford - That which doesn't break you, makes you stronger. Well, at least I really hope so. :pray:
SeaNick - Thanks for all the ideas & suggestions, there is certainly a lot to think about.
Although as I follow your build next door, I think your fabrication skills are in a different league to mine.
Andy - Cheers.
WCA & Viatron - I intend to add some metal strengthening to the fibre glass where the hinges bolt through.
Mr T - Initially the Cordite was going to be offered with doors as an option & I'd have gone without.
But final production was a door only deal, although your idea of a driver only door has some merit.
Dave - "Personalising it" is certainly one way to describe it!

General
Unfortunately, this will be a permanently open topped car, with all the problems that will bring. :icon_sad:
I'm struggling with the doors, so there is no way I am going to be able to make a roof work!

As Mister Towed often says, this is building a car, not assembling a kit.
Although I wouldn't say no to some instructions and a few "Attach Part A to Part B" type jobs. :icon_wink:

Right, I'm off back to my chores, Paul. :)
30 Jan 2013, 8:55pm
Doors:
I'm still working my way through the various options suggested for sorting out my doors.
I'll try to knock up a few more sketches over the weekend, as a cunning plan is slowly forming.

In the meantime…

Cordite Specific Wiring Diagrams:
My new lighting arrangements (front & rear) will result in new wires being joined to the existing wiring loom.
So I always intended to produce an update to my wiring diagram to show which wire was connected to what.
After my first attempt at showing the lighting changes, I've decided to produce a number of wiring diagrams.
One for just the lighting, one for running the engine & one for everything else left over after the first two.

Initially, I wanted to show the wiring as it would be laid out in the car (bonnet, bulk head, dash board, etc.).
However, that proved to be a lot harder to do in practise, so I stuck with a similar style to a Haynes Manual.
I'd already modified the original wiring diagram to allow me to thin out the wiring loom last year…


And this is what my first draft of the new lighting wiring diagram looks like…


I used PowerPoint at work & have just been chipping away at it, a bit at a time, during my lunch hours.
You may notice I am slightly better at using computers than I am at building cars! :rolleyes:

I now need to cross-check this against the original wiring diagram to make sure I haven't missed anything.
I've still got to agree the wires needed for the side repeaters, as they came without any wires attached.
I'm recycling wires taken from the original loom, so the final colour will depend on the length of wire needed. :icon_wink:

Welding Lesson:
With a bit of luck, and a fair wind, my first welding lesson will now be on Monday, 4th February. :eusa_dance:
I am taking the day off work which makes things easier for my mate and I’m really looking forward to it.

Until next time, take care, Paul. :)
30 Jan 2013, 9:22pm
I like your computer generated diagrams. That sort of thing would drive me over the edge, although I would love to be able to do it!
Re your welding lesson, if its outside and you are MIG or Tig welding then prey for no wind at all. For a sammio frame an Arc welder is perfect. 2.5mm rods at about 75 amps and you can weld come wind or rain, though it may get a bit tickly in the rain!:dizzy:
Have fun and watch the flow......
31 Jan 2013, 8:22am
Agree with Seanick about the arc welder - I bought my stick welder for less than £60 from Amazon, and it came with gauntlets and a face shield (albeit a fixed tint one that I quickly replaced with an arc activated type).

It worked a treat repairing my chassis and modifying my frame, it took a little getting used to but within an hour or so I was getting strong, deep welds. It was a bit trickier welding the thin stuff - there's a fine line between insufficient power so no arc and too much so you just blow holes in the job - but I was able to weld in my new floorpans after a bit of practice.

Try one of these for welding on the cheap -

http://www.amazon.co.uk/Silverline-677293-100-45-100-Welder/dp/B000WTPXHE/ref=sr_1_1?ie=UTF8&qid=1359620314&sr=8-1

http://www.amazon.co.uk/Silverline-466888-160-Amp-Welder/dp/B000WTNYXY/ref=sr_1_2?ie=UTF8&qid=1359620314&sr=8-2

Good luck, welding's not as hard as the experts make out so have fun. :)
31 Jan 2013, 8:52am
Whilst I agree that stick is Breyer for outdoors as it doesn't rely on a gas shield as mug and tig does I personally would recommend mig even if it means building a shelter sound you to stop the gas blowing away. Stick is fine for fairly heavy stuff but the right Mig will do that too and will really come into its own when you want to weld together things like small brackets. If you do gong then I can thoroughly recommend Rtech welding in Gloucester, I got both my mig and tig from them and there customer service is second to none and there machines are quality not just rebadged Chinese stuff rebranded.
Hth
Mac