This is a read-only archive of the old Madabout Kitcars forum. New posts and replies are no longer possible, but every thread is still here to browse and read.
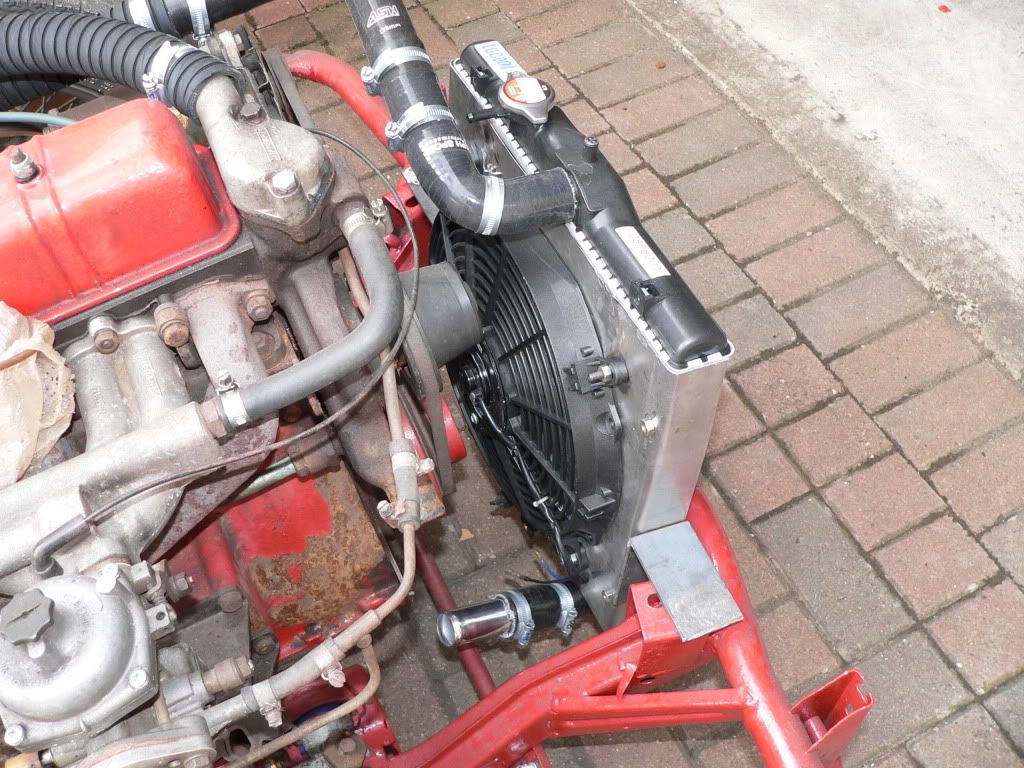
Spent the last couple of days making a fan shroud and mounting brackets for my Honda radiator and sorting out the plumbing -
I took a lot longer than expected as I didn't have a big enough bit of sheet metal to make it in one piece so had to fabricate it in sections and weld them together. It's currently hanging in my garage after a good soaking in black Hammerite.
It'll be a while before I get the engine running again so I still don't know if the very thin and lightweight Civic radiator will be up to the job of cooling the straight six. The backup plan if it isn't is to go for an aftermarket competition Civic radiator that's about twice as thick and will still fit my shroud.
One minor adjustment you may want to make though is to alter the angle of the top radiator hose so that it doesn't go 'up' before it turns back (if you can understand what i mean?)
The only reason i mention that is that was one of the bits that caused me grief when fitting my bonnet to my 6 cylinder as it was rubbing on the bonnet. Amongst other bits
One minor adjustment you may want to make though is to alter the angle of the top radiator hose so that it doesn't go 'up' before it turns back (if you can understand what i mean?)
The only reason i mention that is that was one of the bits that caused me grief when fitting my bonnet to my 6 cylinder as it was rubbing on the bonnet. Amongst other bits
Hmm, will have to see if there's any fouling on the inside of the bonnet when I get to that bit. Does the bonnet drop that dramatically once it's over the valve cover? I can always re-route the pipes if there is.
Oh, and thanks for the compliment about it looking like an original fitment - I am rather pleased with it!
Just spent an hour fitting up the radiator and rearranging the coolant hoses in line with the advice from Dave Cymru.
There's just one more in-line hose connector needed to finish the job now and, as you can see, the radiator top hose now exits down for bonnet clearance.
Although not the most scientific test ever done I've trial fitted the bonnet and the new radiator and plumbing all clear the underside of the bonnet with a few inches to spare.
Starting to look like a Sammio now which is very exciting!
Is the long black hose instead of a header tank..? Looks good
Psycho pops
Thanks for everybody's positive comments, I'm pretty pleased with the way it's coming together - slowly but surely.
Psycho, yes, although I bought an old Land Rover header tank I decided that it would end up with unnecessarily complex plumbing to install it.
After cribbing ideas from Patoune's French Herald based racer I decided to try just plumbing in an in-line filler which will be linked to the standard Vitesse overflow bottle once I've relocated it. I've got a 7psi cap on the filler while the Honda radiator cap at 0.9 bar is about double so it should effectively remain sealed.
I've run the convoluted hose right back to the bulkhead for several reasons: it means I can put the rotary thermostat control inside the cockpit for adjustment on the fly; it will give extra coolant capacity which is always a good thing on an old engine; and I'm going to add a flip up flap above it in the bonnet to allow for level checks and top ups without lifting the whole front end. If you look at pics of the original D24's they often have a flap in the bonnet near to where mine will be for topping up something or other.
I hope it will all come together as a working solution to the cooling issue but only time will tell and I can always have a rethink if something isn't right.
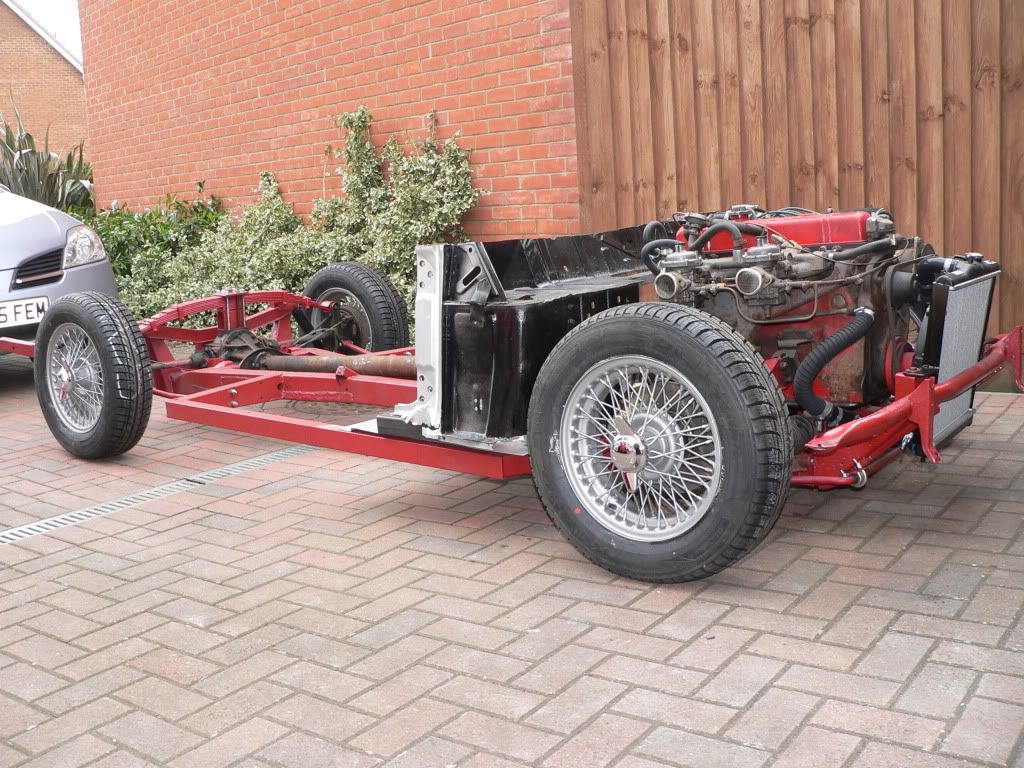
New tyres fitted to my MGB wires this morning. Three out of the four wheels I had them fitted to look shiny and new inside while the last one has a little rust on the ends of the spokes but nothing too serious and I'm really pleased with the way the 175/70/14's look on the chassis.
I've been holding off fitting up the floorpans to the bulkhead in case I had any clearance issues: the good news is that the tyres easily clear the chassis on full lock both ways -
Slightly less good news is that they did foul the bulkhead wall. My fault I'm afraid - I've lowered the front springs so much, 90mm, that the widest part of the tyre is now level with the crease along the mid line of the bulkhead and this is where it's fouling.
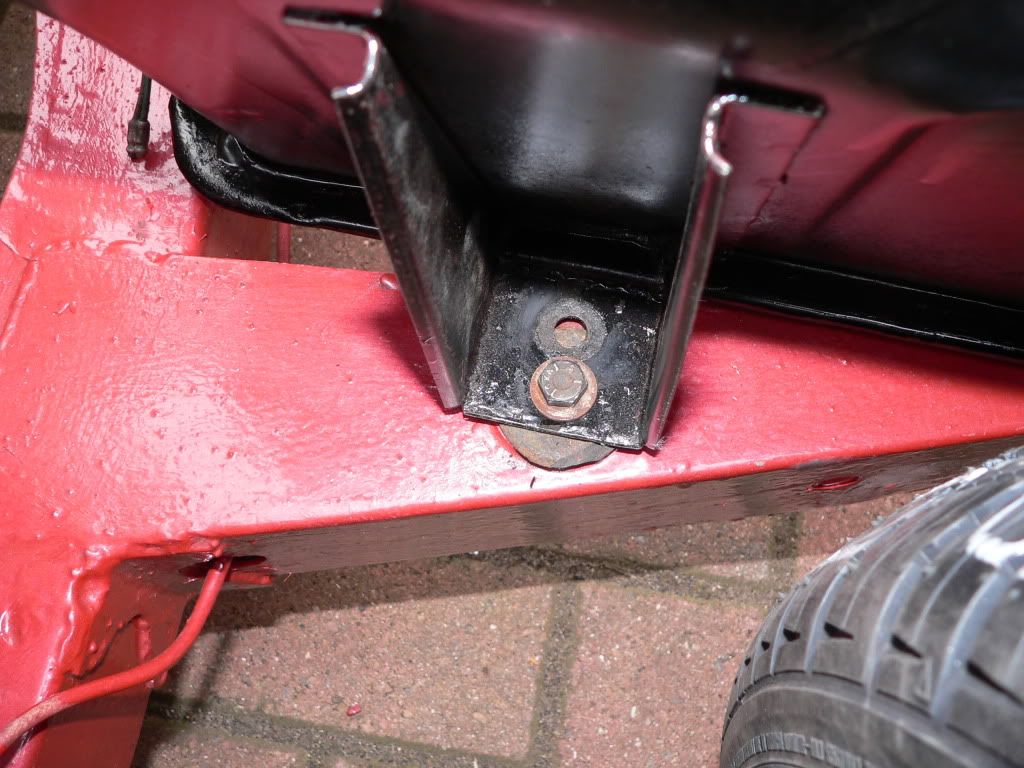
So, I've bitten the bullet and re-drilled the mounting holes, moving them forward 20mm. This will mean I'll need to shave a little off the floorpans and may need to fettle the holes for the frame to bolt to the door hangers but I'm hoping there won't be too much of a knock on effect elsewhere...
Off to work now, hopefully more progress tomorrow.
Very smart Mr T. The wheels/tyre combo go very well and will look ace on the finished car.
I will be tinkering with the bulkhead and wheels this weekend to see if I can get my 15"s to fit in some sensible fashion..... wish I had gone for 14"s now....
As you are also working with the mark 2 2ltr vitesse, I wondered if you had tackled any theory on how to route the rear handbrake cable as far as the compensator? As you know, the guides on the Vitesse which turn the cable through 90 degrees are on the tub and have obviously gone with the wind. It's apparently very critical to get the wires out of the way of the rotoflex drive shafts and still not tighten/loosen when the rear suspension flexes. I'm nowhere near this stage yet but already pondering... Any thoughts?
As you are also working with the mark 2 2ltr vitesse, I wondered if you had tackled any theory on how to route the rear handbrake cable as far as the compensator? As you know, the guides on the Vitesse which turn the cable through 90 degrees are on the tub and have obviously gone with the wind. It's apparently very critical to get the wires out of the way of the rotoflex drive shafts and still not tighten/loosen when the rear suspension flexes. I'm nowhere near this stage yet but already pondering... Any thoughts?
Hi Andy, mine's a late mark one with swing axles I'm afraid.
I don't know if the handbrake routing is the same between mk1's and mk2's and I'm ditching the tunnel mounted handbrake in favour of an umbrella handle sticking out of the dash anyway. I'll be tackling the handbrake issue fairly soon and will post pictures as I go along for future reference.
Very smart Mr T. The wheels/tyre combo go very well and will look ace on the finished car.
I will be tinkering with the bulkhead and wheels this weekend to see if I can get my 15"s to fit in some sensible fashion..... wish I had gone for 14"s now....
Good luck with the 15's, I'm sure you'll find a way of getting them to fit. I'm going to do a bit more tinkering with my bulkhead today so I'll hopefully be able to report back some positive progress later.
I was fortunate enough to be able to drop in and take a look at Phil9's BRG car (No.2) which is awesome (thanks Phil). Having built what must be the first customer example Phil's a mine of useful information and I will be calling on his expertise as I progress my build.
Interestingly, he's just had some 175/80/14's fitted to his wires which look awesome as the sidewalls are significantly taller than the 70 profile tyres. If he can get those to fit then you should manage to get 165/80/15's on yours with a bit of fettling as there's very little difference in size between them.
As you are also working with the mark 2 2ltr vitesse, I wondered if you had tackled any theory on how to route the rear handbrake cable as far as the compensator? As you know, the guides on the Vitesse which turn the cable through 90 degrees are on the tub and have obviously gone with the wind. It's apparently very critical to get the wires out of the way of the rotoflex drive shafts and still not tighten/loosen when the rear suspension flexes. I'm nowhere near this stage yet but already pondering... Any thoughts?
The spartan I built a long time ago dispensed with the handbrake compensator altogether. To restore the same leverage on the cable you were told to redrill the handbrake lever to locate the cable attachment half way between the original hole and the lever pivot point. I used spartans own chassis which had the 90 degree cable guides attached. They weren't in the correct place. There wasn't any problem with the handbrake coming on when driving when going over bumps but once the car started to roll down the drive as we unloaded the shopping causing the suspension to rise and the cable to slacken. Probably best to do a scale drawing of the suspension components showing the extents of movement and find the best guide position by picking a point and measuring the cable length at different suspension positions. The position where the length stays the same is the right one!
Probably best to do a scale drawing of the suspension components showing the extents of movement and find the best guide position by picking a point and measuring the cable length at different suspension positions. The position where the length stays the same is the right one!
Hmm, scale drawings you say...
I'm more a kind of fit it and see guy I'm afraid. I'm quite good at picturing mechanical things in my head and thinking through the potential pitfalls in order to come up with a workable solution. I'm aiming to keep the compensator because it gives consistent pull on both sides but having looked at the angles I'm probably going to replace the 90 degree guides on the chassis with a couple of pulley wheels mounted four or five inches higher up so the cable is level with the pivots on the drums. I hope that makes sense.
I'm more a kind of fit it and see guy I'm afraid. I'm quite good at picturing mechanical things in my head and thinking through the potential pitfalls in order to come up with a workable solution. I'm aiming to keep the compensator because it gives consistent pull on both sides but having looked at the angles I'm probably going to replace the 90 degree guides on the chassis with a couple of pulley wheels mounted four or five inches higher up so the cable is level with the pivots on the drums. I hope that makes sense.
Just had a look at your chassis pics and see yours is swing axle not doughnut. This means that the wheel and back brake assembly rotate about the centre of the driveshaft universal joint. if you can get your pulley at point just in front of the UJ, the cable tension shouldn't change. The point of rotation on the doughnut cars is past the other side of the car which is probably why my spartan rolled away.
I got it wrong before as regards the compensator. The spartan retained the compensator but joined it directly to the handbrake lever at the repositioned hole.
I must apologise to you Mister Towed as my query has just about hijacked your thread. Backing out now and will bring up hand brakes in my own once I get close to the point in build.
I must apologise to you Mister Towed as my query has just about hijacked your thread. Backing out now and will bring up hand brakes in my own once I get close to the point in build.
No problem Andy, I'm not the type to jealously guard this thread for my own topics anyway.
Chances are if you're thinking through a build issue I'm either thinking about it too or have already found a solution so feel free to chip in your two new pennies worth any time you like.
Oh, and putting the 90 degree turns on the cable level with the inboard end of the driveshafts makes sense to me. Watch this space...
Spent today sorting out the bulkhead and new floorpans and welded up the crack that seems to affect most Heralds/Vitesses that was creeping towards the oblong hole where the original heater was and was threatening to turn my bulkhead into two parts.
Having moved the bulkhead mounting holes forwards 20mm to help with the tyre clearance issue I've welded the pans in 10mm further forward than standard then ground off the edge that was sticking out under the front of the bulkhead. This allows the bulkhead to be bolted in further back and the pans to still fit between the front and centre outriggers, in fact the backs of the pans now sit tight up against the inside edges of the centre outriggers.
Even after moving the bulkhead back 20mm I still got a tiny bit of tyre rub on the crease-line. It would't cause any problems on the road because the tyres were just touching but I have a feeling it would be an MOT failure point if left like that.
After thinking through all the clever, technical solutions to this problem I conceded defeat and bashed the bulkheads back in with a lump hammer.
After a few tentative taps I gave it a serious blow and, as if by magic, the convex crease-line popped into a concave one!
I haven't had a chance to see how much clearance this has freed up as I did that bit with the bulkhead off the chassis and then immediately gave it all another coat of Hammerite. I'll be spraying the underside of the floorpans with underseal tomorrow so it'll probably be Sunday before I can report back whether the tyres now fit without fouling.
More pics will follow once I've got something worth photographing.