|
|
| Seven Style builds Westfields, Caterham, Dax Rush, Luego, Robin Hood, Tiger, Locust, MK, RAW, Quantum, you name it, you're building it, share it here. |

7th November 2023, 16:22
|
|
Senior Member
|
|
Join Date: Nov 2012
Posts: 845
|
|
 Mounting excitement...
Once the sun was high enough, I wandered down to the warming cave and grabbed the necessary to fashion my first diagonal brace. Transferring the angles from my card template to the steel angle, I set to with the hacksaw and, after discovering that I'd made the RH brace, offered it up. The cut lower ends needed bevelling into the V - I used a coarse flap wheel in my angle grinder. The top angle needed to be closed a little, rather than opened as I'd imagined. A couple of lump hammer blows with the angle in the vice did the job  . So, onto its LH mirror image twin . Clamping the RH one to the angle made marking the cuts a doddle. . So, onto its LH mirror image twin . Clamping the RH one to the angle made marking the cuts a doddle.

Once cut and offered up, it needed similar attention from both flap wheel and lump hammer. Here's the RH one sitting in position. Excuse milky picture, the camera decided flash was necessary as the sun went behind a cloud

Now I need to cut the fillets and possibly some flat steel straps to bridge each side of what is probably the weakest part of my design. I can then clean all mating areas back to bare metal, drill out the remains of the pop rivets and deliver the skeleton for welding. I'll arrange this rather than just show up as the guys have real work to do, and could well be very busy.
Regards, Mick

|
10th November 2023, 15:47
|
|
Senior Member
|
|
Join Date: Nov 2012
Posts: 845
|
|

This morning, as the rain lashed down, I performed some internet research regarding towing both a trailer and a car, in anticipation of delivering the project for welding activity. I learned that a trailer needed mudguards, as does a 'broken down car' so, either way, the skeleton would need its back body replacing. I dug it out of the GRP heap behind my front hedge and hosed it down. Before offering it up I decided to check for any loose remaining gubbins on the back end, and cable tied the offending disconnected brake lines/cables I found securely to the axle. Whilst it was half way out of the cave and eminently accessible in this afternoon's sunshine, I dug out my smallest cold chisel and with it lump hammered off the remains of the many body attachment pop rivets, knocking the bits left through their holes into the frame with a punch. There must have been at least 50 and the job was strangely satisfying . I shall have the holes filled with weld.

At the moment I'm leaning towards towing it as a 'broken down car' with the back number plate in place and an ON TOW sign. I'll have its log book with me to prove its provenance should a zealous boy or girl in blue take an interest.
Regards, Mick
|
11th November 2023, 13:28
|
|
Senior Member
|
|
Join Date: Nov 2012
Posts: 845
|
|
 Butterfly brain, moi?
This morning I carried the rear body down to the cave and heaved it into position on the frame. I thought I'd make it look a bit more like a car by putting the back lights in. Digging them out of my shed and examining them revealed that they would need quite a bit of work in the location department, so I quickly abandoned the 'car' option and reverted to 'trailer'. Using a length of the ever handy paracord I tied the trailer board securely in the number plate recess of the body moulding, where it sat nicely. Threading the seven pin plug and its lead through to the frame's front, and admiring my handiwork, it dawned on me that reflective triangles would be needed  . .

I thought I could use tech screws into the newly cleared rivet holes to secure the moulding, but the holes were too big for the 5.5 mm items I had. A search revealed that 6.3mm ones were available, but in a minimum of 100, and as I would only need eight I decided to run a tap through the holes and screw it home that way pro-tem. I lashed out the almost four quid for the triangles and called it a day.
Regards, Mick
|
14th November 2023, 12:10
|
|
Senior Member
|
|
Join Date: Apr 2011
Posts: 282
|
|
Mick, I may be wrong but, if you are towing something you need the towing vehicle's reg on the trailer and the towed vehicle covered so that your untaxed " trailer" doesn't trigger the ANPR cameras and get you tickets for 2 vehicles.
It is coming on well.
|
14th November 2023, 15:58
|
|
Senior Member
|
|
Join Date: Nov 2012
Posts: 845
|
|
Hi Dpaz,
Thanks for that. My Jazz is kosher, so I don't think I'll be in any ANPR danger. I think the only circumstance in which I would fall foul of the persons in blue would be if I were pulled by a real jobsworth. When collecting my Mk1 Marlin Roadster on tow from Birmingham on a Sunday morning a good twenty years ago, we passed a jam sandwich plotted up on a roundabout. Despite its not having a windscreen, and being both open and unpainted, they scarcely gave it a glance. A pull would have been interesting, as my full harness belts were simply draped over my shoulders to give the illusion of safe Marlin piloting. Happy Days!
Regards, Mick
Last edited by Mick O'Malley; 2nd January 2024 at 05:51..
Reason: Typo.
|
17th November 2023, 11:16
|
|
Senior Member
|
|
Join Date: Nov 2012
Posts: 845
|
|
Tap tap tapping...
After what seemed an interminable fight with my camera, which would suddenly no longer communicate with my PC through its supplied cable, I uploaded my latest pictures using an SD card reader. Hooray!
Anyway, the day before yesterday, before my mentally exhausting camera battle (I'm no sort of techie, a telephone, to me, is made of Bakelite and sits on the hall stand) I wandered down to the cave, wheeled the partially clothed skeleton most of the way out of the cave and took off the rear body moulding. Offering up my 6mm tap to the old rivet holes revealed perfect compatibility, so I set to cutting the threads at all ten attachment points, the six side ones needing the wheels taking off. Thinking forward to the time when permanent attachment of the moulding would be necessary, and noticing the pristine 7mm tap in my set, which also has a 1mm pitch (the 6mm has seen a great deal of action over the years and looks due for replacement), I thought maybe I'd open the holes out further for greater peace of mind. A quick Ebay search revealed that 7mm screws and washers must be made (judging by the horrendous prices), not of the advertised stainless steel, but of Platinum plated Unobtanium, so that idea was swiftly abandoned.

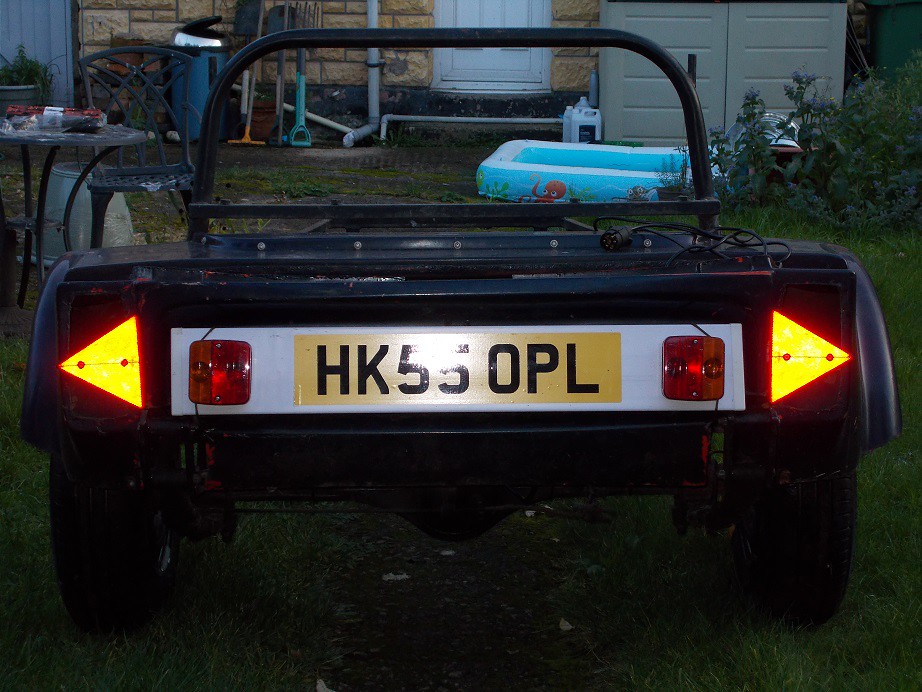
Popping the rear body back on I then fitted the newly purchased reflective triangles, screwing them to bespoke lengths of batten though the rear lamp cluster holes. Approaching dusk decided the camera to employ flash, nicely demonstrating the efficacy of the rear end gubbins - not that I'll be towing at night!
Since then I've purchased a Spitfire centre rear deck filler cap, its fittings, and a short length of the necessary 2" pipe which will be welded into the top of the Cortina fuel tank, bridging the gap, the old filler being chopped off and a blanking plate welded in its place.
Regards, Mick
Last edited by Mick O'Malley; 17th November 2023 at 15:38..
|
18th November 2023, 15:44
|
|
Senior Member
|
|
Join Date: Nov 2012
Posts: 845
|
|
Today, looking at the dismal weather, I decided to not venture down to the cave, but then remembered that the bits I'd ordered for the modified filler position had arrived yesterday so I might as well do a little offering up. I retrieved the tank from my shed and slid it into the boot, where it will eventually live. However, the boot floor had been so comprehensively butchered for the previous giant tank I'd removed that it had nothing to sit on  . OK, what else could I do? I hit on cutting off the Ford filler stub, ready for the resulting hole to be blanked off at some future date. Because of its angle and proximity to the tank's flange, it didn't lend itself to an easy attack. Trying it with each in turn of the four sides of the flange trapped in my Workmate I managed to start the necessary hacksaw cut. I got about two thirds of the way through before the saw's frame started hitting either the flange or the tank's body, so I took out the blade, made a grip at one end of it with gaffer tape, and finished off the cut. Neither easy nor finger friendly! . OK, what else could I do? I hit on cutting off the Ford filler stub, ready for the resulting hole to be blanked off at some future date. Because of its angle and proximity to the tank's flange, it didn't lend itself to an easy attack. Trying it with each in turn of the four sides of the flange trapped in my Workmate I managed to start the necessary hacksaw cut. I got about two thirds of the way through before the saw's frame started hitting either the flange or the tank's body, so I took out the blade, made a grip at one end of it with gaffer tape, and finished off the cut. Neither easy nor finger friendly!

I gently filed clean the cut edge, gaffer taped over the hole, and called it a day, pleased that I'd at least done something .
Regards, Mick
|
|
Currently Active Users Viewing This Thread: 2 (0 members and 2 guests)
|
|
|
 Posting Rules
|
You may not post new threads
You may not post replies
You may not post attachments
You may not edit your posts
HTML code is Off
|
|
|
All times are GMT +0. The time now is 13:10.
|


 Hybrid Mode
