|
|
| Old No.7 Builds 275 kits from Dan |

22nd April 2020, 20:48
|
|
Senior Member
|
|
Join Date: Aug 2012
Posts: 2,143
|
|
Photo......
|
23rd April 2020, 06:11
|
|
Senior Member
|
|
Join Date: Aug 2017
Location: Auckland, New Zealand
Posts: 309
|
|
 Door handle Mechanism
Hi guys,
Firstly thanks to LLM - Been a legend throwing me good ideas to minimise my thinking brain and grey hairs getting more prevalent.....Cheers.
I have managed to fit both sides striker plates to the doors, need of course some tidying and weatherproofing, but work really well. 3mm Aluminium striker plate riveted on to the door bar. Aluminium push rod that will be bonded and secured onto the end of the mini door handle plastic push rod.
I have fitted the drivers door temporarily, fitted the handle and it works well. Some pics:
 Door striker Door striker
 Door striker fit Door striker fit
 Door handle push rod Door handle push rod
 Door handle fit Door handle fit |
24th April 2020, 03:57
|
|
Senior Member
|
|
Join Date: Aug 2017
Location: Auckland, New Zealand
Posts: 309
|
|
Door-skins and handles initial fit
Door skins and handles have been fitted for the time being,
just tek screws holding on at the moment as I want to work an angle with the cert guy as to what he is happy with for temp fixings for skins before paint etc.
I may need to captive nut the door skins and bolt through the door for fixing. At least then I can remove the skin later on for paint and if needed for final gapping etc. Going to put a weather seal in the top of each door to minimise the water/moisture heading down into the door skin.
Gaps are not great but are workable, not too bothered at the moment with that. The L/H side of the car looks like it needs the body to be about 5 mm higher in places, nothing I can do now about that so good old profiling will have to occur to match the body to the door skin. I may be able to pinch half off of each which will help. Filler and sanding the outcome.....
Took the car for a "drive" into the cul-de-sac so I could warm up everything and get the trans working again. All door locks/mechanisms work well and are solid so happy with those.
Some pics out of the garage......
 IMG_20200424_150631 IMG_20200424_150631
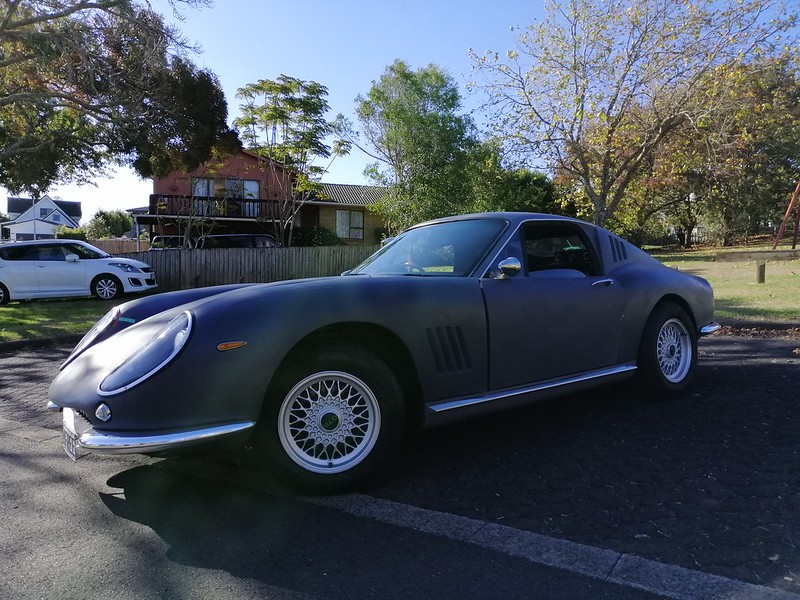 IMG_20200424_150438 IMG_20200424_150438
 IMG_20200424_150359 IMG_20200424_150359

|
24th April 2020, 07:58
|
|
Senior Member
Enthusiast
|
|
Join Date: Jun 2015
Location: Reading, Berkshire
Posts: 688
|
|
Looking very nice indeed.
You are so getting there. Congrats
Dave
|
24th April 2020, 08:20
|
|
Senior Member
|
|
Join Date: Aug 2012
Posts: 2,143
|
|
Looking good !
With regard to water getting down behind the door skin, don't forget to put a few drain holes in the bottom of the outer skin.
|
24th April 2020, 19:17
|
|
Senior Member
|
|
Join Date: Aug 2017
Location: Auckland, New Zealand
Posts: 309
|
|
Quote:
Originally Posted by Lucky@LeMans

Looking good !
With regard to water getting down behind the door skin, don't forget to put a few drain holes in the bottom of the outer skin.
|
Roger that fella will do! Gonna flowcoat the inner of both door skins once finalised and create a nice easy path for any water to escape hopefully..... |
24th April 2020, 19:25
|
|
Senior Member
|
|
Join Date: Aug 2017
Location: Auckland, New Zealand
Posts: 309
|
|
Quote:
Originally Posted by DaveP
Looking very nice indeed.
You are so getting there. Congrats
Dave
|
Thanks Dave, been a long time coming together, too long but things will get there. My industry (aviation) is as you probably know getting slashed and burned at the moment so things are not hot for me right now in COVID. Looks like I am safe at present in my role but heading for some kind of “hibernation period”. Unsure what that means fully yet but likely reduced hrs for the next 6-12 months. Looks like plenty of time to work on the car, just the money won’t be there to do it! |
25th April 2020, 07:12
|
 |
Senior Member
|
|
Join Date: Feb 2012
Location: Wembley, London
Posts: 5,058
|
|
WelshKiwi – First of all, your car looks great. 
Sorry to hear your ‘real job’ might be at risk, as who knows what the ‘new normal’ will be for flying.
Good luck and take care, Paul. 
|
25th April 2020, 20:48
|
|
Senior Member
|
|
Join Date: Aug 2017
Location: Auckland, New Zealand
Posts: 309
|
|
Quote:
Originally Posted by Paul L
WelshKiwi – First of all, your car looks great.
Sorry to hear your ‘real job’ might be at risk, as who knows what the ‘new normal’ will be for flying.
Good luck and take care, Paul.
|
Thanks Paul, it is what it is, 30 years in the industry has been fraught with times of crisis...just got to play with the cards dealt when they present. Positive spin, the car is getting the TLC that has been required way before this point!
Thanks for the kind thoughts and comments, it is great to see others responding well to how the car is coming together, with a long project you are always doubting how it is gonna turn out! Cheers. |
2nd May 2020, 04:19
|
|
Senior Member
|
|
Join Date: Aug 2017
Location: Auckland, New Zealand
Posts: 309
|
|
Early beer o clock - rear window woes
Well not exactly to plan today, finished the interior rear trimming to the point I can fit the rear glass.
Tried the old classic cord fit method and failed miserably....as the slope of the glass is quite large, visibility a little limited. Not sure if my “ridge” for the pinch seal to sit on is too thick, but struggled to get it round the bottom corners and then cut the rubber seal with the cord quite badly pulling to get it in...
Net result I think it might have to be a new rubber and possibly some professional help.
If you guys can give me an idea of the thickness of your window ridges before you got your glass in appreciated. I have even’d out the dims around but don’t want to take too much away as you can’t put it back on easily!
Beer in hand so all will fix itself......Cheers.
|
28th May 2020, 04:53
|
|
Senior Member
|
|
Join Date: Aug 2017
Location: Auckland, New Zealand
Posts: 309
|
|
Rear Window in
Hi guys,
finally the rear window is in. Took some professional hands (plus my scabby ones), one scoping attempt (i.e. thinks it will go in), one failed attempt (i.e. not a hope in hell getting the top in) and then removal of about 5mm all around the screen edge and re-priming.
Net result - third attempt, She's a tight one, but a bit of lube in the right places and she's in..... 
Going to leave the ali trim out until I decide what next steps are with it and paint etc as it may come back out again and the trim is the expensive bit and will damage easily.
Left to do:
- Finish doors - fixings and lock
- Finish wheel arches - 90% done need some self manufactured fixings.
- Finish grille - Need to Ali weld the slats together
Finish rear bootlid locking/securing mechanism.
- Last look over things and drive on D plates to the testing station for either the good news, or the "more to do" news......Getting close.
 Rear Window 3 Rear Window 3
 Rear Window 2 Rear Window 2
 Rear Window 1 Rear Window 1 |
28th May 2020, 06:45
|
 |
Senior Member
|
|
Join Date: Jul 2011
Posts: 5,328
|
|
Very nice work, it's looking stunning.
One observation, though: I could be wrong, but I don't think the screen seal trim is just decorative, I believe it locks the seal and screen in place. That was certainly the case with my MG's 'Bermuda' Hard Top (in the background below) - when I restored it, before the trim strip was fitted the slightest pressure would flip the seals and let the perspex pop out.

If it's the same on yours, your rear screen could pop out if you drive it to the testing station without the trim fitted.
Keep up the good work! |
28th May 2020, 06:49
|
|
Senior Member
|
|
Join Date: Aug 2017
Location: Auckland, New Zealand
Posts: 309
|
|
Hi Mr T, the locking strip is in the seal so the screen is locked. It is just the decorative chrome/Ali trim that I haven’t fitted.
She’s in and solid! Cheers.
|
28th May 2020, 11:07
|
|
Senior Member
|
|
Join Date: Jul 2011
Posts: 5,328
|
|
Ahh, that's good. |
24th September 2020, 05:43
|
|
Senior Member
|
|
Join Date: Aug 2017
Location: Auckland, New Zealand
Posts: 309
|
|
Very long time between posts.....Boot lock worked out
Hi all,
I have been working away through Covid chaos and with some "new balance" i.e. a 3 1/2 day work week have managed to get a bit done on the car. Optimistic that Certification is weeks away and not months....
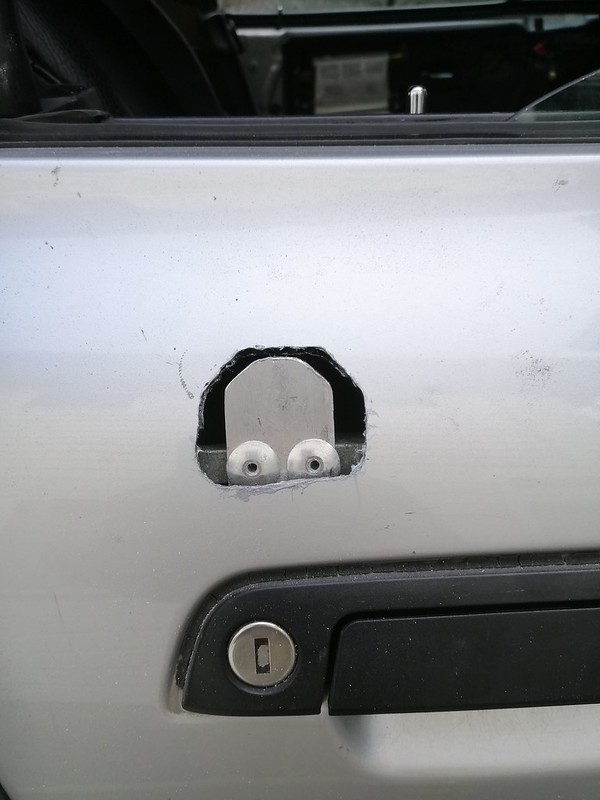
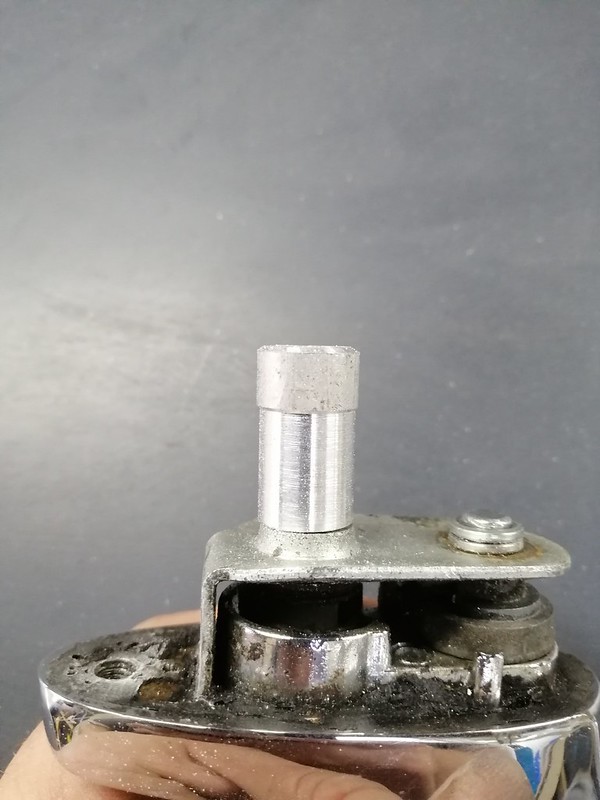
Finally got the boot lock worked out, was brave and cut away access holes etc to allow me to frame it all up/access parts and it has worked out.
The photos tell a lot of it, but basically I am using the original BMW boot key tumbler (minus the central locking), the original lock mechanism upside down (on the boot lid) and the striker plate fixed to the car.
Took a while, but the photos are off the whole system working, boot shuts and locks and open with the button push. Need to finish off fixing it all in place and finishing the frame in the boot lid/covering the mechanism. The wiring for the boot lock is also being run in conduit fixed to the boot lid..... Only slight downside is I had to change the exterior with a panel to hide the depth of the lock, but will fair it all in and blend so it looks better.....Shutlines also have to be worked on as they are a bit out just now..... Here ya go.
 IMG_20200924_171748 IMG_20200924_171748
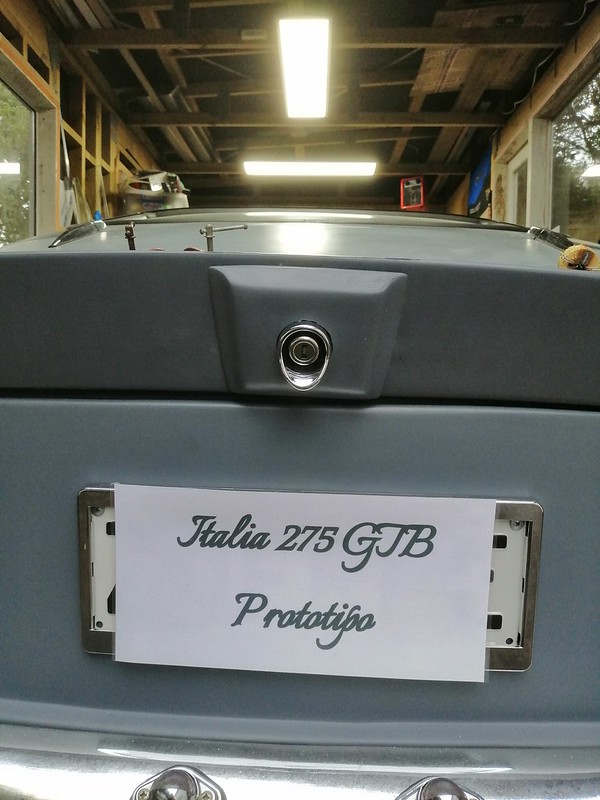 IMG_20200924_171758 IMG_20200924_171758
 IMG_20200924_171810 IMG_20200924_171810
 IMG_20200924_171826 IMG_20200924_171826
 IMG_20200924_171835 IMG_20200924_171835
 IMG_20200924_171851 IMG_20200924_171851
|
27th September 2020, 00:44
|
|
Senior Member
|
|
Join Date: Aug 2017
Location: Auckland, New Zealand
Posts: 309
|
|
Boot lock - Further
Hi all,
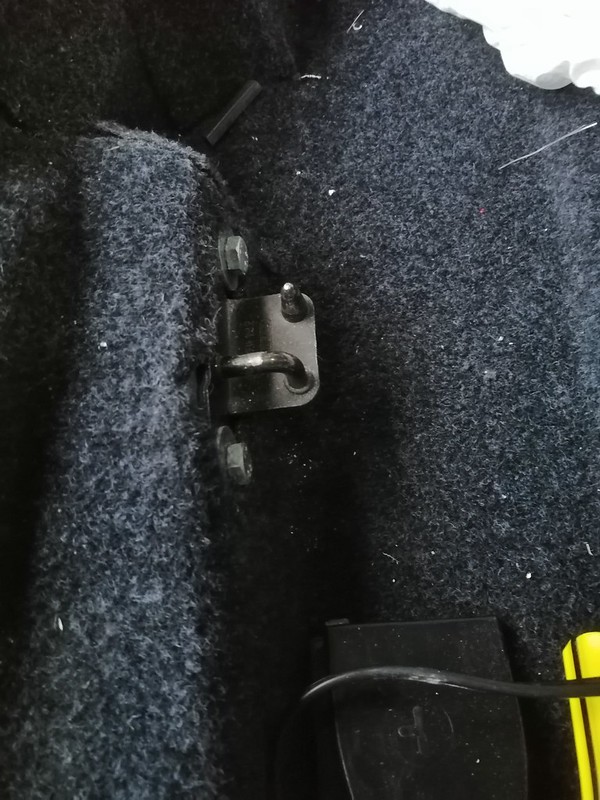
Further work on the boot-lid/lock.
Frame glassed in, boot tumbler connector rod adjusted for shape and fitted. Boot lock connector/harness is active so the light comes on as the boot opens. - But I have fitted a switch to shut that off incase it decides it wants to come on unknowingly. Plus it means I can have the boot-lid open, switch isolated and the battery doesn't drain. So can at least switch it on if needed to be on due I drop my lipstick in the dark recesses of the boot. 
Signs are for me so I don't leave it switched on!
Of course needs finaling/box in/carpeting/boot lines etc but the boot works......
 IMG_20200927_131659 IMG_20200927_131659
 IMG_20200927_131709 IMG_20200927_131709 |
30th January 2022, 18:14
|
|
Senior Member
|
|
Join Date: Aug 2017
Location: Auckland, New Zealand
Posts: 309
|
|
So the latest in my saga, the car will be going for certification now on Feb 15th and hopefully a couple of days later back to me and NZ road legal...
As explained a few times the rules for LVV in NZ are different to what you can do in the UK, and just a MOT and a cert adjustment won’t cover it over here...
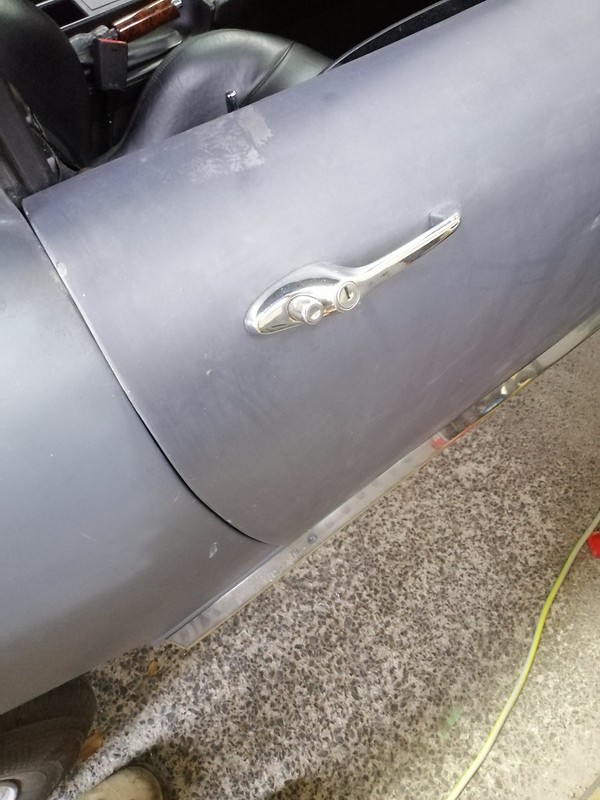
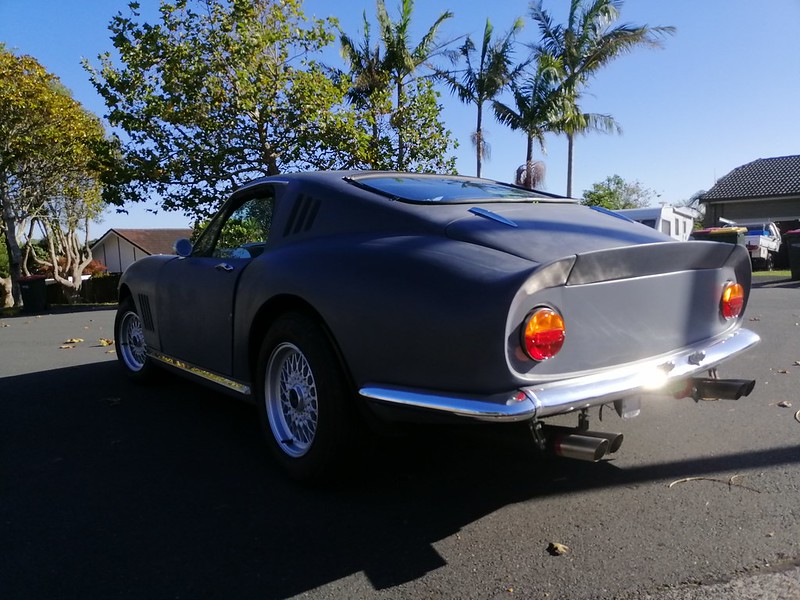
The car is at the stage where it is mechanically sound, all the requirements for cert such as fuel filler mods, door and boot locking, general structure and warrant of fitness lights etc are done. The bodywork is not completed and still has a way to go for fit and finish...Photos look ok but I have had some issues with shut lines/ door to rear quarter profiles as well as boot lid closure lines that are gonna need a lot of work prior to painting....I am hoping that mid Feb all that will be future work, I can enjoy the car for a few months on the road and a few pics from the Brit and Euro car show in Mar will happen. (As long as the show goes ahead under our current COVID settings etc). Fingers are crossed.....
|
30th January 2022, 19:13
|
|
Senior Member
|
|
Join Date: Jul 2014
Location: Herts
Posts: 148
|
|
welcome back
Hi welshkiwi,
Good to have you back on the forum.
Best wishes with your NZ certification.
Regards,
Kidge
|
3rd February 2022, 01:29
|
|
Senior Member
|
|
Join Date: Aug 2017
Location: Auckland, New Zealand
Posts: 309
|
|
Quote:
Originally Posted by Egdik
Hi welshkiwi,
Good to have you back on the forum.
Best wishes with your NZ certification.
Regards,
Kidge
|
Thanks Kidge, I have a bit of catching up to do with all the forum and a bit of catching you guys up with my efforts....Will endeavour to do that over the next few weeks as you can imagine the car is getting a bit of focus so will be good to bind all the info together. Cheers and hope your car has been everything you needed over this weird last few years! |
20th February 2022, 02:12
|
|
Senior Member
|
|
Join Date: Aug 2017
Location: Auckland, New Zealand
Posts: 309
|
|
Small update, the car has been inspected by the Low Volume Vehicle (LVV) certifier and has passed.
Just got to wait for processing of all those docs etc at Head Office at Wellington and I am clear to get my WOF pass, restart the rego on the car and I am road legal. Interesting process that now means I have a data chip on the car that can be scanned and show any WOF inspector, certifier or police the photos of the car etc as it was certified...Fingers crossed that data chip is activated as certified in the week ahead and I am good to go. Photos to follow once on the road and in the sun!
|
|
Currently Active Users Viewing This Thread: 11247 (0 members and 11247 guests)
|
|
|
 Posting Rules
|
You may not post new threads
You may not post replies
You may not post attachments
You may not edit your posts
HTML code is Off
|
|
|
All times are GMT +0. The time now is 03:44.
|


 Hybrid Mode
