Scottie - Cheers mate.

Whilst no kit currently on offer from Ribble/Sammio, Tribute or Miglia will ever require this much fabrication work.
I do hope that potential builders realised that someone with no previous experience of welding or fibreglass can learn.
I can only laugh at myself for thinking the work required to modify the original Spyder kit might be beyond me.
 Mr T
Mr T - You have no idea how much I want to have a photo of me in my car parked next to something "modern".

Your pragmatic approach to what actually matters when you have got the car on the road is also a big help to me.
Even if the body shell isn't perfect, it will still stand out from the crowd on that initial viewing and that is what counts.
Swifty - Thanks for the feedback, I'll keep an eye out for a photo of the back of your car for comparision.
I have now fixed quite a few of the original MkI problems and can live with the knock on impact of those fixes.
- - - - - - - - - - - - - - - - - - - - - - - - - - - - - - -
Taking Shape - Part 1
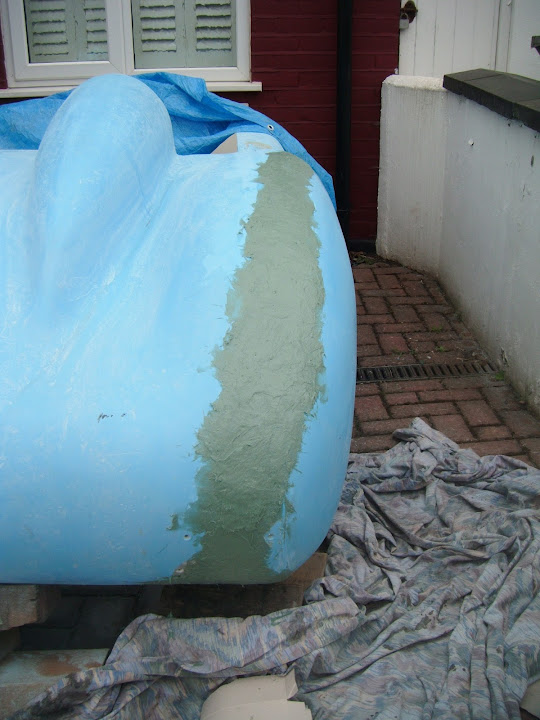
After cleaning up the bracket screw holes and the surrounding areas, I started 'Round 1' of the applying fibreglass filler.


This covered the holes and lower section of the original gaping wound.
Filler Round 2


This was actually the last of the filler in the tin, so I just made a start on the latest gash.
Then it was time to open a fresh tin and move on to Round 3 to finish the job.
Note:
I had to leave the three holes that had supported the mesh former until I 'glassed the inside edge.
This time I remembered
Mac's advice about starting to sand the filler before it is fully hardened.
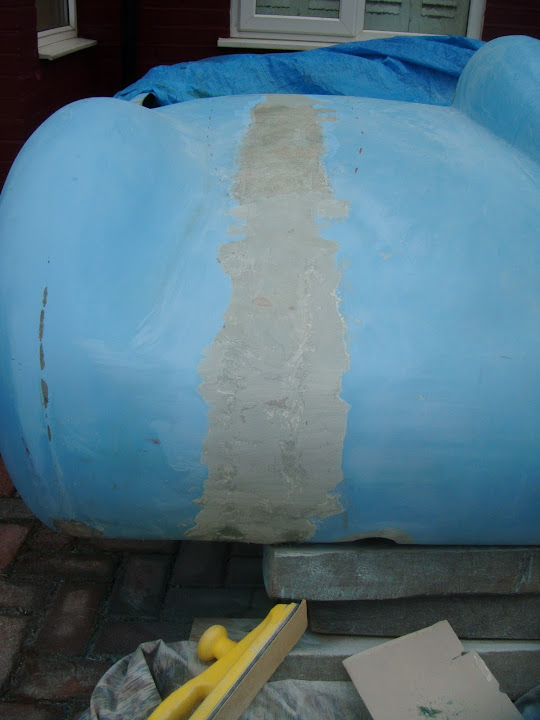


While I had the long board and sanding block out, I tackled the flash lines at the bottom of the arches.


So after my first session on the car, things were slowly taking shape.


End of Part 1...